8.1 Organization types
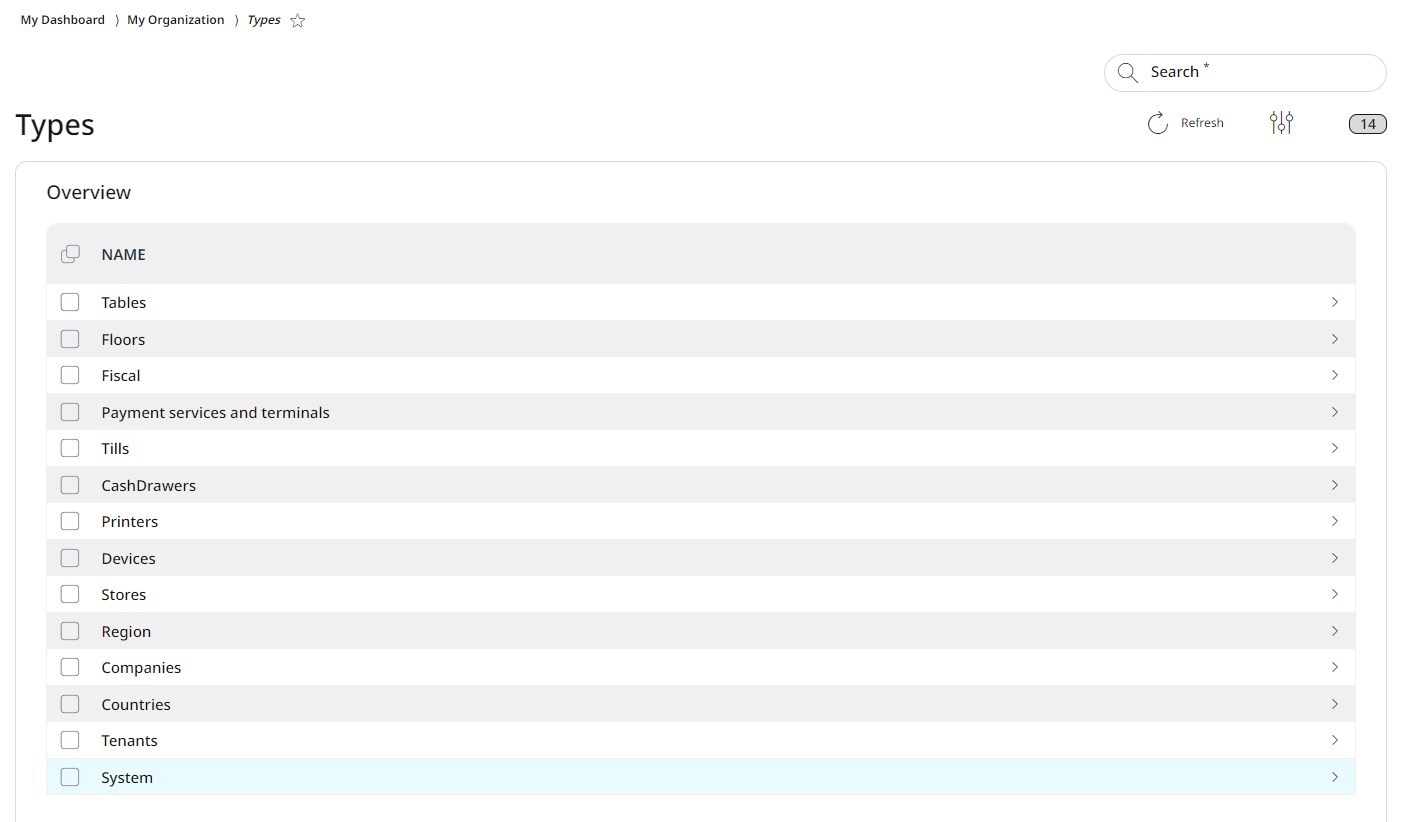
Organization types are used to assign and structure organizational units, from countries and companies to devices or tables, down to the smallest elements. The RETAIL7 system comes with a wide range of default organizational types, but you can also assign an organizational unit to a custom-created type. This allows you to create a personalized hierarchy within your store by defining and assigning all levels and sublevels.

This process can be followed on the RETAIL7 organization tree diagram. There, for example, settings can be configured that only apply to one country or one store. When the app is set up on a device for the first time, or a store is configured, all levels are automatically displayed in the tree diagram.
Adding organization types
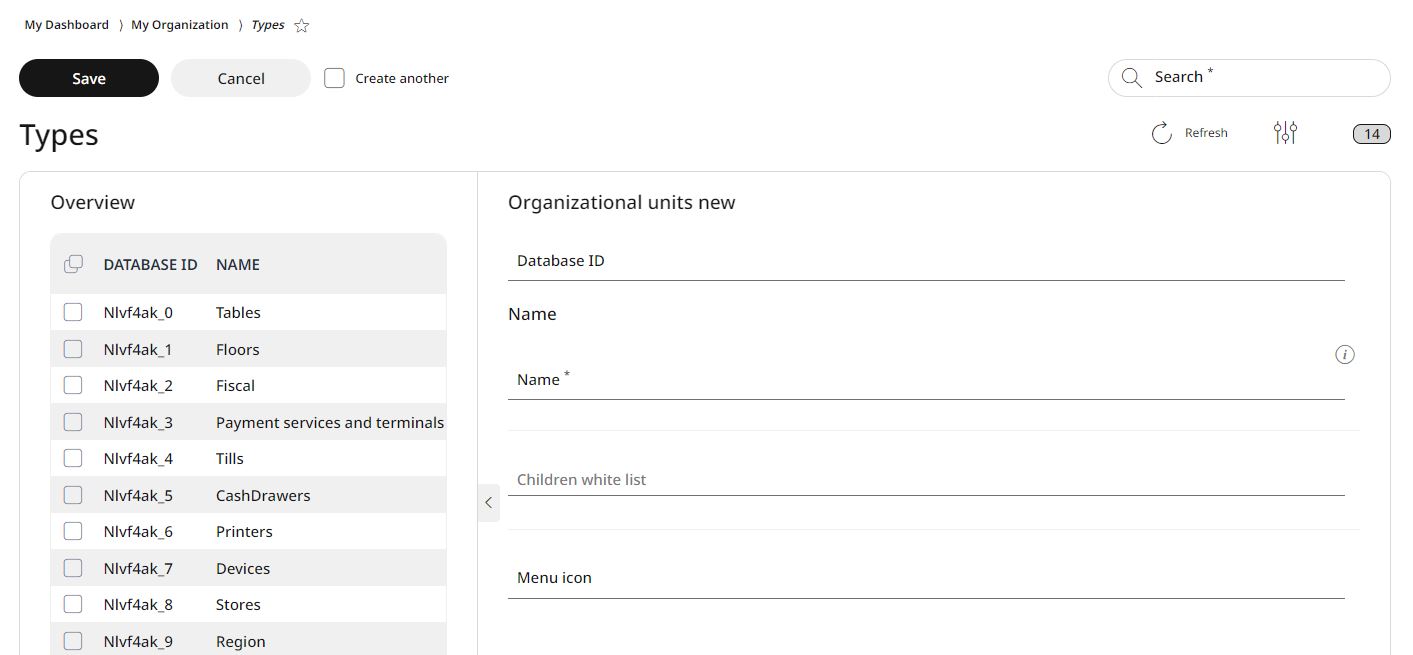
The RETAIL7 system allows users to create new organization types and assign them to previously defined organizational units. To avoid confusion, it's important to assign unique names to each type. Additionally, you can use the search function to filter for the desired type. Fields marked with * are mandatory and must be completed to save the form successfully.
Note: Adding, editing or deleting organization types is possible only with the highest user rights.

Open the menu → My organization → Organization types and click Add.
You can enter a database ID manually, (in this case, ensure it is unique), but if you leave this field blank, the system will automatically assign one upon saving.
The next step is to add the name. This name allows the type to be filtered using the search function, so it should be unique to avoid any confusion. For this reason, it is the only mandatory field.
Specify a menu icon: this icon will be displayed in the tree structure, allowing each store to have its own unique icon.
Click Save to add the new unit type to the list. Clicking Cancel will discard the new unit type without saving it.
Editing and deleting organization types
With RETAIL7, organization types can be edited and deleted at any time, ensuring that the system remains up to date by removing unnecessary types. When editing types, it is important to save the changes; otherwise, the information will be lost.
Editing organization types:
Choose the desired organization type from the list.
Select Edit.
Make all required changes.
Click Save.
Deleting organization types:
Select the desired organization type from the list.
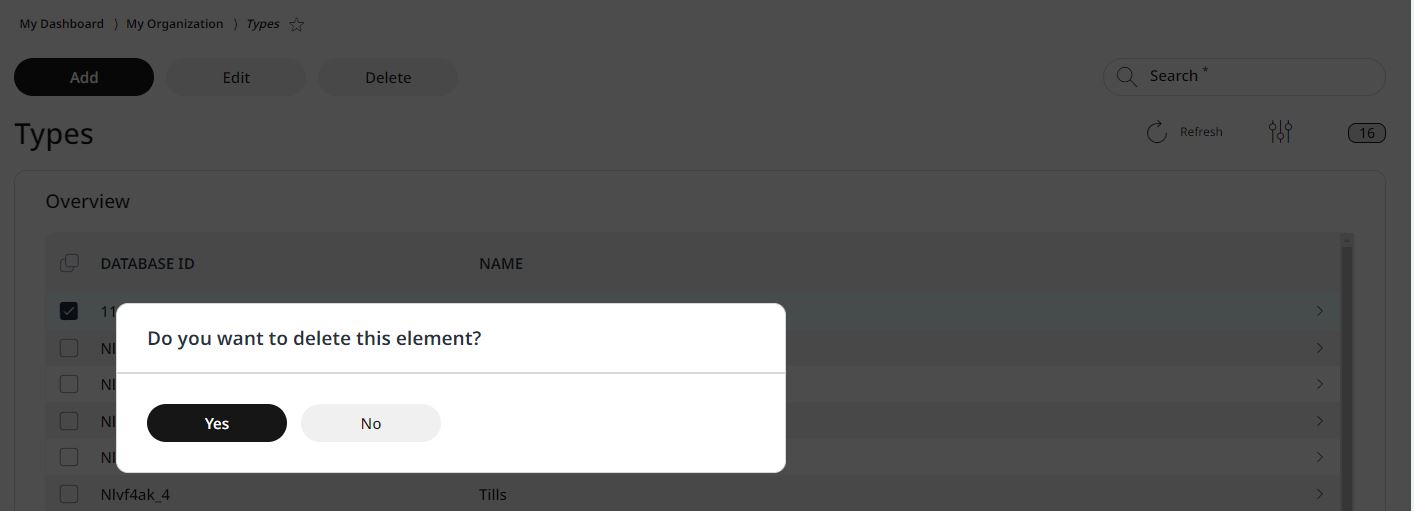
Click on Delete.
Confirm the dialog box with Yes.

Press No to cancel the deletion process.