8.2.4 Companies
After defining the country level, the next step is to create the individual company or companies within the system. This process establishes the structure for managing stores and operations under each company. When the app is set up on a device and the store is defined, the system automatically transfers this information to the tree structure. This ensures that the organizational hierarchy remains consistent and up to date.
Functions on the overview

Import data or own configuration
Download data or configuration to your own system
Update the list view
Activate/deactivate table fields
Number of list items
Search
Information about the companies
Adding a company
After defining the parent country, you can proceed to create the individual companies. When the app is configured on a device and the store is set up, this information is automatically integrated into the tree structure, which is accessible in the Management Console.
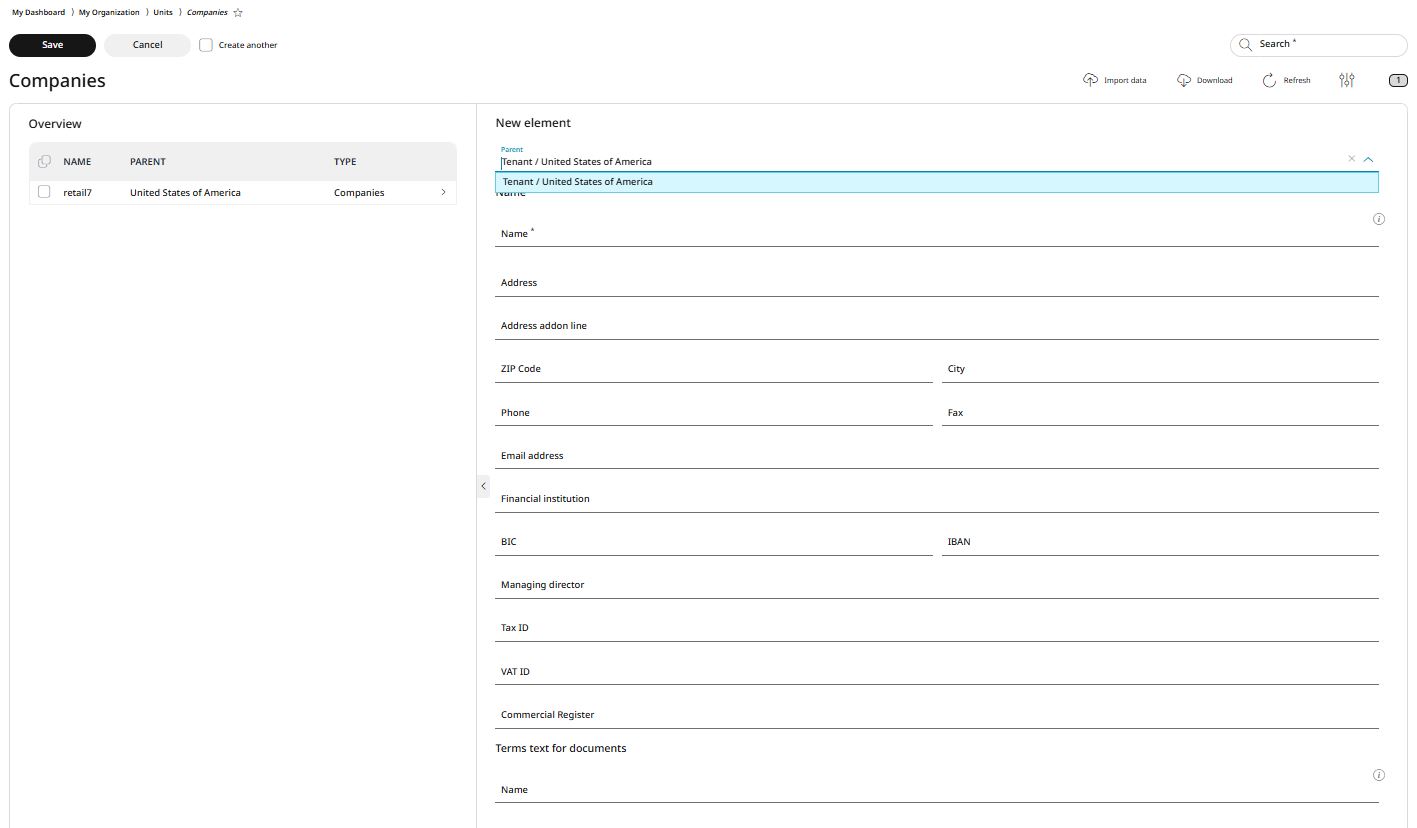
For adding a company, go to My organization → Organizational units → Companies and click Add.
Select the parent element.
Assigning a parent element ensures that companies are systematically displayed within the tree structure, which helps keep the system organised and easy to navigate.
If the organisation operates in multiple countries, it is recommended to select the country as the parent element to maintain a clear hierarchy.
If the organisation is limited to a single country, the company can be assigned directly to the tenant.

Provide a unique and recognisable name for the company.
The name will enable you to filter and locate the company easily using the search function. Ensure that each name is used only once to avoid any potential confusion. It is also important to choose a distinctive name to help differentiate between companies within the system.
Enter the address.
This data is particularly important if the stores have identical names. This way they can be distinguished by their respective addresses.
Define an Address Add-on (Optional)
If needed, you can define an address add-on to include additional details for an address. This feature allows for more detailed and customised address entries when necessary.
Enter the ZIP code and city, the telephone and fax number and the email address.
Add the name of the financial institution with associated IBAN and BIC number.
The IBAN is required in Germany for domestic transfers and the BIC for international transfers. Be particularly careful here so that all the details are correct so that no transfers are made by mistake.
Enter the managing director of the company.
Add the tax ID, VAT ID and the corresponding commercial register.
Each company is assigned to a local court via the commercial registration office and receives a unique tax number or VAT ID from the financial authority. Thus, the company can be clearly identified by these numbers. We advise you to obtain further information from your tax advisor.
Click Save to confirm and store the data, or click Cancel to discard the new entry without saving.
Editing and deleting a company
With RETAIL7 it is possible to edit or delete previously stored companies at any time. This ensures the system remains up to date, as unnecessary companies can be removed. Remember to save any changes made to retain the updated information and avoid data loss.
To edit a company:
Select the desired company from the list.
Click Edit.
Note: The parent level of the entries cannot be edited, the field is inactive. If you need to change the parent level of an element, you will need to delete the existing entry and re-create it with the correct parent level.
Make the necessary changes.
Click Save to apply the changes, or Cancel to discard them.
To delete a company:
Select the company you need to delete from the list.
Click Delete.
In the confirmation dialog box, click Yes to proceed with deletion, or No to cancel the deletion process and retain the company.