11.3 Item discount
Using promotions and discounts increases the customers´ willingness to buy. Discounts can be applied directly to individual items, or the whole receipt. In the Management Console, each item can be configured to be discountable separately, and the several types and amounts of discounts can be set also there. More information about this in the Item List section.
With this feature, the discount is applied directly to individual items.
NOTE: On some user interfaces, the Item Discount or Receipt Discount field is located directly at the bottom of the screen.
 Open the RETAIL7 app.
Enter the login data and log in.
Begin a transaction by adding an item you would like to add a discount from.
Click on the item to select it.
Click on Item discount at the bottom of the menu bar.
By clicking on Item Discount you get an overview of all available discounts. All the discounts can be configured as you wish via the Management Console. See the Promotions section for more information.
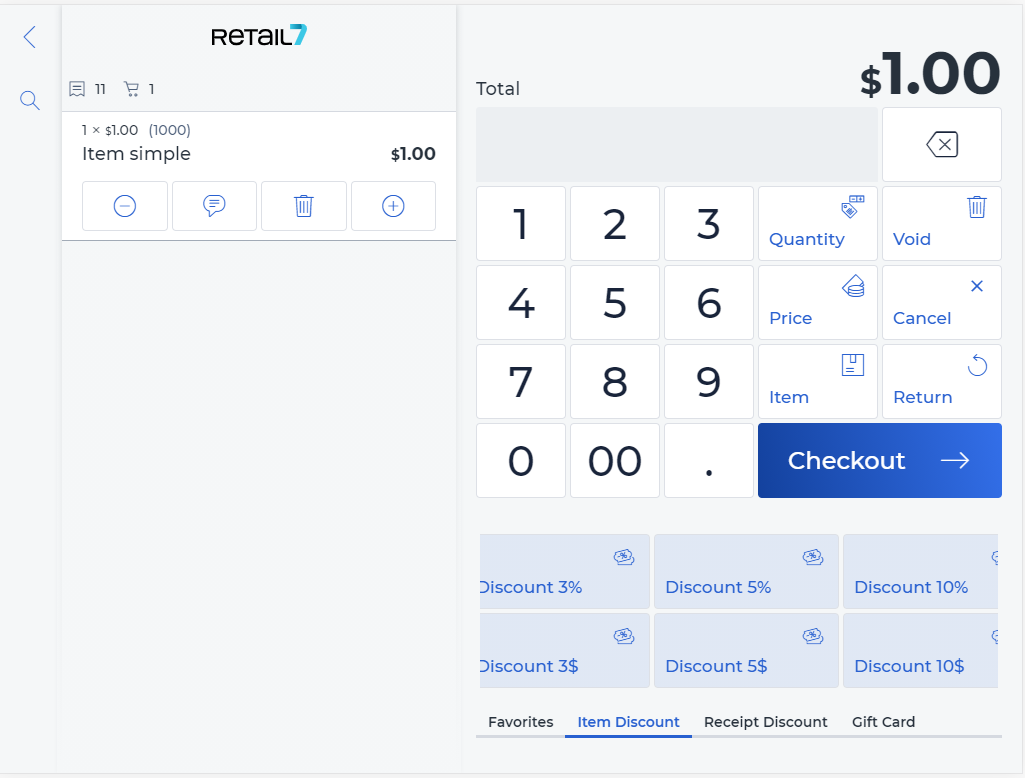
4. Click on the desired discount.
5. Choose the reason for applying the discount.
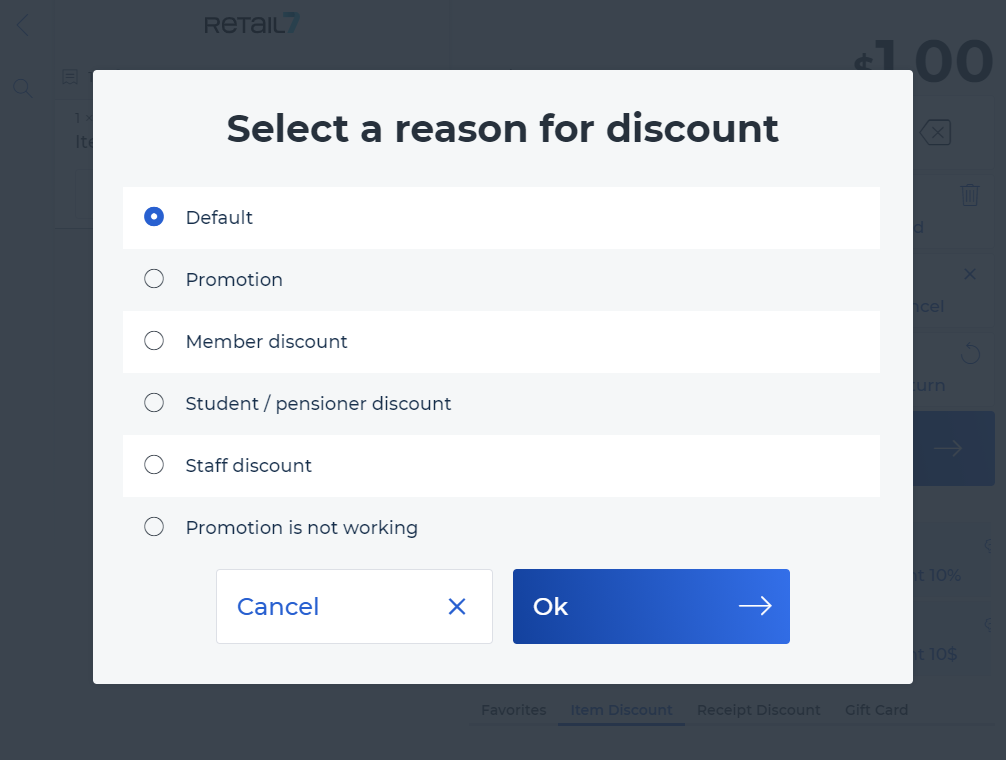 NOTE: All discounts can be given only after adding a reason. The item discount will be displayed under the respective item in the basket view.
The available reasons can be configured via the Management Console. More information about this in the section Reasons. By specifying a reason, it is easier to understand at a later stage why a discount was applied.
6. Select OK.
The discount will then be applied to the transaction. Also, there is a possibility to first select the discount and then register the desired items. In this case, the discount will be applied subsequently, but only to the next registered item.
Note: the amount of the discount must not exceed the item price.
Now the transaction can be continued.