Epson TM-m30f
The Epson TM-m30F printer is one of the first printers with certified TSE in Germany. When setting up an Epson TM-m30f printer in the store, we are of course happy to help.
To do this, connect the printer to the Internet via WLAN or a LAN cable and add it to the network.
In these instructions, we will explain exactly how the network must be set up, and how the user interface can be set up. Following these instructions, an Epson receipt printer can be connected to the retail7 POS system without any problems.
What is needed for this?
Before the printer can be used, a receipt roll is required.
1. First open the cover by pressing the large button in the groove on the top.
2. Then the flap should open.
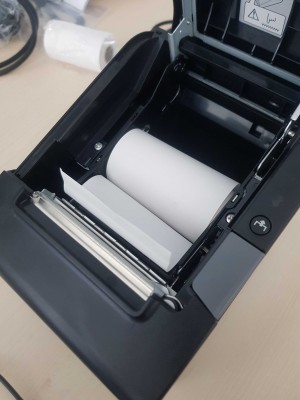 3. Then insert the receipt roll so that the paper is unrolled from the bottom side. NOTE: make sure that a short section of the paper hangs out of the printer after closing the cover. That´s how the printer can cut the paper automatically when it´s activated.
What else is needed?
A POS app end device (cell phone, tablet, PC) for setting up the printer
A WLAN adapter for the receipt printer, which is attached to the lower side of the printer.
The printer cannot connect to the WLAN network without the adapter. For this, the adapter stick must be attached to its rear side.
How to reset the network settings of the receipt printer?
First, information from the receipt printer is needed about its user menu. This can be obtained by pressing the push button with the arrow pointing upwards. Generally, it stands for the paper feed function. But this button is also used to navigate the menu of the Epson Tm-m30f receipt printer.
1. First turn off the receipt printer to get the device information.
2. Then simultaneously press the button with the arrow and the switch on button. When both buttons are released, the device information is displayed.
3. The receipt printer menu can be called up very simply by pressing the arrow button for two seconds. The device menu is then printed out.
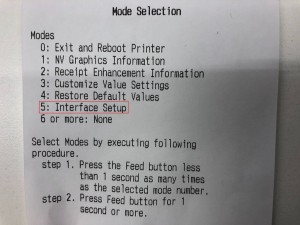 4. In the menu, the Interface Setup can be found under the fifth item. To get more information about the setup, press the arrow button pointing upwards five times briefly and once long, to enter to menu item 5 (follow the same procedure to access the other menu items).
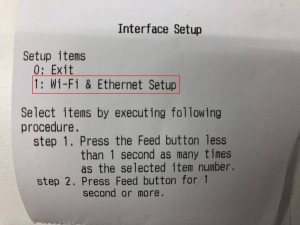
5. Wi-Fi & Ethernet Setup is then displayed as the first item. Now press the arrow button once briefly and once long, to open the first menu item.
 6. The next printout from the receipt printer comes to the Wi-Fi & Ethernet Setup. Under point 2, it says Simple AP. To get there, press the arrow button twice briefly and once long.
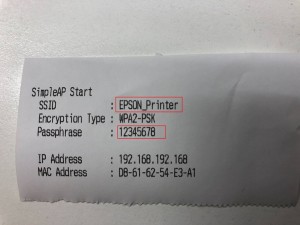
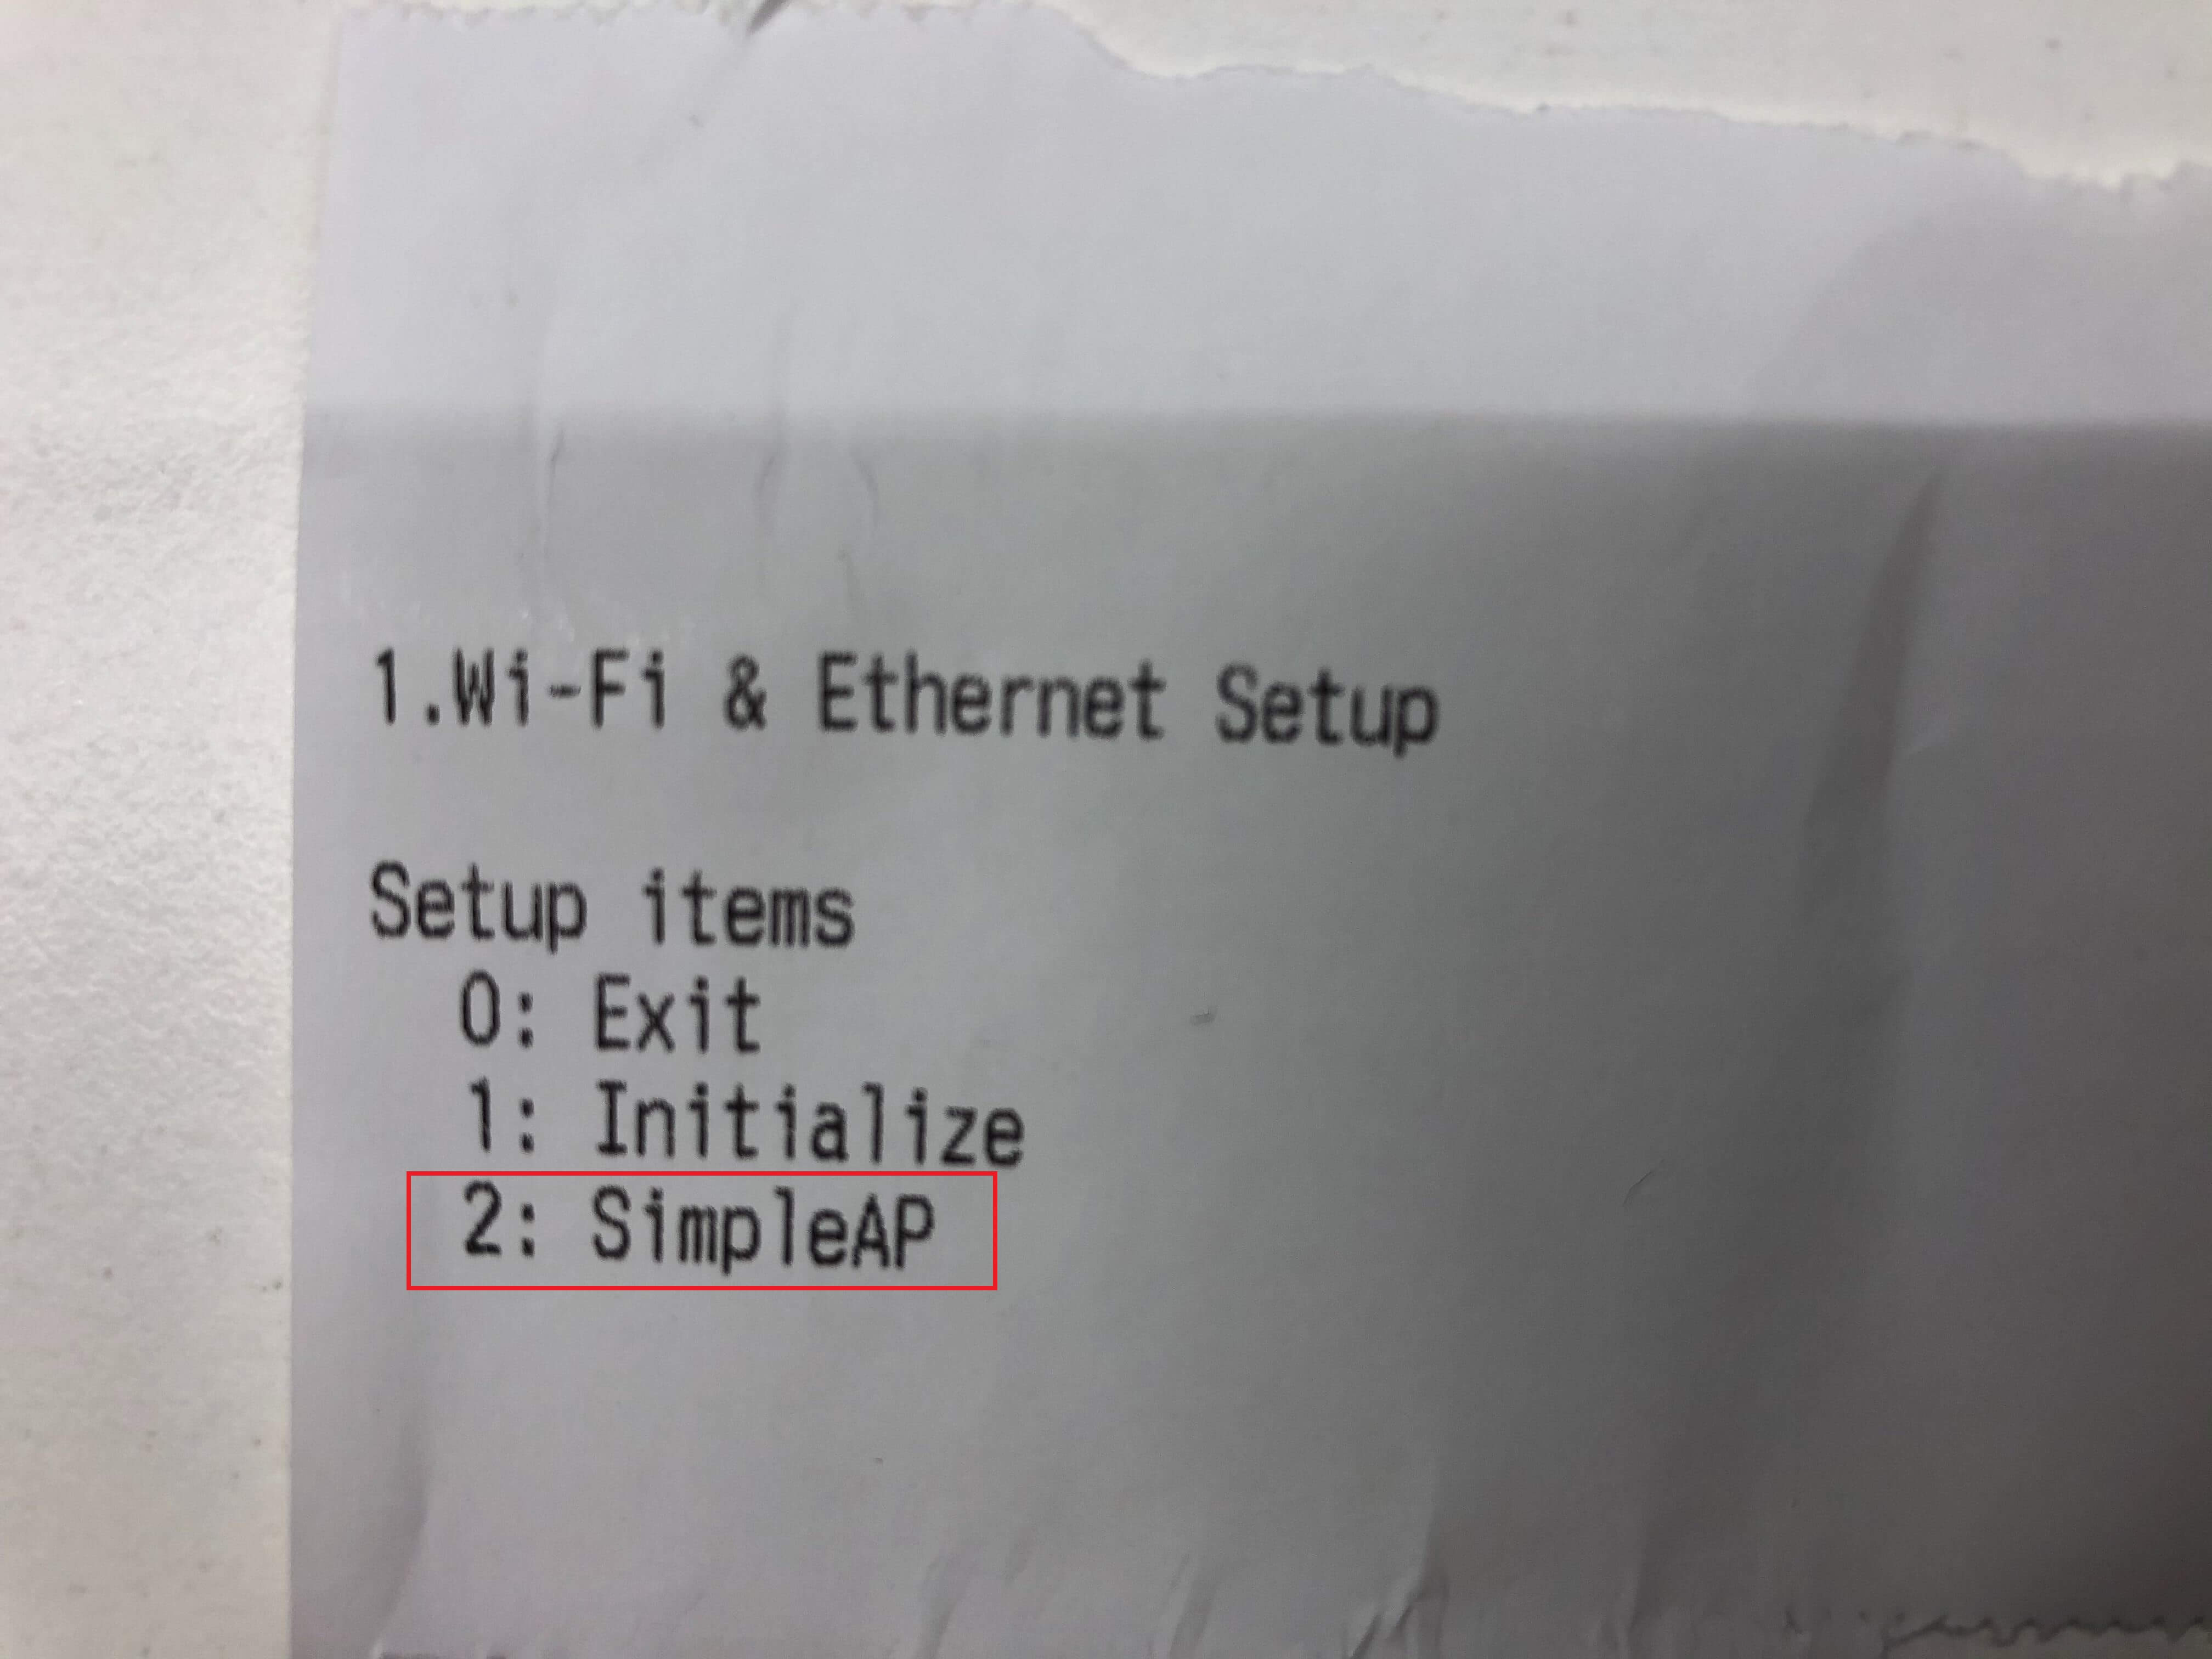 7. Then the SSID and password (passphrase) are printed.
 How to connect an Epson TM-m30f to the cash register?
A connection to the receipt printer must now be established in the POS device.
Open the WLAN or LAN network setup on the device.
Search for the Epson receipt printer.
When found, connect the POS device to it with the password from the last SimpleAP Start printout.
How to edit the network settings of the Epson TM-m30f receipt printer?
 1. To do this, open the Internet browser of your choice (e.g. Internet Explorer, Firefox or Chrome).
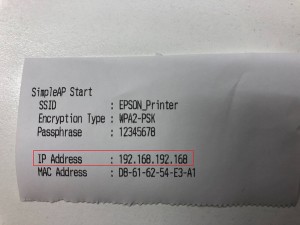
2. Then write https:// and add the IP address from the SimpleAP start note.
NOTE: you have to write the IP address without spaces or other characters, but pay close attention to the dots between the numbers. If the POS device notifies that the connection is not secure, it is still possible to access the page. To do this, press either Details or Advanced. There you can either Continue anyway or Go to this insecure website.
3. Then log in on the page with the following data:
Name: epson,
Password: epson.
For newer devices, the login data can also be the following:
Name: epson,
Password: serial number of the device, which you can find mostly on the rear or underside of the printer, on a label.
For a TSE server, the login data are:
Name: admin,
Password: admin.
4. On the following page, the Wireless option can be selected under Configuration in the Network section. The network is then switched to wireless contact. However, further data must be entered so that this function can be used correctly.
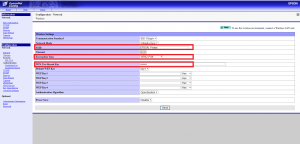 5. Simply enter the name of the network under SSID, select WPA-PSK(AES) under Encryption Type and the password for your own network is required under WPA Pre-Shared Key.
6. Then press Send and the data is saved.
7. Press Reset in the next window and the Epson TM-m30f receipt printer is already integrated into the WLAN network. Now the cash register can easily transfer the information between the devices via the IP address.
8. In addition, the Epson device must be enabled under Configuration Network. In the menu under Configuration Network, go to ePos-Device. Select enable there. Only then can the printer be used. The printer confirms the changeover with a printout of its data.
9. It may still be necessary to activate that the printer will actually print. For this, the print function must be activated under ePos-Print.
The video about it under https://youtu.be/k4hT2OiM_p8