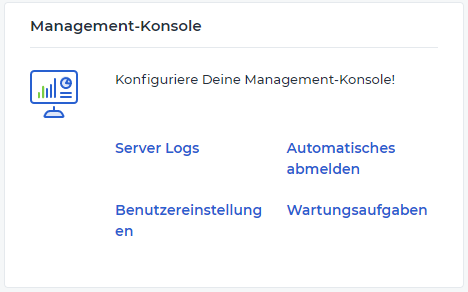
7.4.4 Management Console settings
In this area it is possible to make all the settings related to the Management Console of the system. The console is used to configure the end device(s) on which the retail7 POS software is installed.
7.4.4.1 Server logs
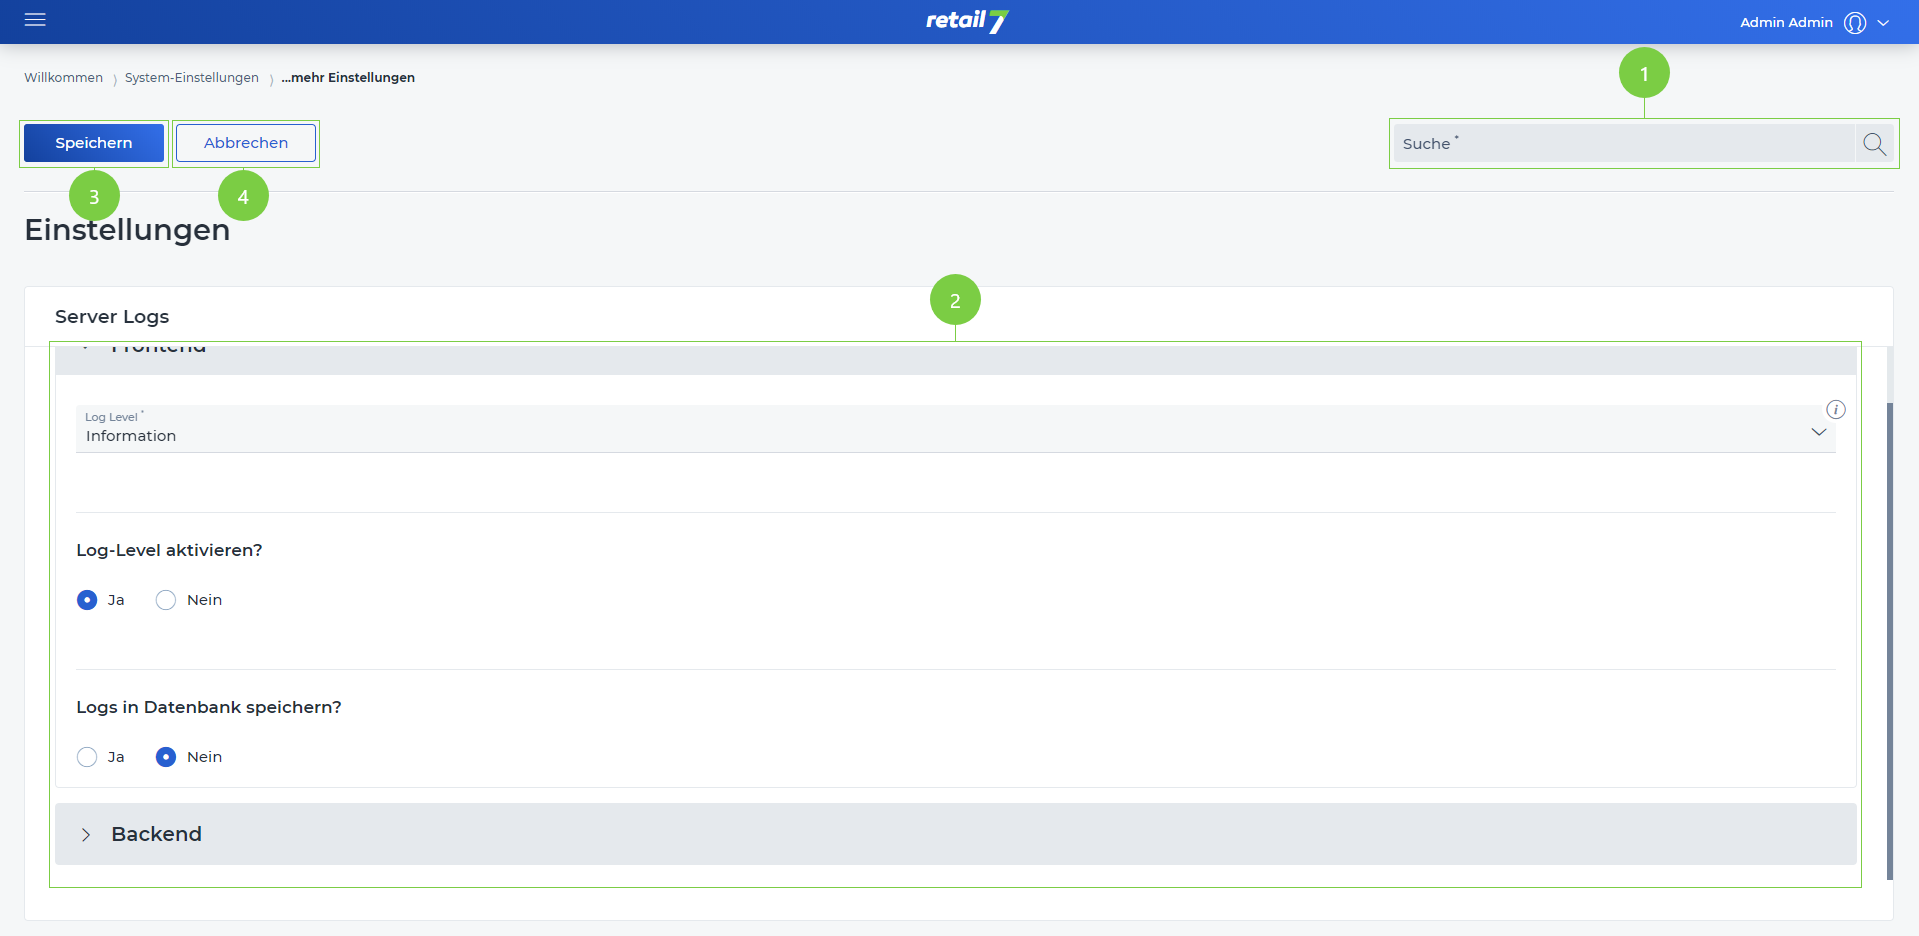 1 Search function
Enter the desired search term in the search.
Click on the magnifying glass.
Wait for the result and select a desired setting.
2 Editing window
3 Save entries
4 Close editing window
7.4.4.1.1 Set server logs
Logs are messages displayed to the user when the system registers errors, warnings or other information. The server logs are displayed to the user. It is also possible to store them in a database.
Open the menu → System Settings.
Click Server Logs under the Management Console menu.
Open the Frontend submenu.
Select the log level.
retail7 offers different levels of logs, where you can select which type of display should be shown in the system. In this case, this setting applies to the entire system. In addition, the logs are displayed only for a defined time.
5. specify whether the log levels should be enabled.
6. Define whether the logs should be stored in the database.
7. Open the Backend submenu.
8. Select the log level.
retail7 offers different levels of logs, where you can select what kind of display should be shown in the system. The display is shown only for a defined time,
9. specify whether the log levels should be enabled.
10. Define whether the logs are to be saved in the database.
11. Click on Save.
7.4.4.2 Automatic logout
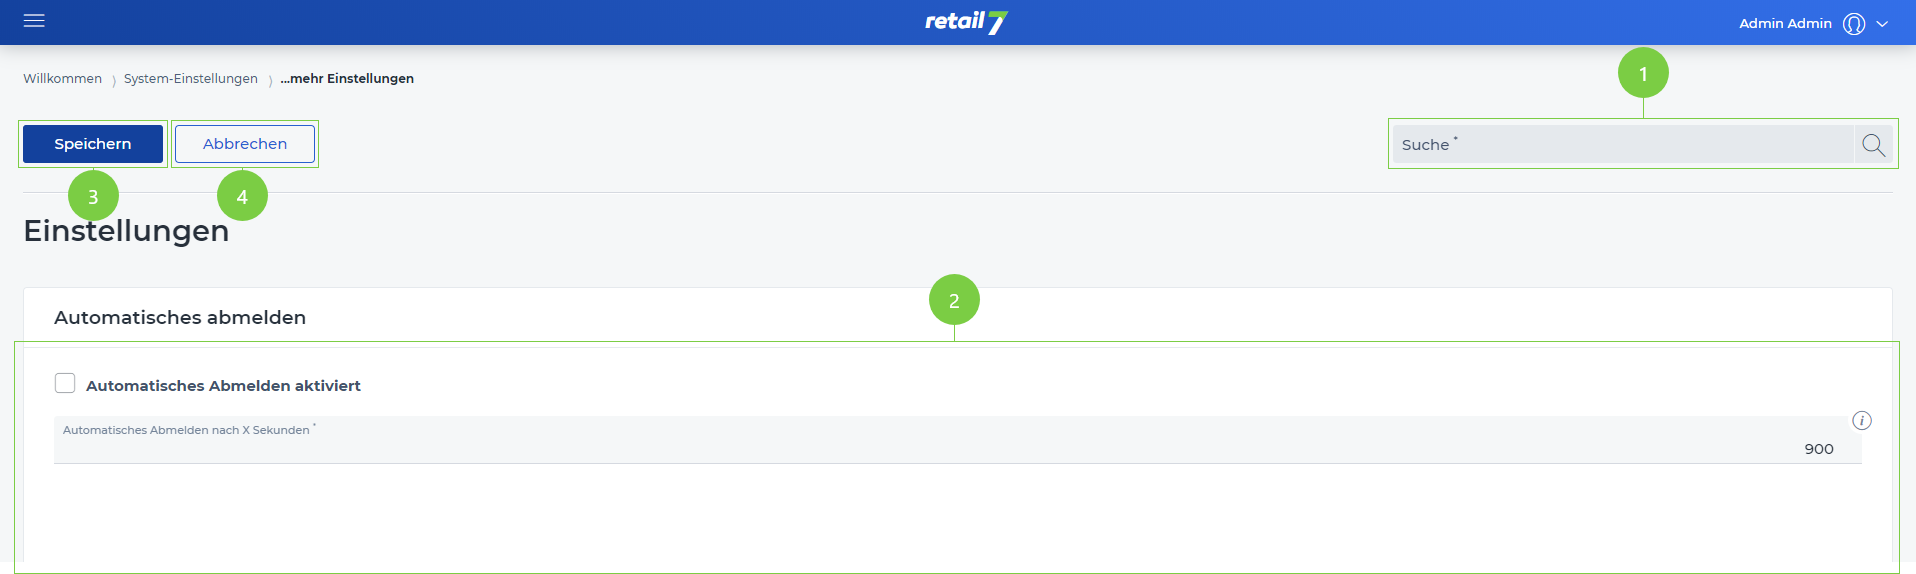 1 Search function
Enter the desired search term in the search.
Click on the magnifying glass.
Wait for the result and select a desired setting.
2 Editing window
3 Save entries
4 Close editing window
7.4.4.2.1 Set automatic logout
With this function, the cash register is logged off after a time x. This ensures that no third person uses the cash register, as it is always logged out automatically. The time can be configured individually.
Open the menu → System Settings.
Click Automatic Logout under the Management Console menu.
Check the box if you want automatic logoff to be active.
If the function is not active, the cash register must always be logged out manually.
4. Specify after how many seconds the automatic logout will take place.
5. Click on Save.
7.4.4.3 User settings
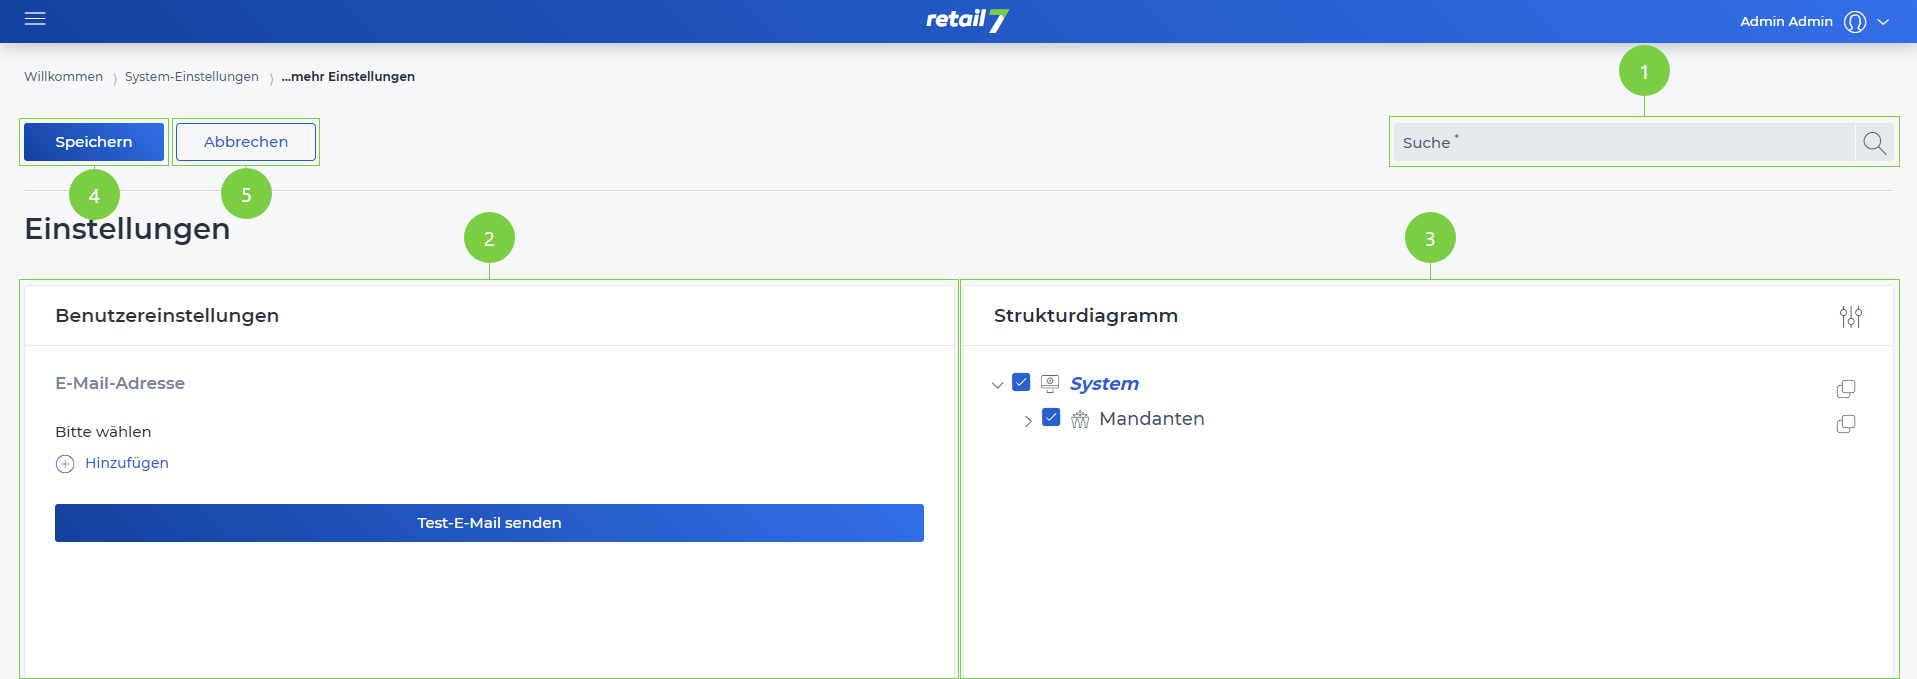 1 Search function
Enter the desired search term in the search.
Click on the magnifying glass.
Wait for the result and select a desired setting.
2 Editing window
3 Structure diagram
4 Save input
5 Close editing window
7.4.4.3.1 Create user settings
In this area, all settings related to the user are created. These can be configured as desired.
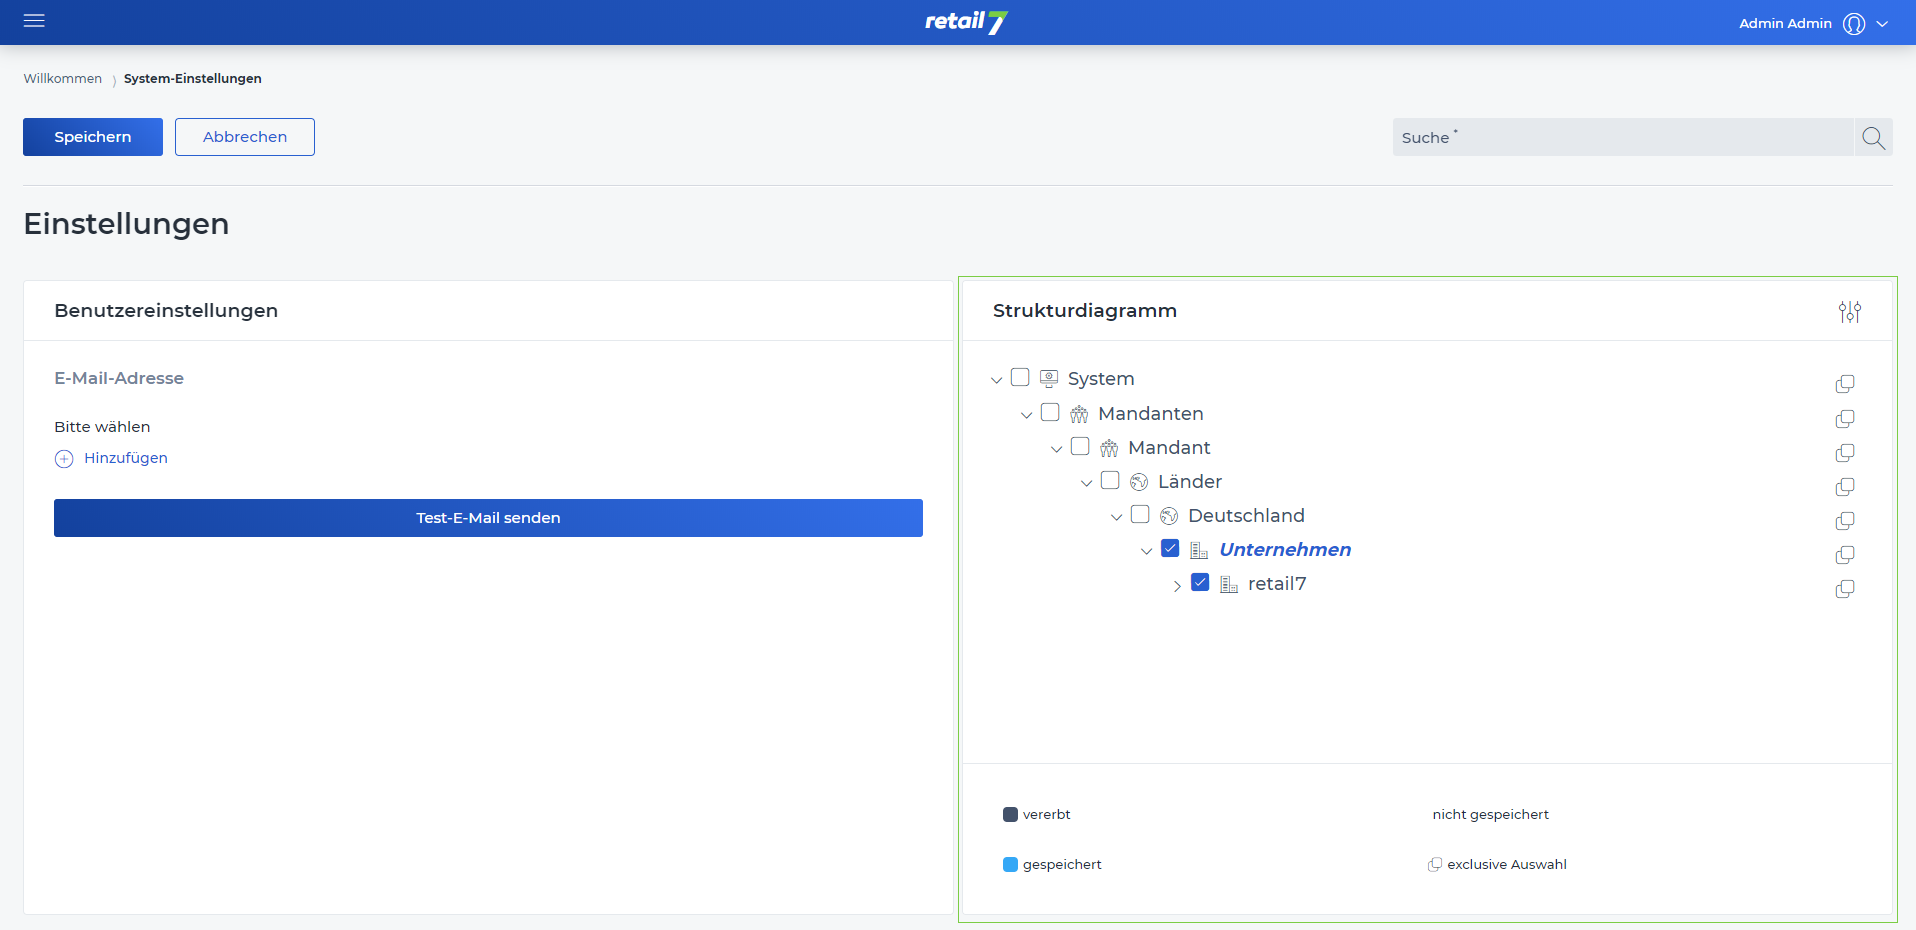
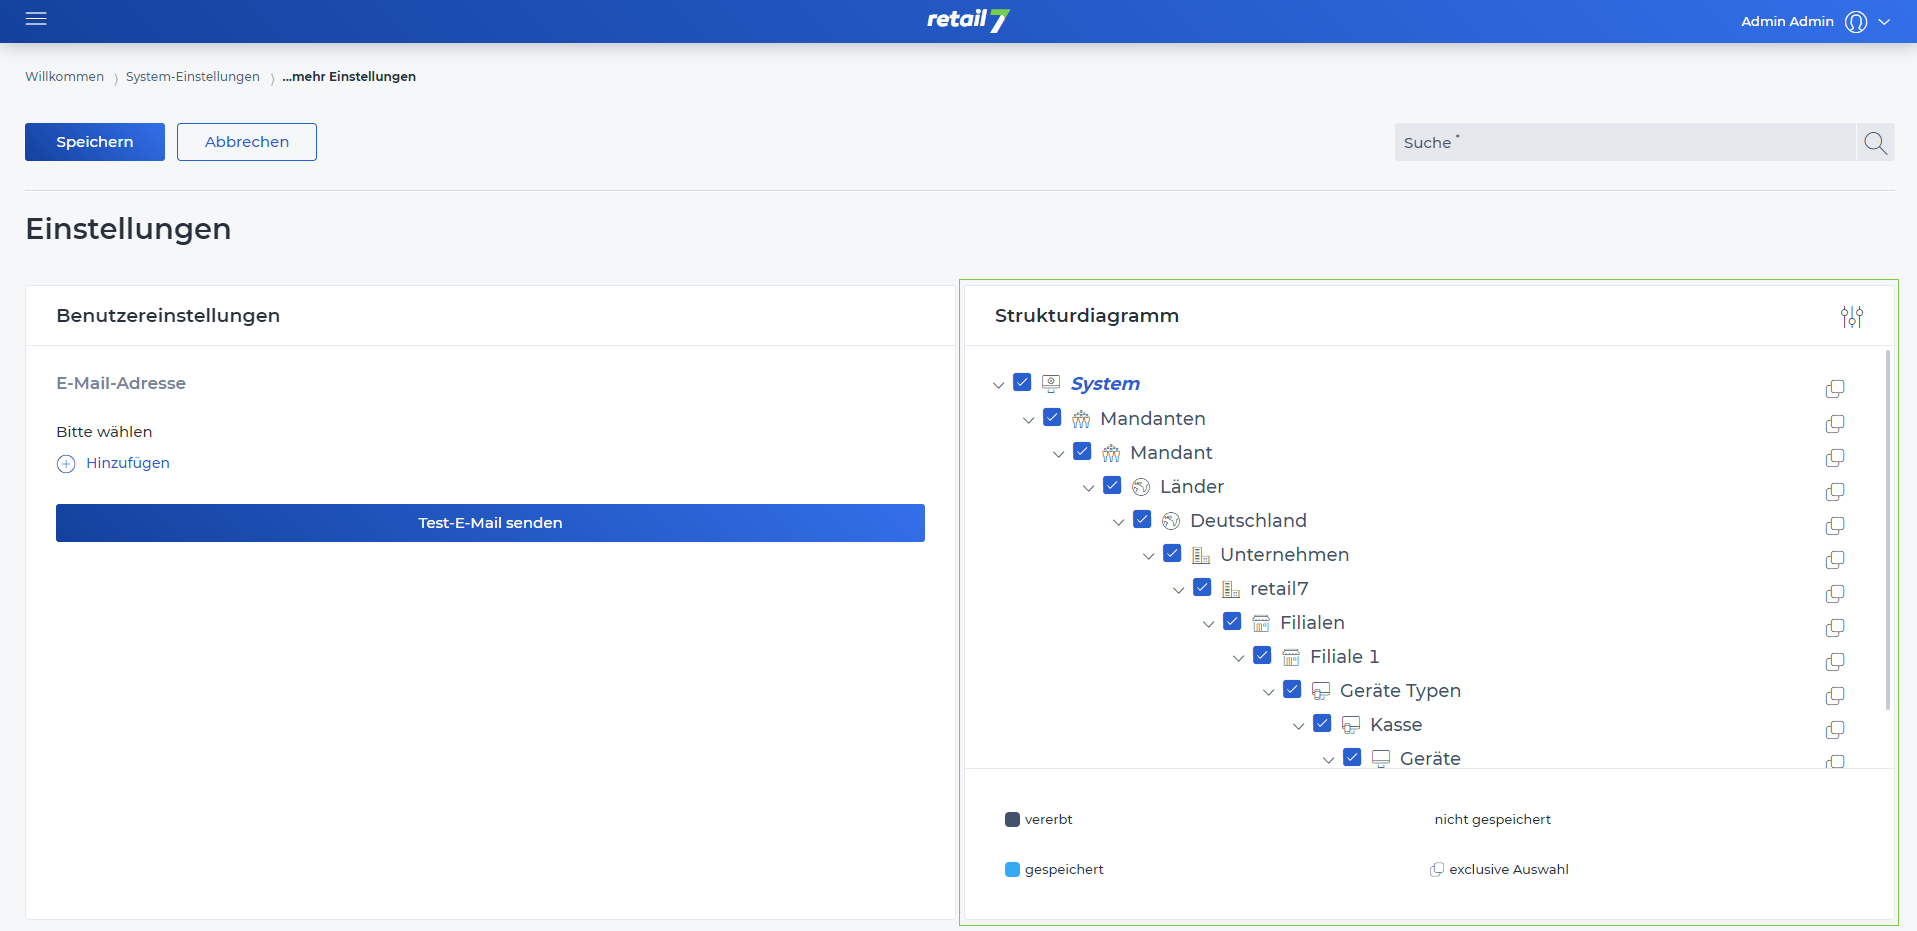 ATTENTION: In the structure diagram the top level (system) is automatically selected, thus the user setting applies to all elements of the structure.
Open the menu → System Settings.
Click User Settings under the Management - Console menu.
Click Add.
Specify an e-mail address.
Click on Send test e-mail.
Select Save.
7.4.4.3.2 Assign user settings structure diagram
Under My Organization, a structure can be created according to specific ideas. Subsequently, settings can be assigned separately for each level, which then also apply to all sublevels. For example, store 1 receives configurations that do not apply in store 2.
Open the menu → System Settings.
Click User Settings under the Management - Console menu.
Expand the structure diagram.
All created organizational units can be seen here. These can be configured under Menu → My Organization.
4. Select the level to which the user settings are to be assigned.
All sublevels are automatically selected and thus the user settings are assigned here as well.
In this example, the user settings only apply to the retail7 company and all subordinate elements. For all other companies in Germany, the settings assigned to the system continue to apply.
5. Click Add.
6. Enter an e-mail address.
7. Click on Send test e-mail.
8. select Save.
7.4.4.4 Maintenance tasks
 1 Suchfunktion
Den gewünschten Suchbegriff in die Suche eingeben.
Auf die Lupe klicken.
Warten auf das Ergebnis und eine gewünschte Einstellung auswählen.
2 Bearbeitungsfenster
3 Eingaben speichern
4 Bearbeitungsfenster schließen
7.4.4.4.1 Set maintenance tasks
Maintenance tasks are program-technical operations. These are necessary, for example, to keep the system up to date by performing an update. The tasks can be placed in a queue, which is then performed when the previous one is done.
Open the menu → System Settings.
Click Maintenance Tasks under the Management Console menu.
Specify the maximum number of days the maintenance tasks are saved.
After this time, the task will be deleted from the queue.
4. Specify how many days the maintenance tasks will be kept.
5. Click on Save.