4.5.1 Inventory
The RETAIL7 system's stock management functions make it easier to maintain accurate stock levels, optimize purchasing, minimize losses, and support strategic planning. To ensure system-registered stock matches actual store inventory, periodic inventories are essential. You can create new inventories, add item counts, identify differences, and update system stock accordingly. Separate inventories (e.g., by item groups or users) can also be conducted and merged into one.
Adding a new inventory
Open Master data → Stock management → Inventory.
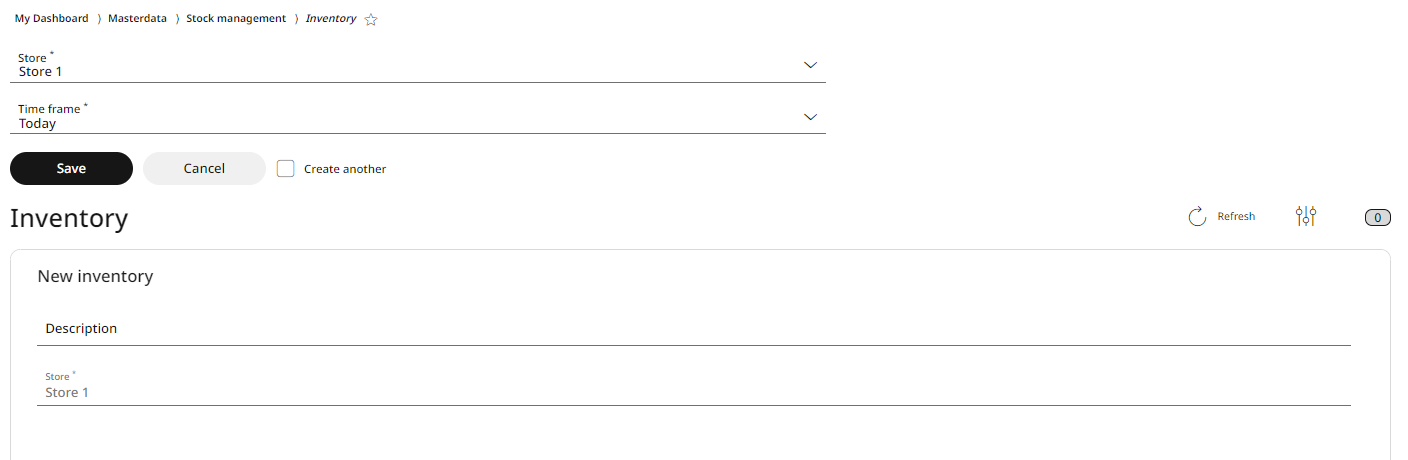
For a new inventory, select the store and click on Add.
Enter a description and click on Save.
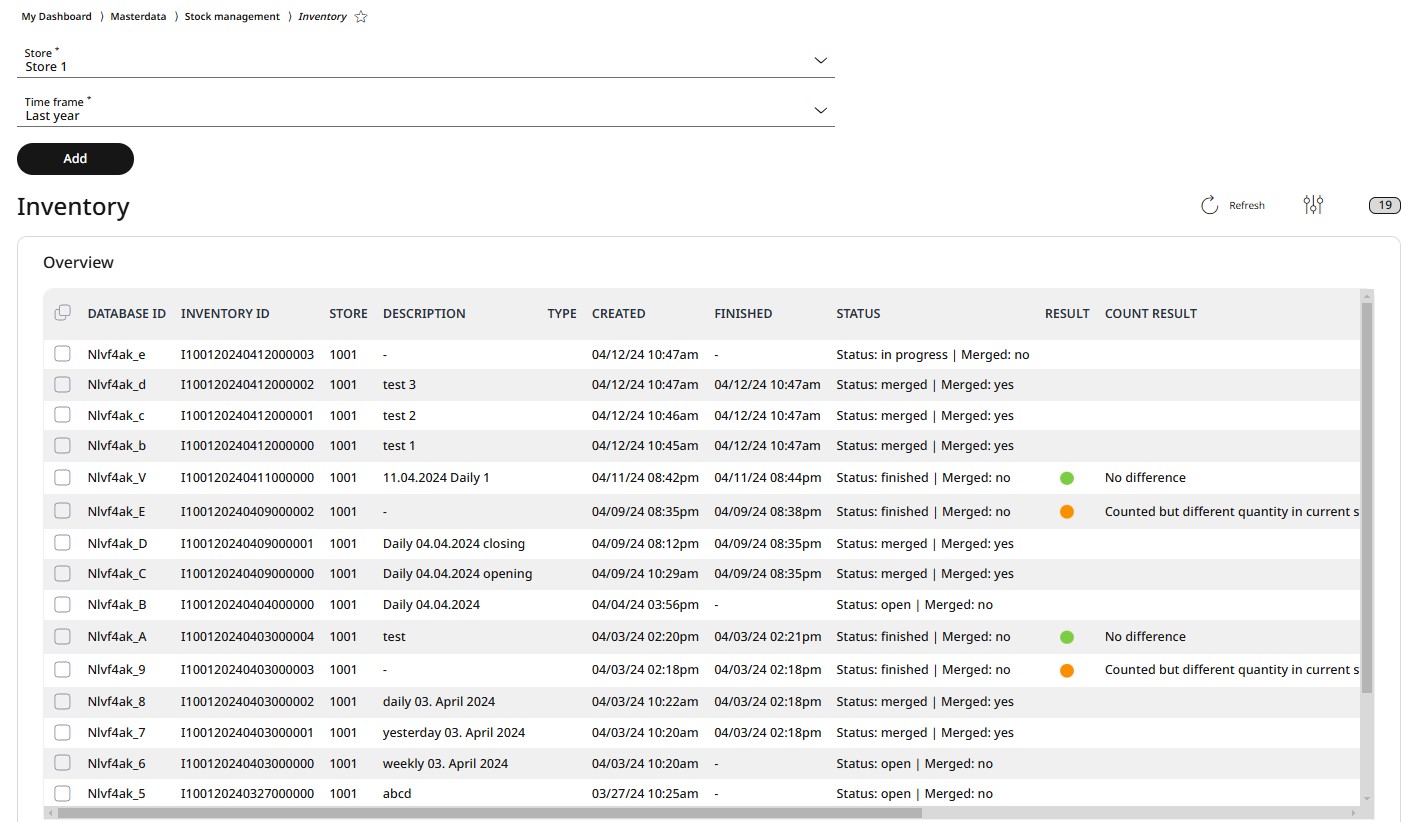
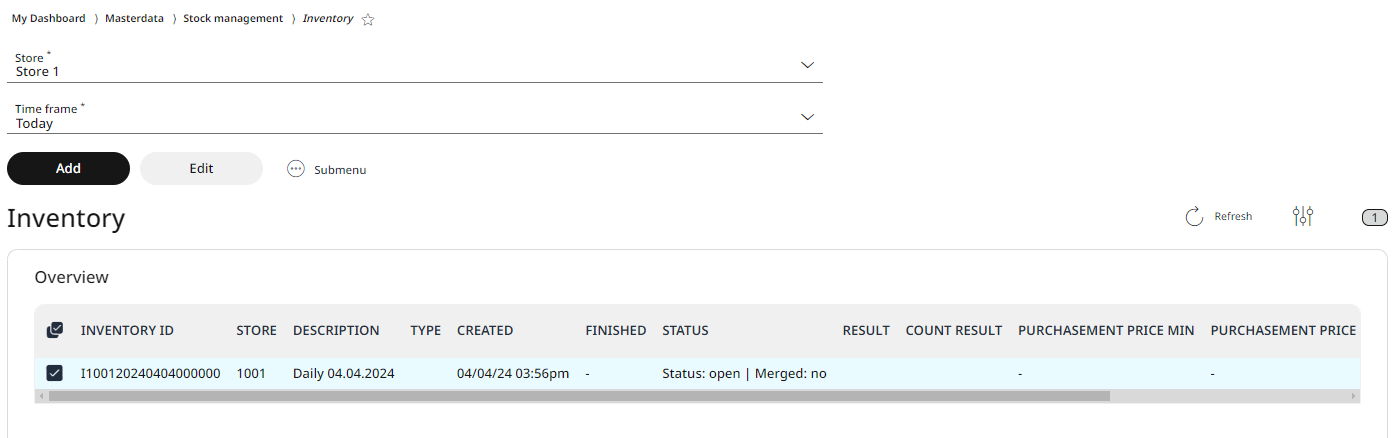
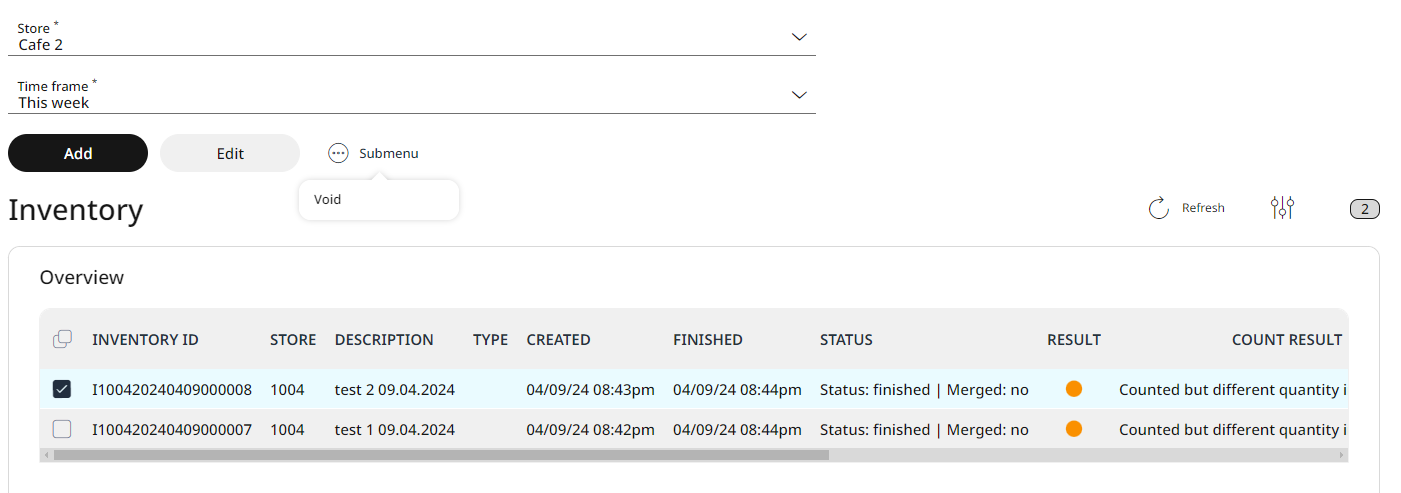
Now the new inventory is created and displayed in the list view with an Inventory ID given by the system, the ID of the store, the description, date and time of creation, and as Status: open / Merged: no status. Since this inventory is still empty, there is no result, count result, or the purchasement minimum, average and maximum prices (for these, they need to be added to the items in the item list previously) displayed yet.
NOTE: The inventory ID number is assigned automatically and has the following structure:
I = Inventory
XXXX = Store number
YYYYMMDD = Date in the format YYYY MM DD
XXXXXX = Consecutive counter which is incremented by one with each inventory
Next step is, to add items to this empty inventory aka count the items in the store.
NOTE: beside the steps described below, the inventory can also be counted via the RETAIL7 POS app. More about this under RETAIL7 POS application -> Functions -> Stock management -> Inventory count chapter.
For adding items to this new inventory, click in the box at the beginning of the row and click on the Edit button.
Now the inventory is opened for editing and three tabs are displayed.
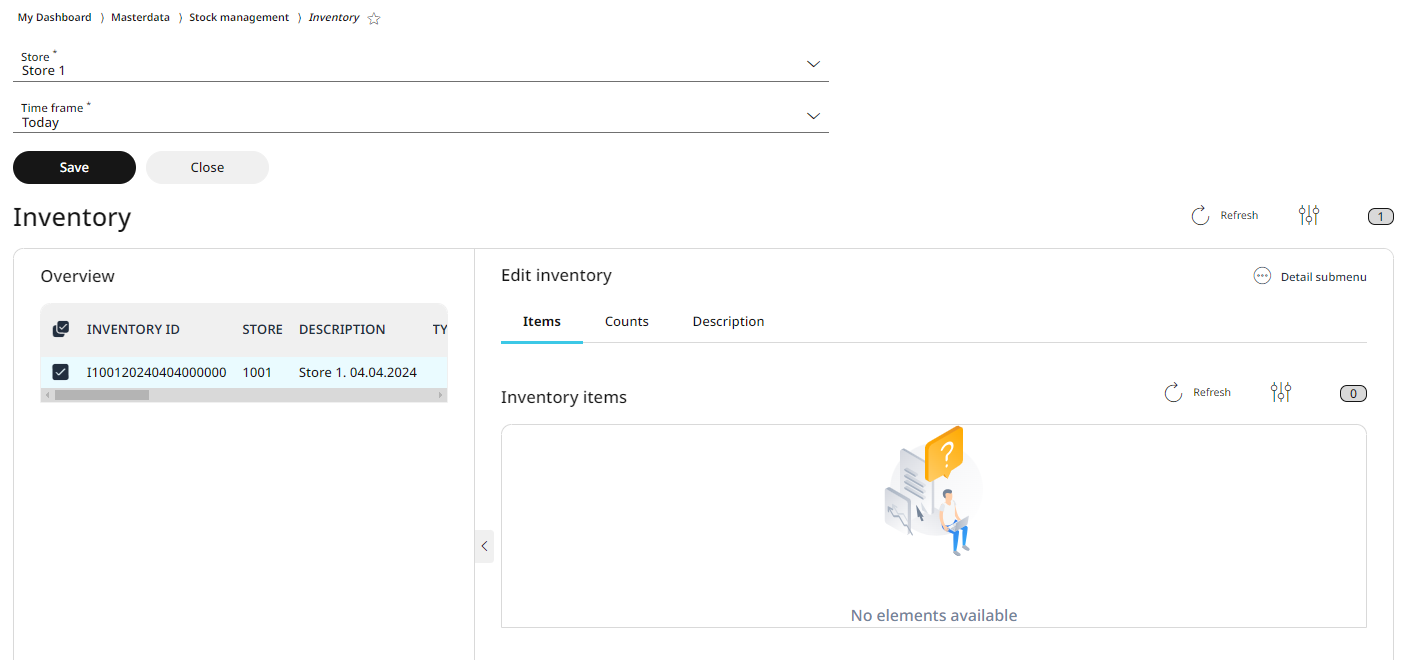
The contents of the inventory can be seen in details on the Items tab - since no items were added yet, it is empty for now
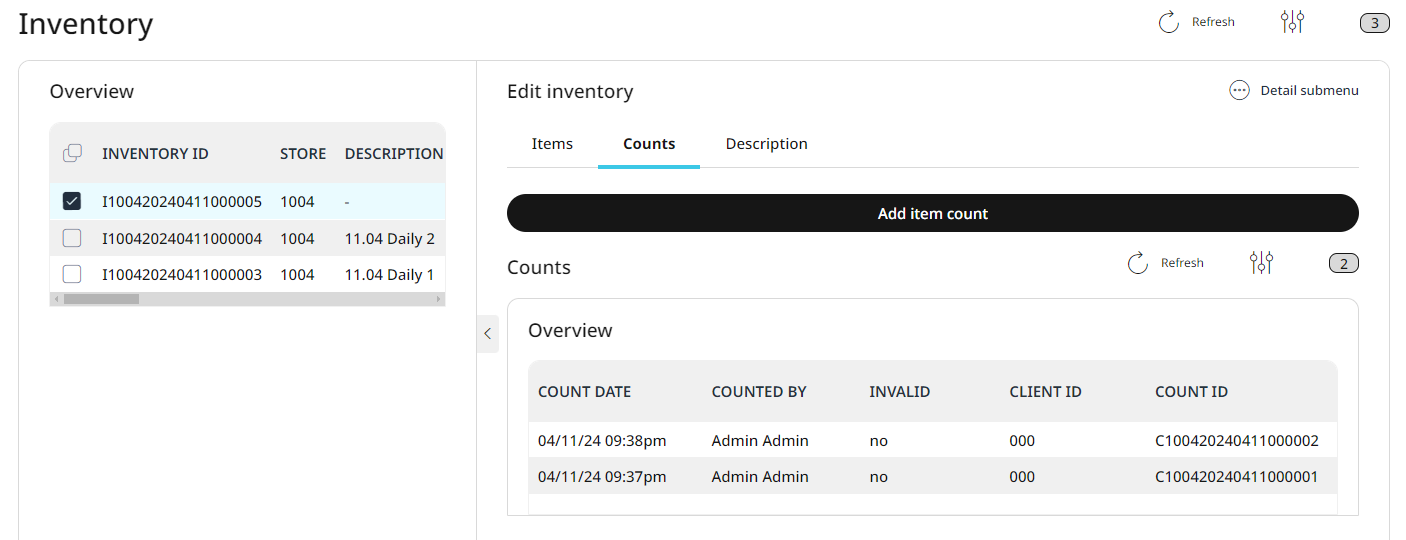
Adding the counted items to this inventory is possible on the Counts tab.
The description (or name, title) of the inventory can be edited on the Description tab.
Click on the Counts tab to begin adding the items you count in the store (you can maximize the view for a better overview with the < button and minimize back with the > button).
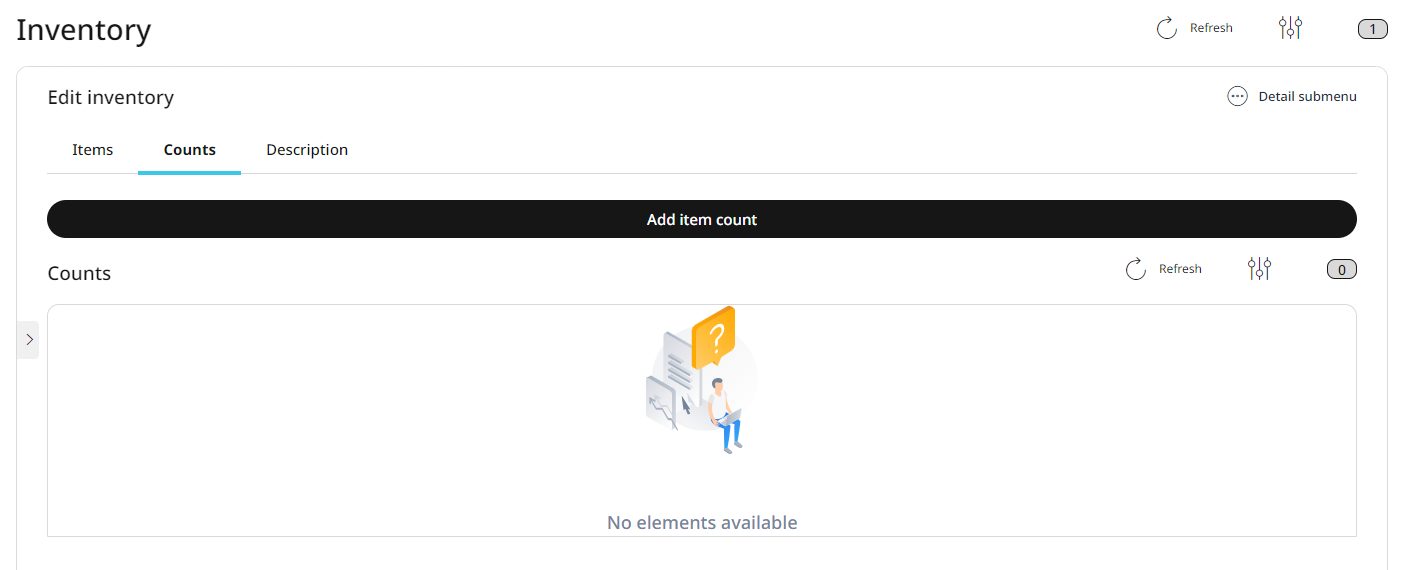
By clicking the Add item count button, you can register the items one by one in a pop up window by entering the Item ID or Name manually, or by selecting the item from the roll-down menu.
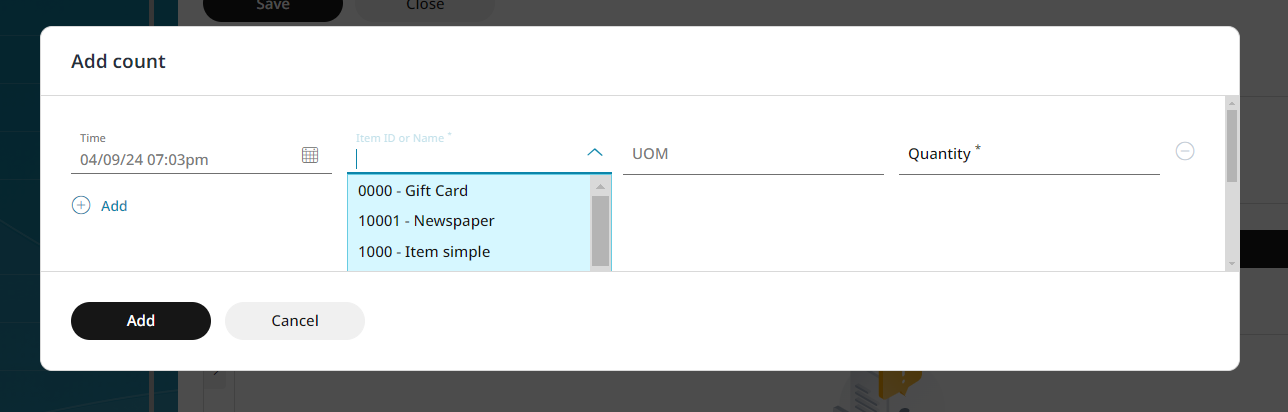
The date and time is automatically added, just as the UOM (Unit of Measure - according to the item data).
Enter the counted quantity and click on Add.
The row of the count of this item is on the Counts tab now, together with who counted it and when, and it´s possible to check what has been counted by certain users. For this, the usernames can be selected in the list of counts and a new window will then show which items with which quantities have been logged by that user.
To add more items to this inventory, select + Add and search for the next items counted.
By clicking on the Items tab, the overview of the count is displayed with details:
the counted Item ID or name,
the Target stock,
the Counted stock,
the Trading correction,
the Difference,
and the Minimum, Average and Maximum purchasement prices for this item.

To count more items, click on Counts tab again, select + Add and register the next item with the quantity counted. Continue this until all the items are registered.
When finished with adding all the counted items, click on Save.
To see if the counted amount matches with the amount in the system, now the two quantities needs to be compared. For this, you have to Finish the inventory, so the system could run the check on current stock and display the result.
For finishing the inventory, select the inventory by clicking in the box at the beginning of the row. Now click on Submenu and choose Finish from the options. 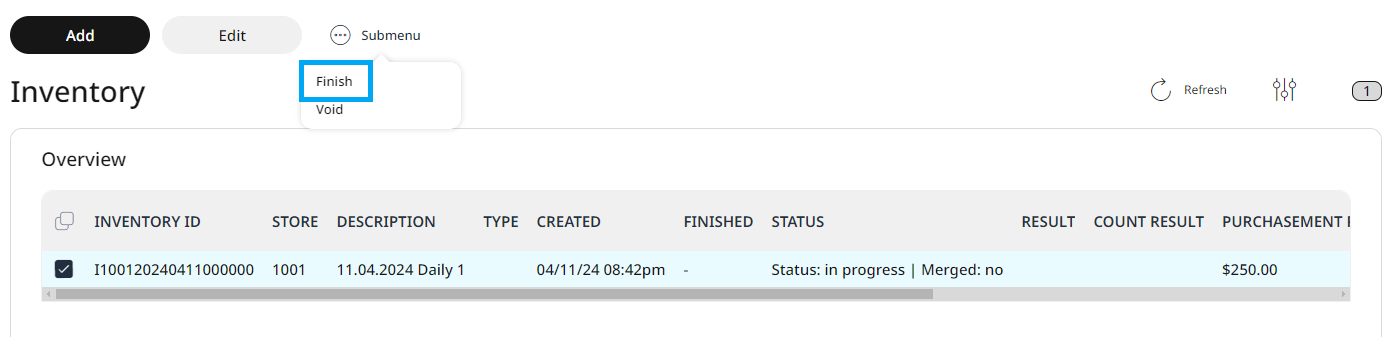
If the counted number in the inventory matches the number of the current stock, the Result status light will be displayed as green, and Count result confirms that there is no difference.

If the counted number in the inventory doesn´t match with the number of the current stock, the Result status light will be displayed as orange, and the Count result warns that there is different quantity in current stock.

When an inventory is finished, it means that it cannot be edited for the recount. In this case, a new inventory should be created.
Merging two or more inventories to one
It is always an option not to count the whole stock all at once, but to divide the tasks among the workers, or to carry out the inventory e.g. by item groups, and for this you can create separate inventories.
For seeing the final result, these different inventories must be merged into one, an then this final one is the one to be finished. Please note: already finished inventories cannot be merged anymore. The merging must always be executed only with inventories still in the In progress status.
Create the inventories as mentioned above, add counts of items and click Save.
Select all the inventories to be merged by clicking in the boxes in front of their Inventory IDs.
Now, by opening the Submenu, there are three functions available: Finish, Merge and Void. Click on Merge.
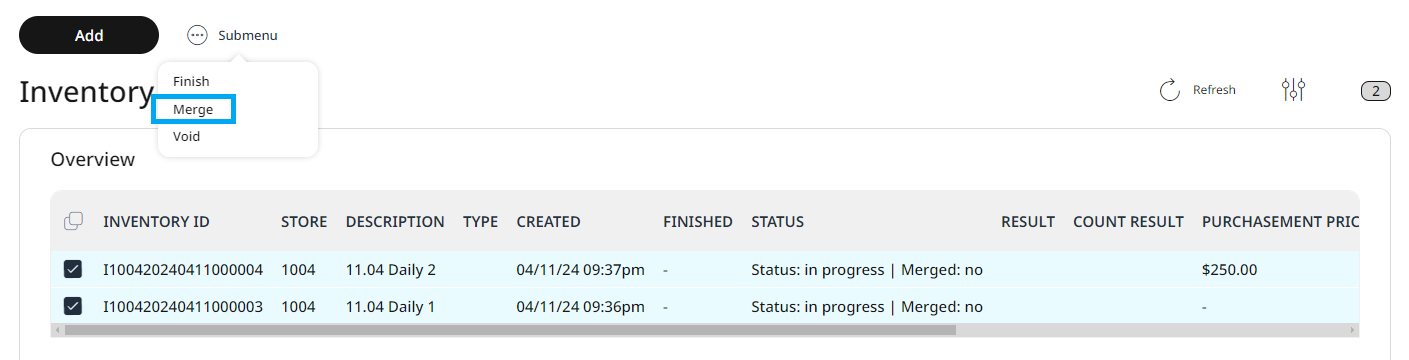
Select a reason from the roll down menu in the pop up window for merging and click Ok.

Now a new inventory is created automatically from the merged ones, and the status of the original inventories changes to Merged.
The new, merged inventory has no Description yet, and its status is In progress. On the Counts tab of this new inventory the items from the merged inventories are listed all at once. Also, this merged inventory is still editable, so a proper description and even new items can be added.
Now this merged inventory can be finished as previously explained: by clicking in the box at the beginning of the row, and choosing Finish from the Submenu options.
If the counted number in the merged inventory matches the number of the current stock, the Result status light will be displayed as green, and Count result confirms that there is no difference.
If the counted number in the merged inventory doesn´t match with the number of the current stock, the Result status light will be displayed as orange, and the Count result warns that there is different quantity in current stock.
When an inventory is finished, it means that it cannot be edited for the recount. In this case, a new inventory should be created.
Editing inventories
You can always edit inventories after they has been saved, until you haven´t merged or finished them. This means that items can be added subsequently (e.g. if additional ones were found after the first counting), and the description can be changed. In these cases it is important to save again so that no new information is lost.
In case you would like to edit an inventory:
Select the desired inventory number from the list.
Click on Edit.
Click on the Counts and/or the Description tab and do the needed changes.
Click on Save.
By clicking on the Cancel button, the editing is withdrawn, the inventory remains unchanged.
Deleting inventories
Deleting inventories is not exactly the same as deleting e.g. items from the database. If the inventory data is no longer needed, it cannot be deleted, but voided instead. This means, the inventory will remain on the inventory list view, but is displayed as voided. Thus, the system no longer counts this information, but it is still visible that an inventory was made in a certain period.
In case you would like to void an inventory:
Select the desired inventory by clicking in the box at the beginning of the row.
Click on Submenu and choose Void.
Select a reason for voiding the inventory.
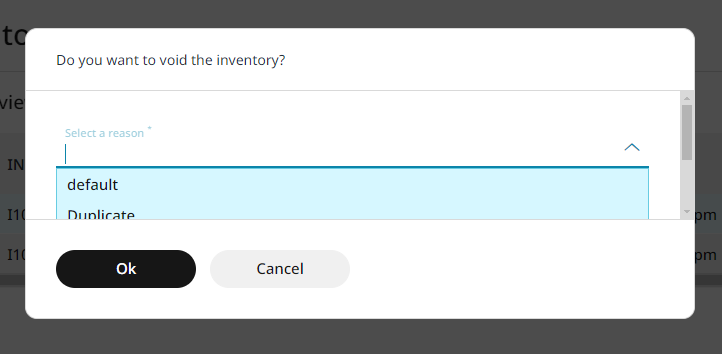
Click OK for voiding.
By clicking on the Cancel button, the voiding is withdrawn, the inventory remains active.