8.2.13 Floors
The floor planning and editing feature is designed for the gastronomy sector. It allows you to create and manage operating areas, referred to as floors, either in the POS app or the Management Console.
Once a floor is created, you can add tables and define their attributes, such as number, shape, size, position, and the number of seats. Tables can then be assigned to the appropriate floor. You can also create multiple floors as needed to accommodate your setup.
Functions on the floors overview
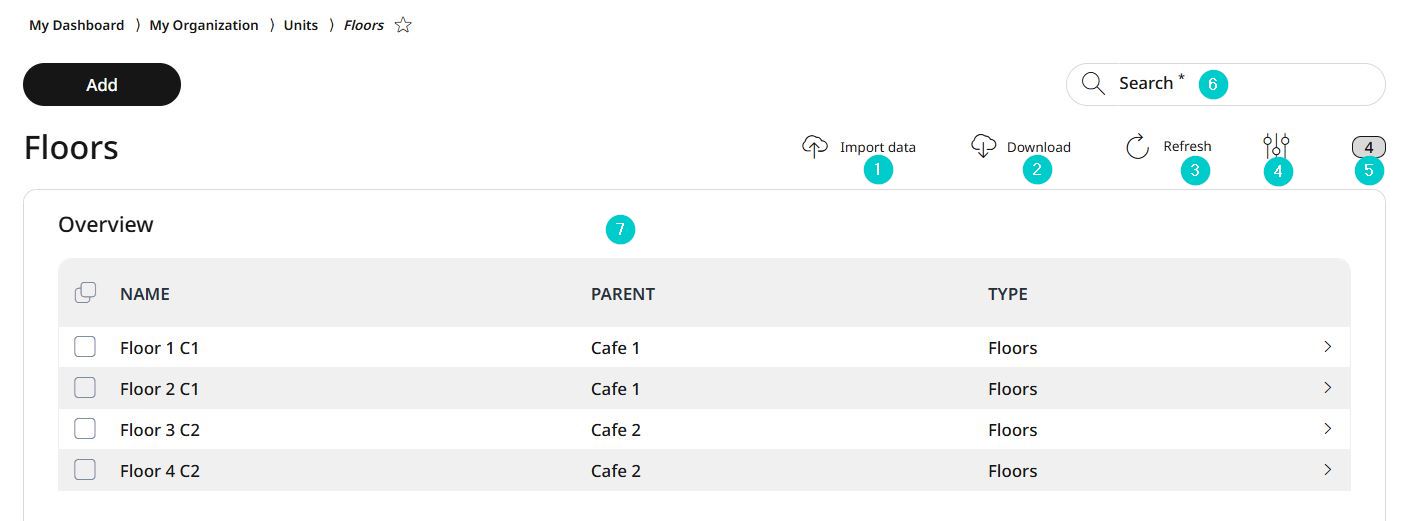
Import data
Download data
Refresh view
Activate/deactivate table fields
Number of list items
Search
Information about the floors
Adding floors
You can add a new floor either in the POS app or in the Management Console. The process consists of two steps:
Creating the Floor
For adding a new floor, go to My organization → Units → Floors and click Add.
Specify the parent element for the new floor.
Enter a name for the new floor. The name should be unique to avoid confusion.
At this stage, you must save the new floor to create it. Once saved, you can proceed to add further details to the floor plan.
Click Save for creating the new floor element, or Cancel to discard the process.
Designing the floor plan in the Floor Plan Editor
Select the newly created floor and click Edit.
Note: the parent element cannot be edited at this stage. To assign a new parent element, you must delete the current floor and create a new one.
In the top-right corner of the edit mask, the Detail submenu appears, providing access to the Floor Plan Editor.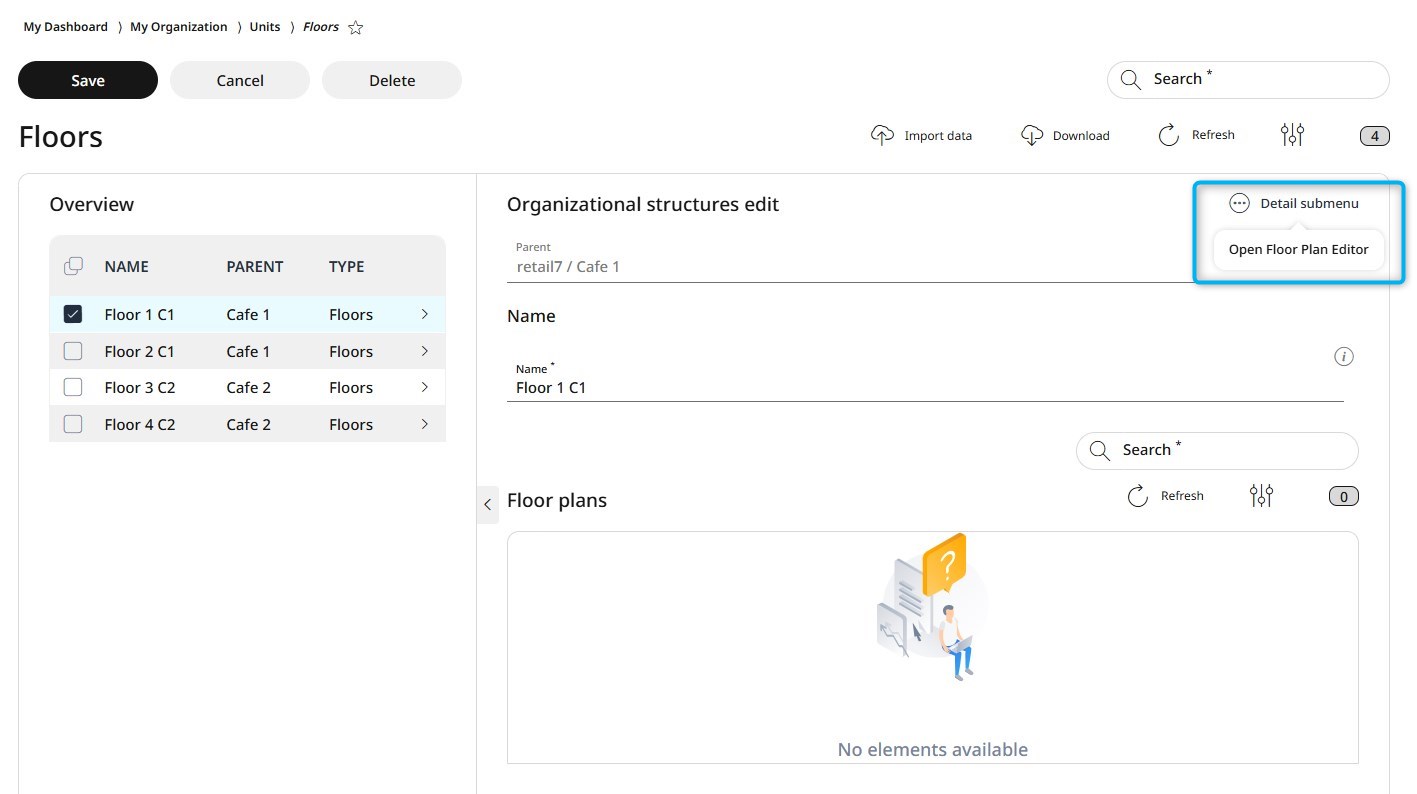
Clicking on it opens a pop-up window where, in a few steps, you need to enter the name, the room size and the amount of tables of the new floor before accessing the Floor Plan Editor.
Functions of the Floor Plan Editor
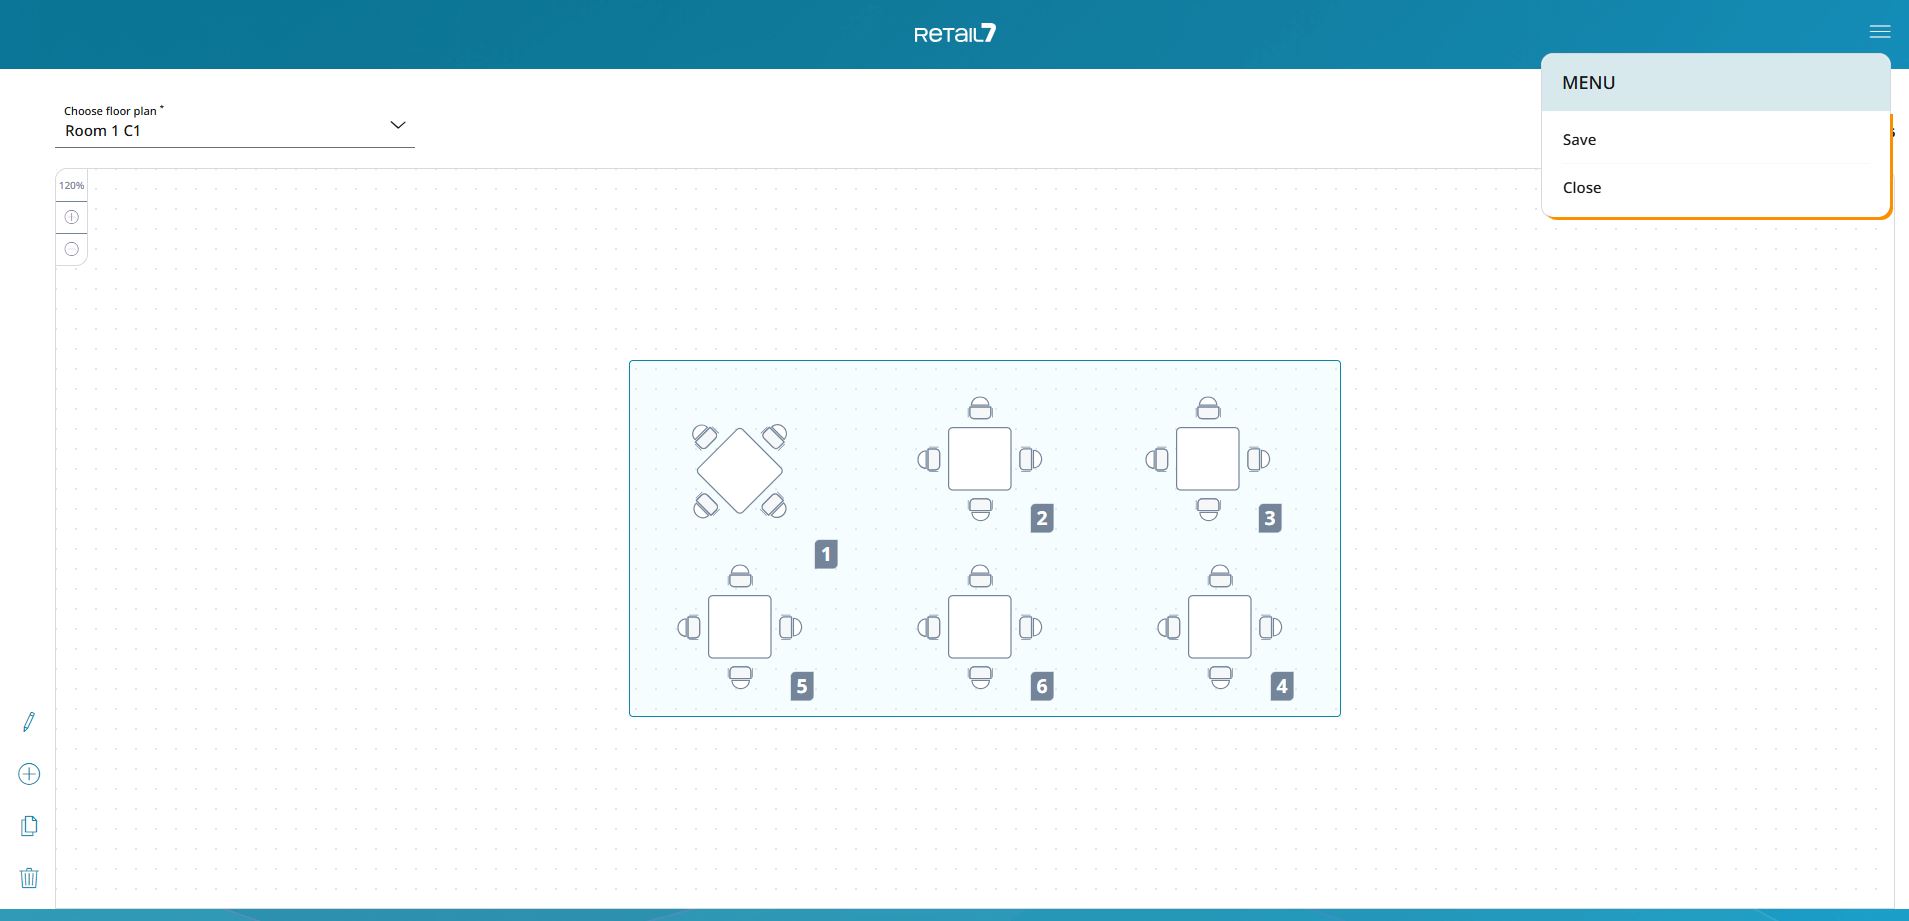
The Floor Plan Editor is a graphical tool that helps visualize table placement. You can easily move tables using drag and drop, with the grid background ensuring precise positioning. You can add or remove tables, and by clicking on each, you can adjust the table shape, number of seats, and even rotate or flip them to accurately reflect their real-life arrangement in the room.
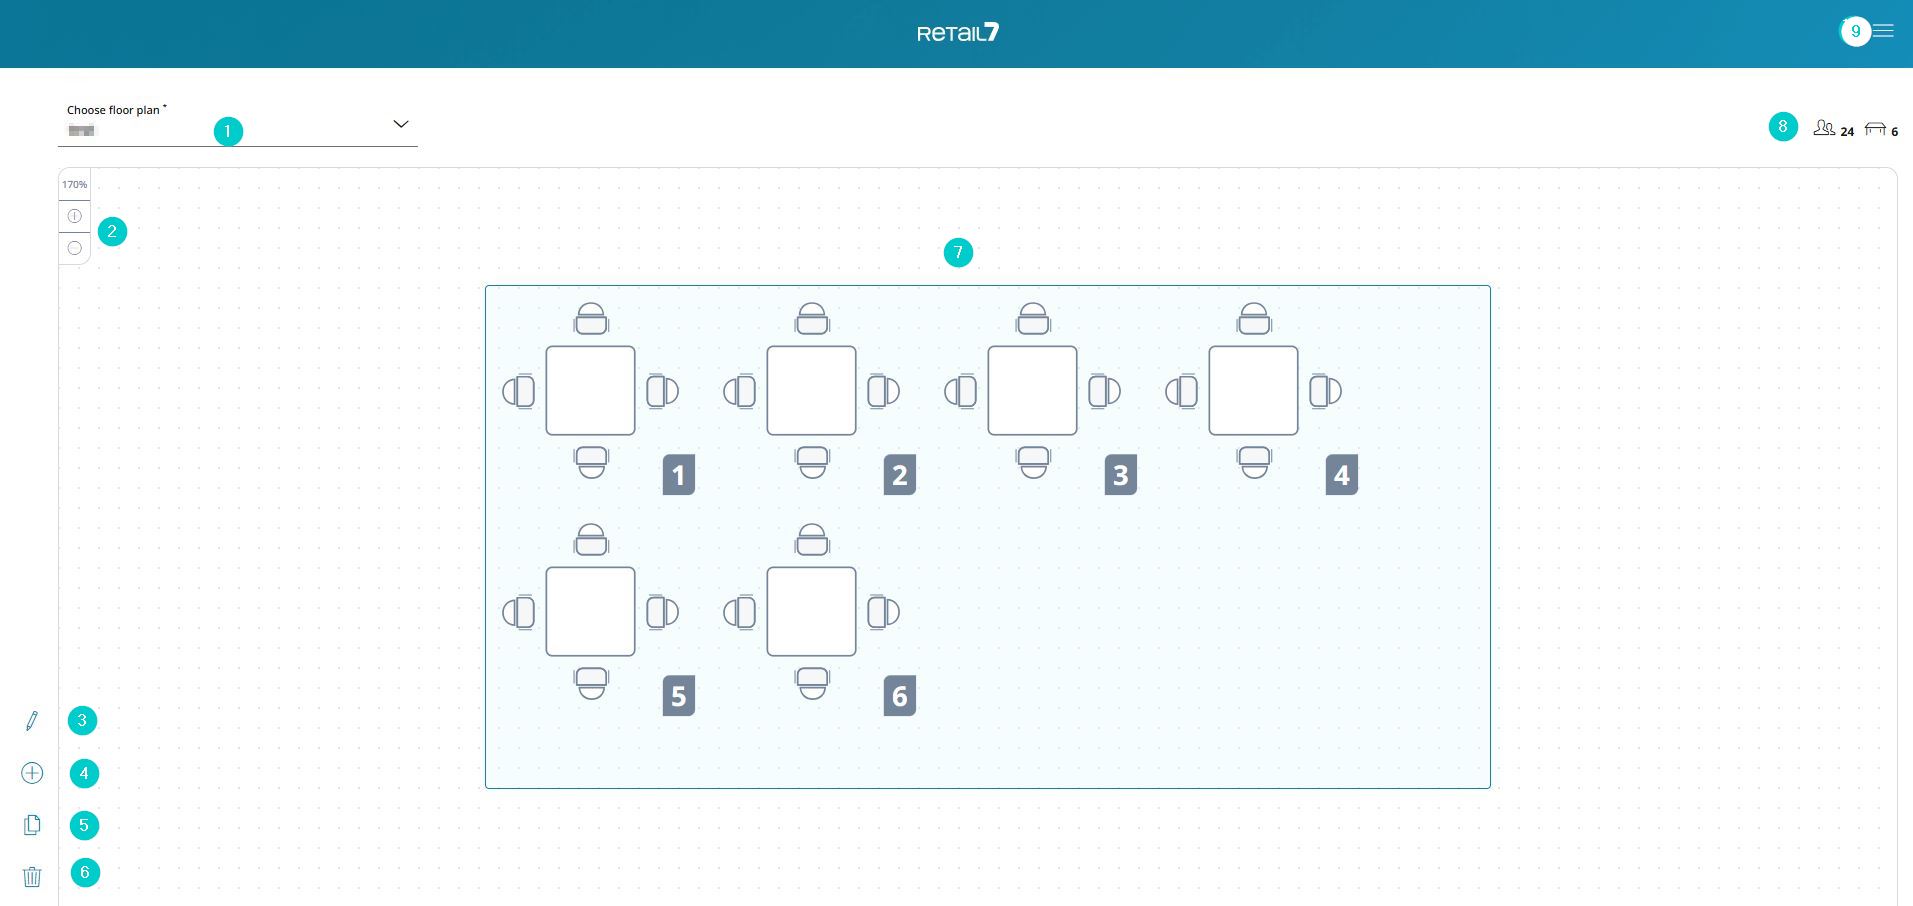
Rolldown menu for choosing floor plan
Floor plan view zoom in/out
Edit the floor plan
Add a new floor plan
Copy the current floor plan
Delete the floor plan
View of the room
All customer seats and tables on the floor
Saving and/or closing the Foor Plan Editor
Once a floor is created, you can add tables and define their attributes, such as number, shape, size, position, and the number of seats. Tables can then be assigned to the appropriate floor. You can also create multiple floors as needed to accommodate your setup.
For configuring the floorplan of the new floor, click on Edit (3).
The Floor Plan Editor control interface will appear on the left side of the screen, consisting of two tabs:
On the Tables tab you can configure all properties of each table:
Modify Tables: Click on a table to change its shape, adjust the number of seats, reposition it by manually entering a rotation value, or flip it horizontally or vertically.
Add or Delete Tables: Easily add new tables or delete existing ones as needed.
After changing or deleting a table, you can keep the changes by clicking on Confirm, or restore the original settings with the Cancel button.
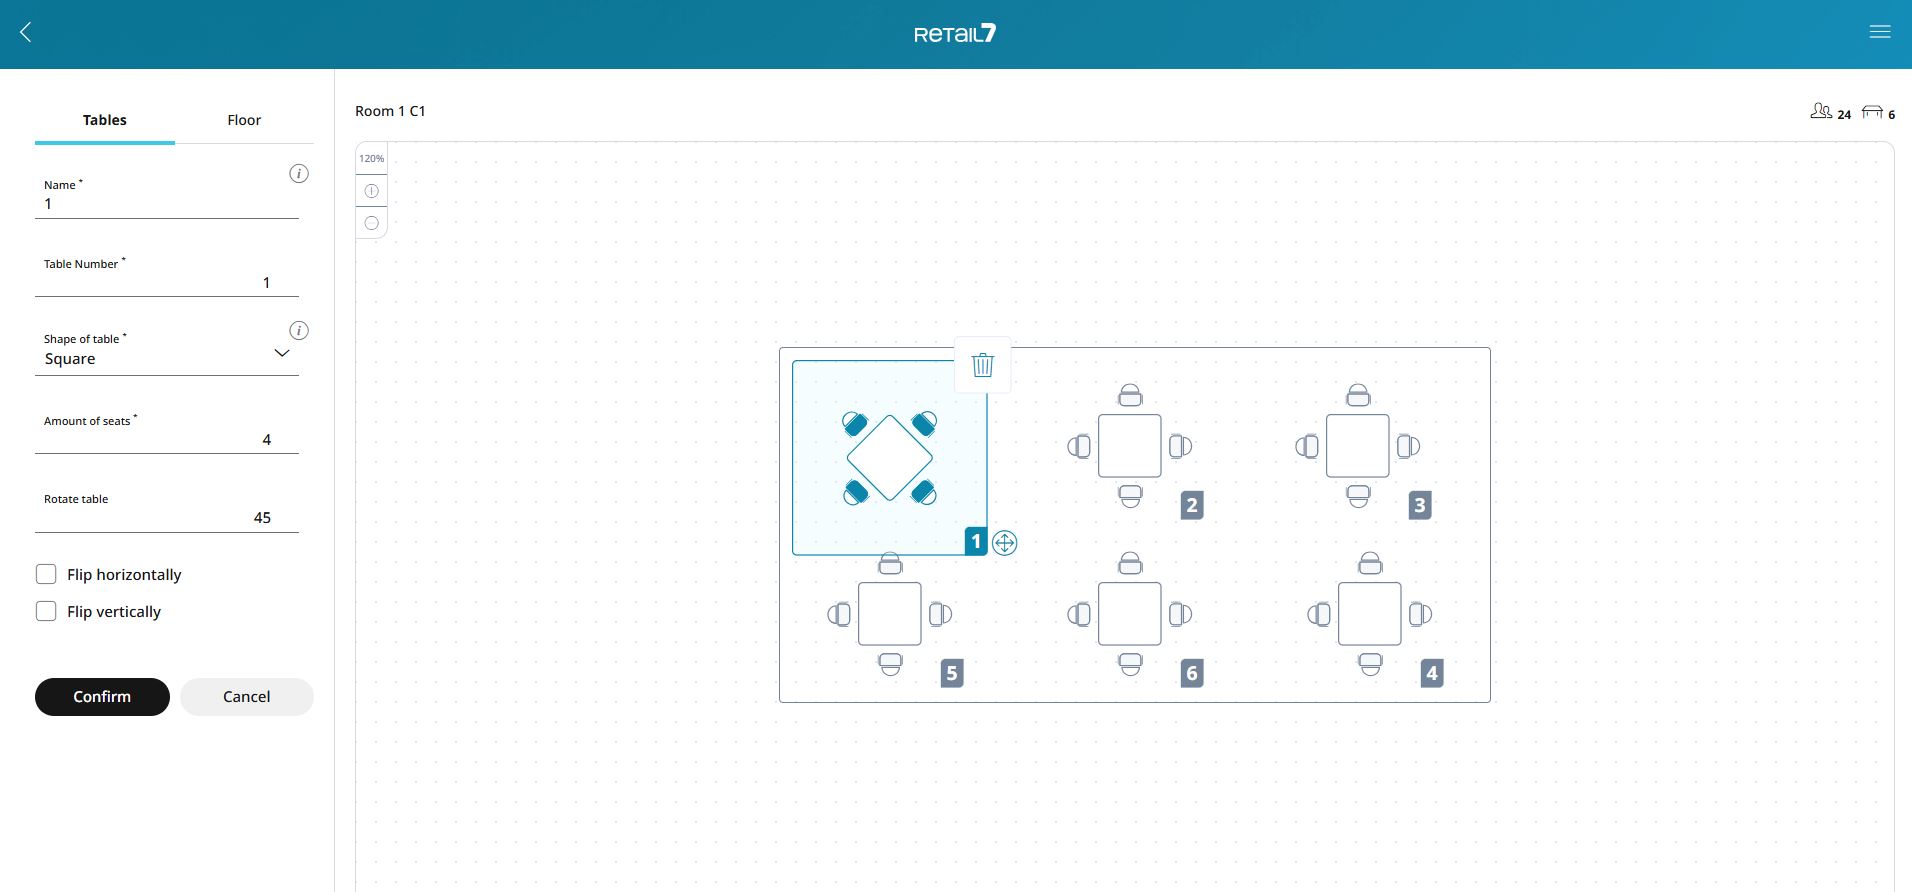
Switching to the Floor tab allows you to:
Change the floor’s name.
Adjust the room size.
After making changes, click Confirm to save the new data or Cancel to discard changes and restore the original settings.
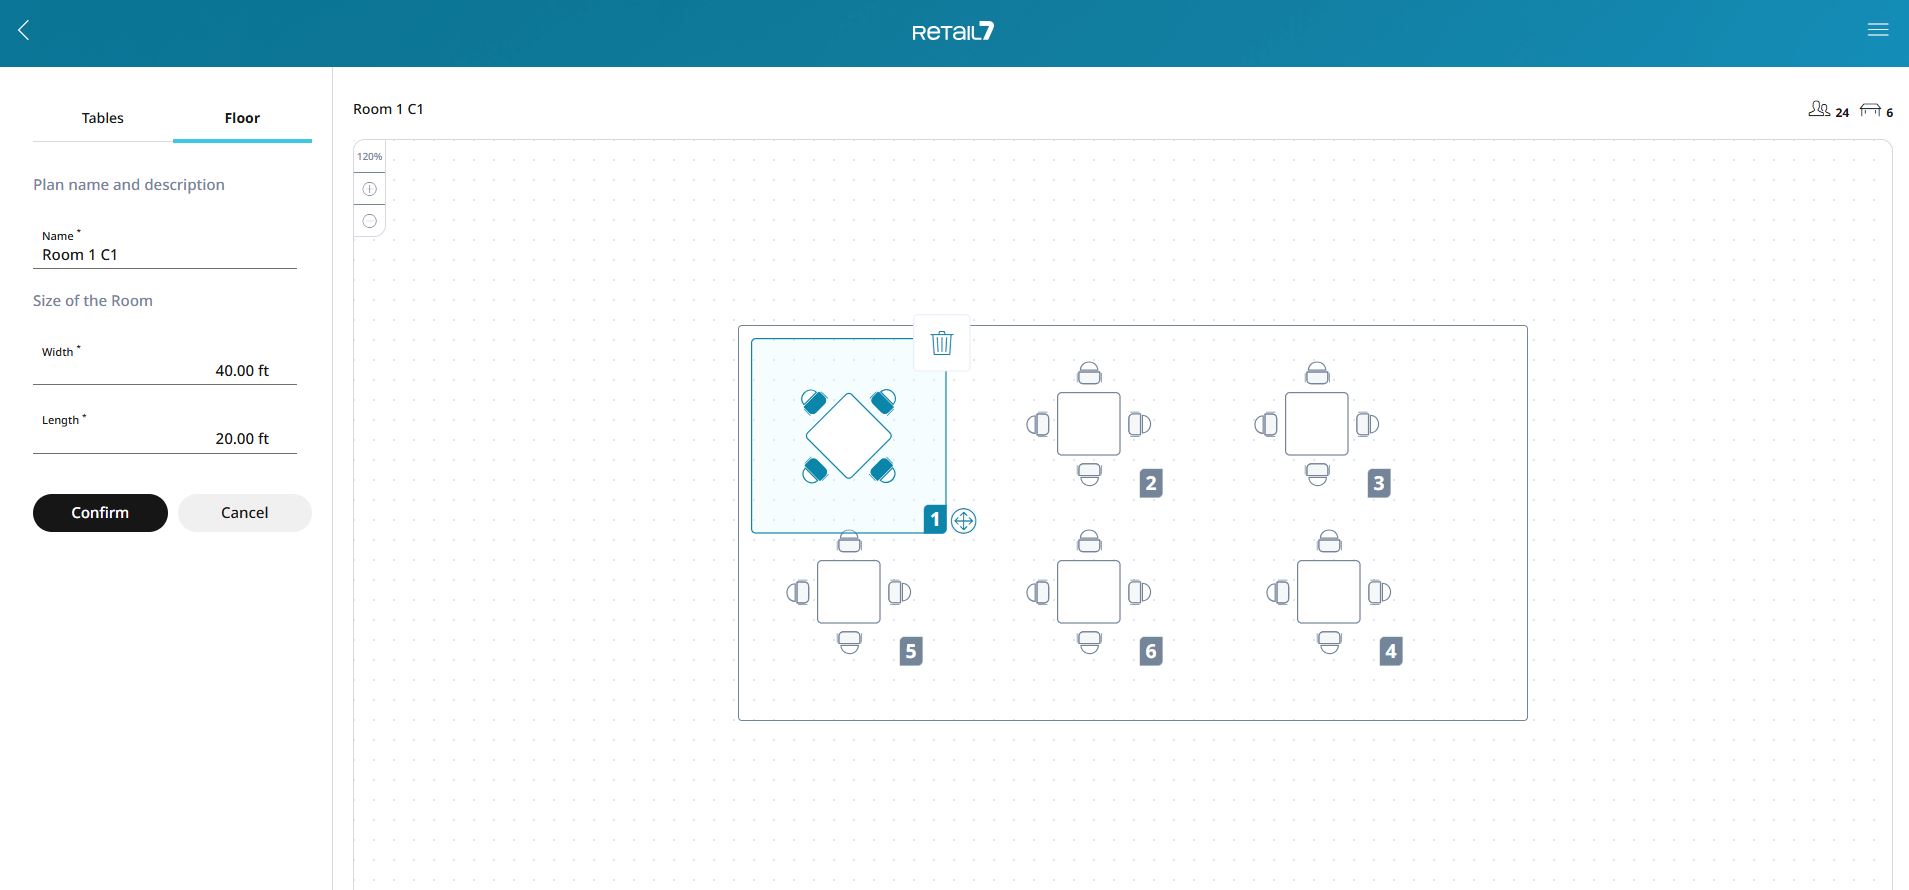
When finished editing the floor and the tables, you can go back to the editor overview with the < icon in the top left corner.
When finished working with the Floor Plan Editor, you can save your work and close the editor via the top right menu.
Editing and deleting floors
You can edit or delete saved floors at any time. Remove unused floors to keep the system up to date. Be sure to save after making any changes to ensure no information is lost.
Note: the parent element of a floor cannot be edited at this stage. To assign a new parent element, you must delete the current floor and create a new one.
To edit a floor:
Select the desired floor from the list and click Edit.
Modify the name or select a floor plan and click Edit.
Make the necessary changes in the Floor Plan Editor, click Save to apply them and Close the Floor Plan Editor.
Select Save to confirm the changes or Cancel to abort the process.
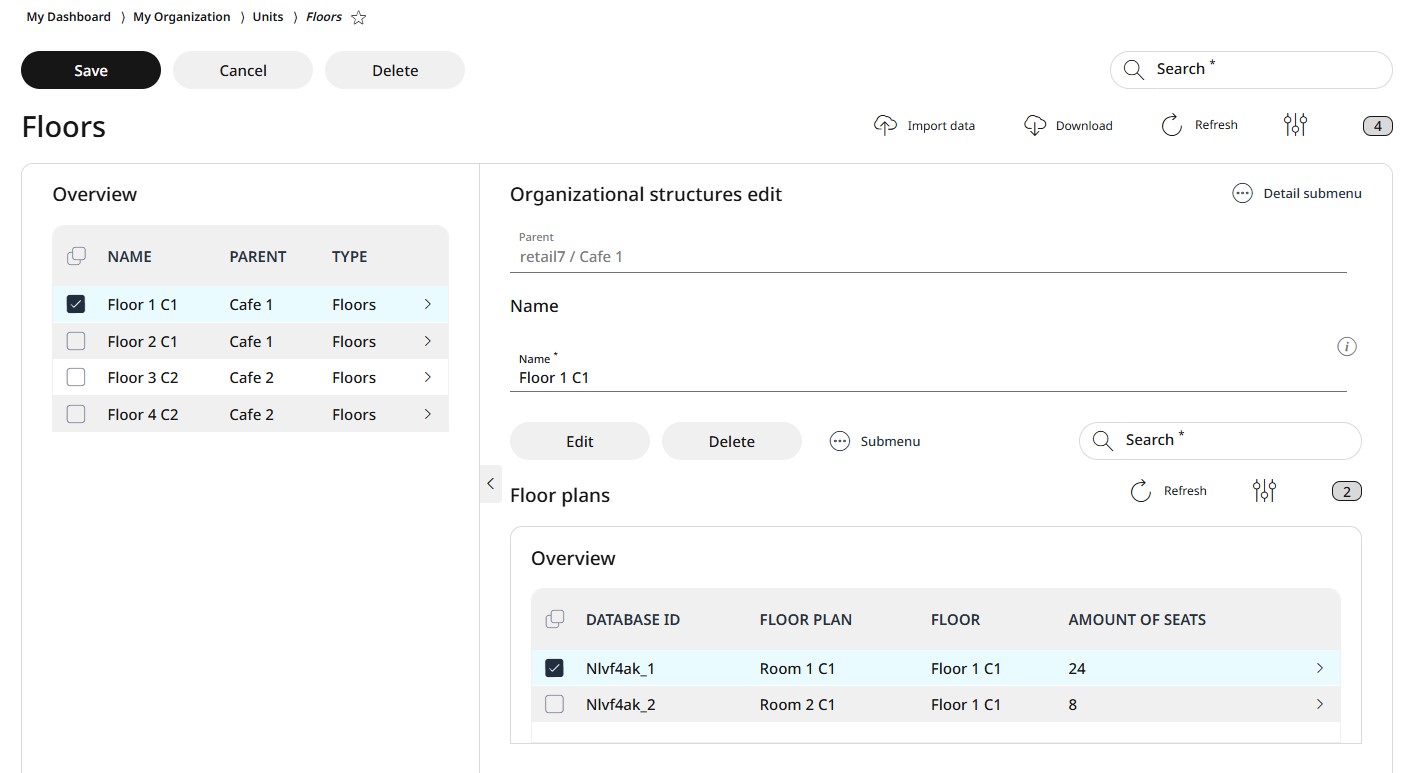
To delete a floor:
Select the desired floor from the list.
Click on Delete.
Confirm the dialog box with Yes or press No to interrupt the deletion process.