8.2.10 Tills
Tills are components of cash drawers, designed to hold coins and notes. Tills can be assigned to specific users. To enable this functionality, download and use the plugin available in the Marketplace.
Tills can be managed in the Management Console under two menus:
My Organization → Units → Devices.
My Organization → Units → Tills.
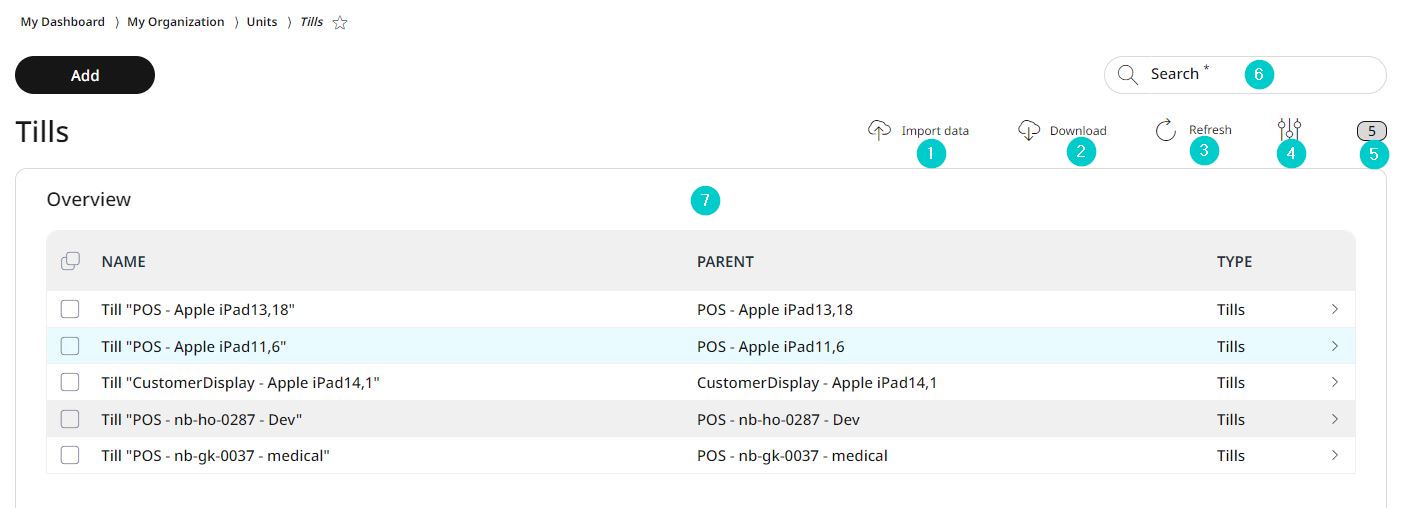
Functions on the overview

Import data or own configuration
Download data or configuration to your own system
Update the list view
Activate/deactivate table fields
Number of list items
Search
Information about the tills
Adding tills
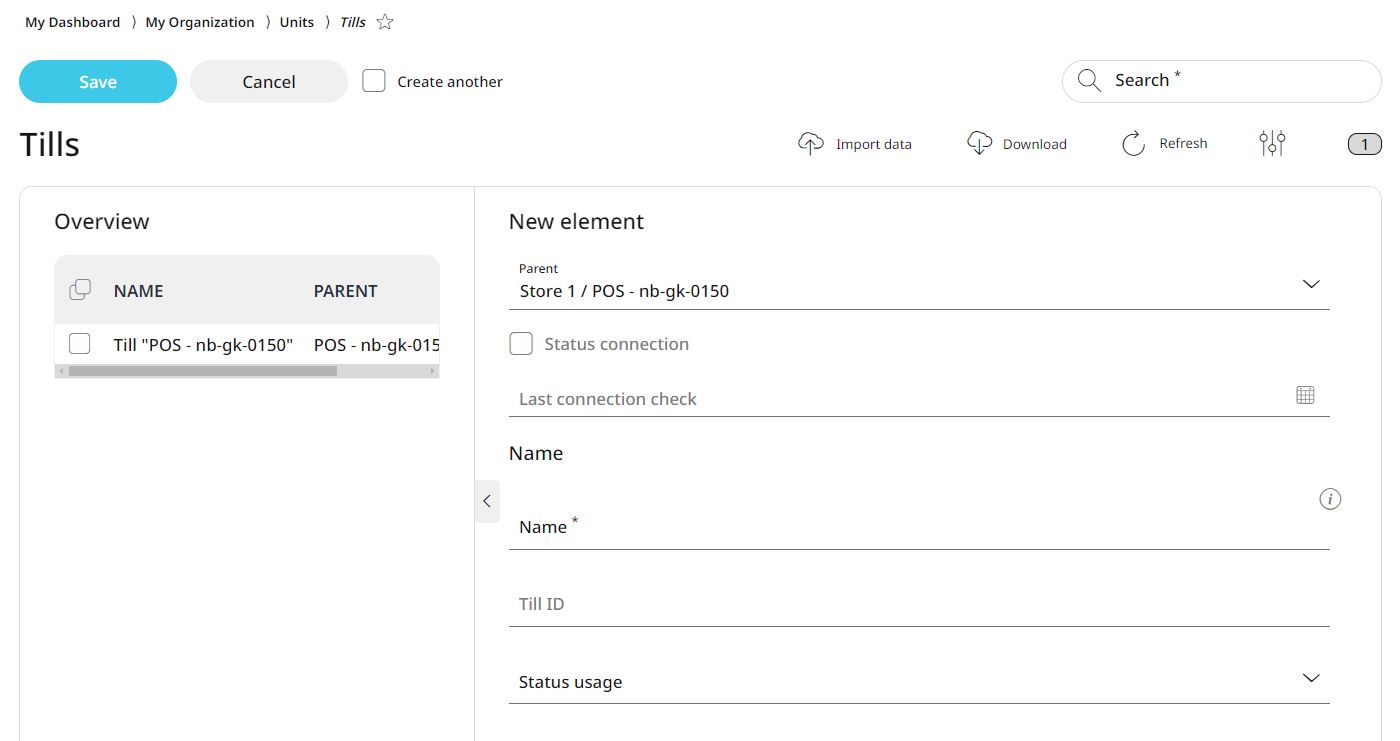
For adding a new till, go to menu → My organization → Organizational units → Tills and click Add.

Specify the parent element for the till.
Levels organize tills in a systematic tree structure, making navigation and management easier. You can assign specific settings to any level in the tree, and these settings will automatically apply to that level as well as all associated sublevels.
Enter a name for the till.
With the help of the name, the tills can be filtered out via the search function. The name should be unique to avoid confusion.
Set the usage status of the till by choosing from the rolldown menu.
Select Save.
Editing and deleting tills
With RETAIL7, all saved elements can be edited or deleted to keep the system up to date by removing unnecessary drawers. Remember to save after editing to retain changes.
To edit a till:
Select the desired till from the list.
Click Edit.
Make the necessary changes.
Click Save to confirm the updates.
To delete a till:
Select the desired till from the list.
Click Delete.
In the confirmation dialog box click Yes to delete the till, or click No to cancel the deletion process.