8.2.3 Countries
For businesses operating internationally, the RETAIL7 system streamlines cross-border operations with its multilingual POS software. It supports various languages for diverse teams and allows assigning each store to its respective country, ensuring structured organization and efficient management across all locations.
Adding countries
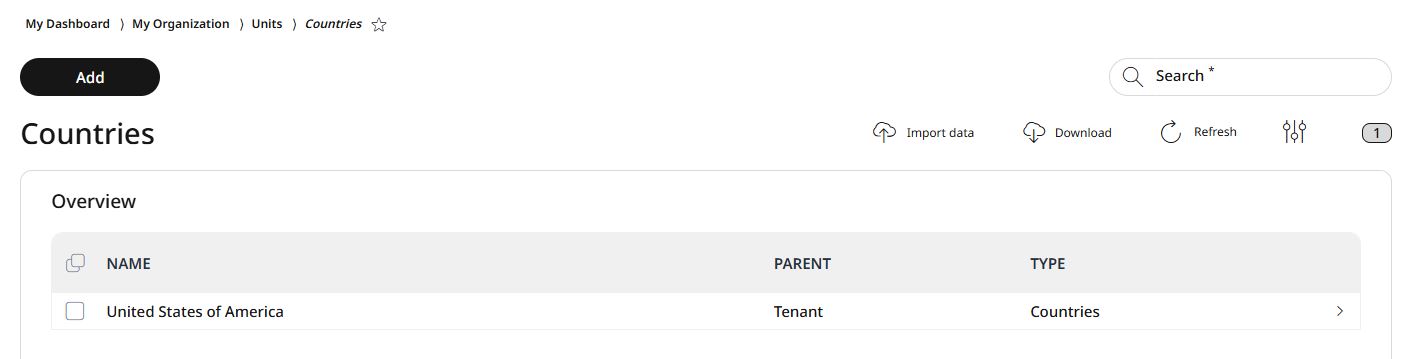
For adding a new country, go to the menu → My organization → Organization units → Countries and click Add.
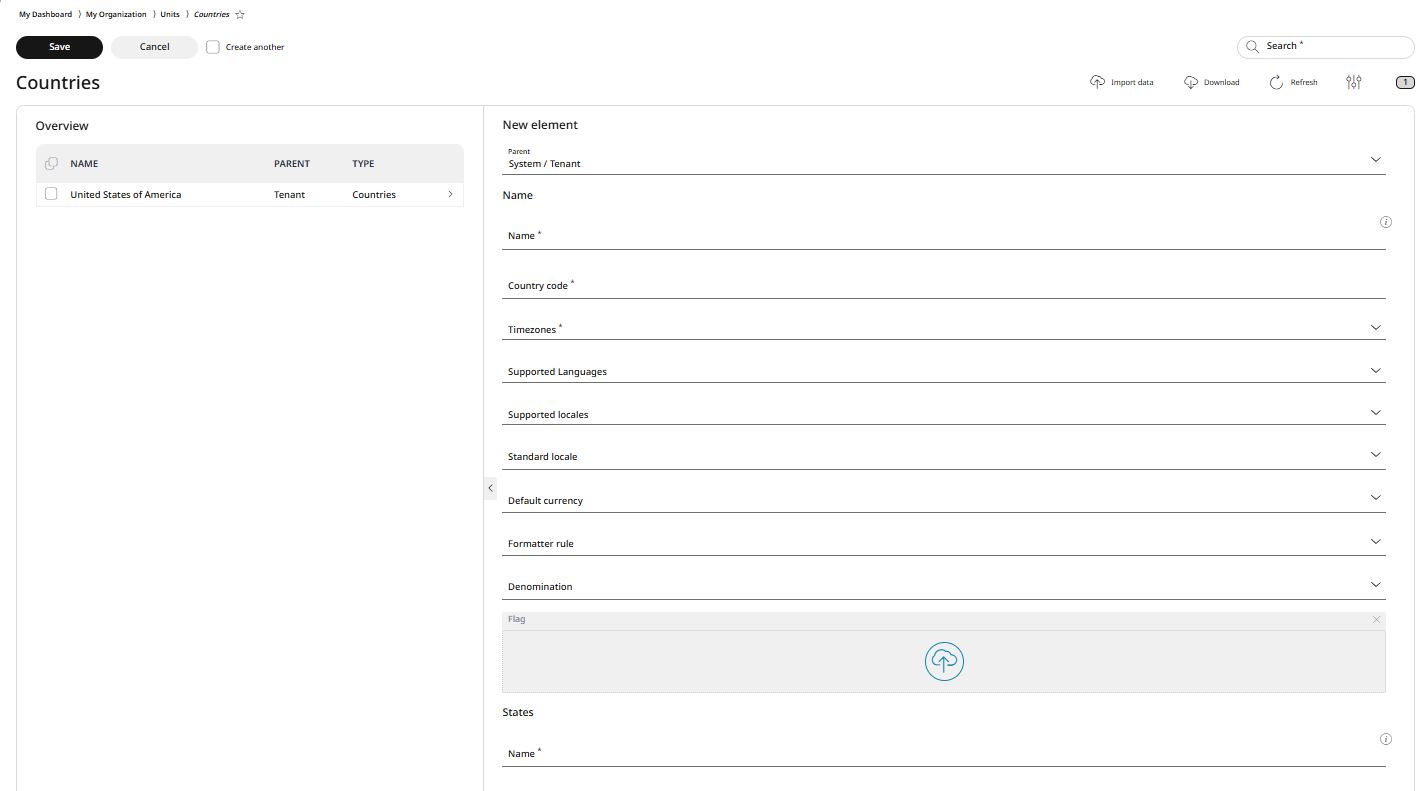
Choose the parent level under which the new country belongs.
In RETAIL7, countries can be organized systematically using a tree structure. By assigning levels, you create a hierarchical framework that simplifies navigation and management. Additionally, configurations set at a higher level automatically apply to all sublevels, ensuring consistency across the system.
Enter the name of the new country to be added.
Using the name, countries can be easily filtered through the search function. To avoid confusion, it is crucial to assign each name uniquely. Additionally, the name should be distinctive and easily recognizable.
Define the country code to assign a unique identifier to a specific country within the system. This code is typically a standardized abbreviation (e.g., "US" for the United States or "DE" for Germany) or a custom code based on your organization's requirements.
Configure time zones, supported languages and supported locales.
You can specify multiple entries for each of these settings from their rolldown menus. This feature is especially useful for stores located in countries where multiple languages are spoken or different time zones apply.
Set the standard locale from the rolldown menu.
The default locale may represent the company's headquarters or primary location. This locale is automatically selected as the default setting.
Choose the default currency along with its formatting rules and associated denominations (coins and bills).
The term "denomination" refers to the specific units of currency used. This feature also allows you to exclude certain denominations from the payment process. For example, if 1 cent is not to be used, you can specify all denominations except for 1 cent.
You can assign a flag to represent the country or locale by uploading an image.
If a country has multiple states and your business operates only in certain ones, you can now specify each states where your stores are located.
To add additional federal states, click Add, and enter the name manually. For example, if you have stores located in New York and California, you can specify these two states. States without any stores cannot be added.
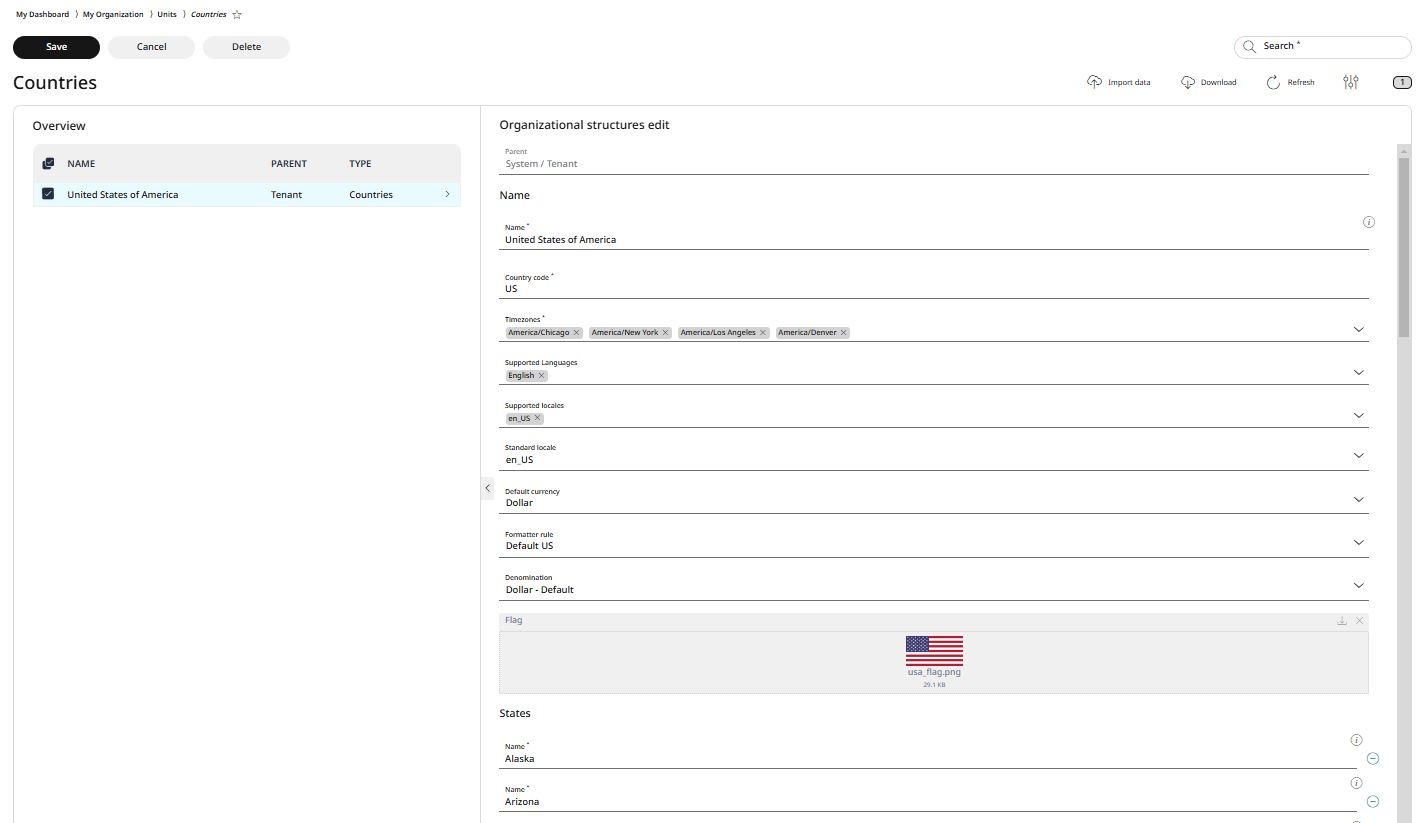
Editing and deleting countries
Countries that have been saved can be edited or deleted at any time. This ensures that the system stays up to date, with obsolete countries being removed as needed. Remember to save any changes made, or the new information will be lost.
Note: when editing a country, the only field that cannot be modified is the parent level. If you need to move a country under a different tenant or system, you will need to delete the country and re-create it, selecting the new parent level during the creation process. This ensures that the country is correctly associated with the appropriate parent in the system.
To edit a country:
Select the desired country from the list.
Make the necessary changes.
Click Save to apply the changes, or Cancel to discard them.
To delete a country:
Select the country you wish to delete from the list.
Click Delete.
Confirm the action by clicking Yes in the dialog box, or No, if you wish to cancel the action.