8.2.14 Tables
After creating a floor and adding tables, you can define, edit, or delete not only the number but also the shape and position of the tables. These actions can be performed in the Floor Editor (see under chapter 8.2.13 Floors) or in this separate menu in the Management Console, called Tables.
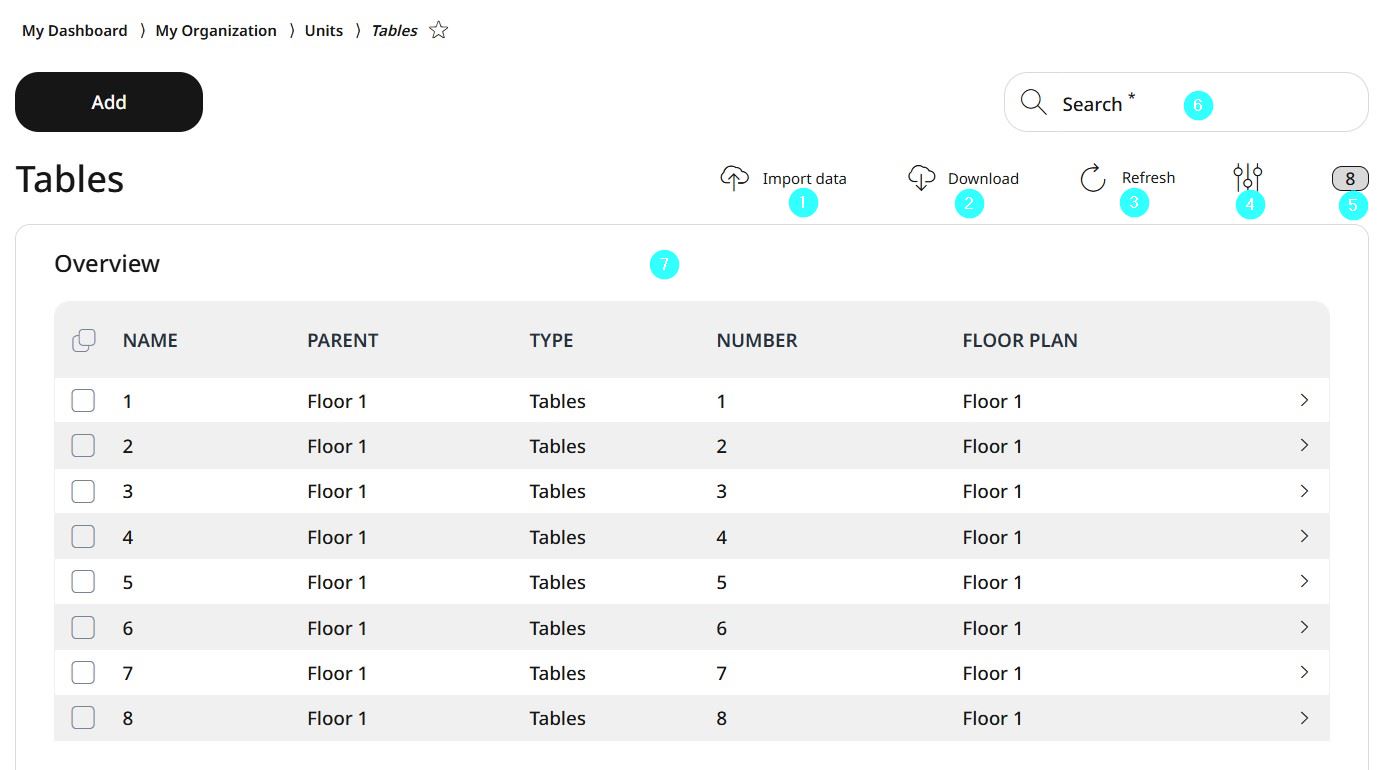
Functions on the tables overview

Import data
Download data
Refresh view
Activate/deactivate table fields
Number of list items
Search
Information about the tables
Adding tables
Adding tables to a floor is the easiest under the Floor menu (see chapter 8.2.13 Floors), with the Floor Plan editor which, being a graphical tool, helps to visualize the table parameters and placement right away. You can easily add or remove tables, and by clicking on each, you can adjust the table shape, number of seats, and even rotate or flip them to accurately reflect their real-life arrangement in the room.
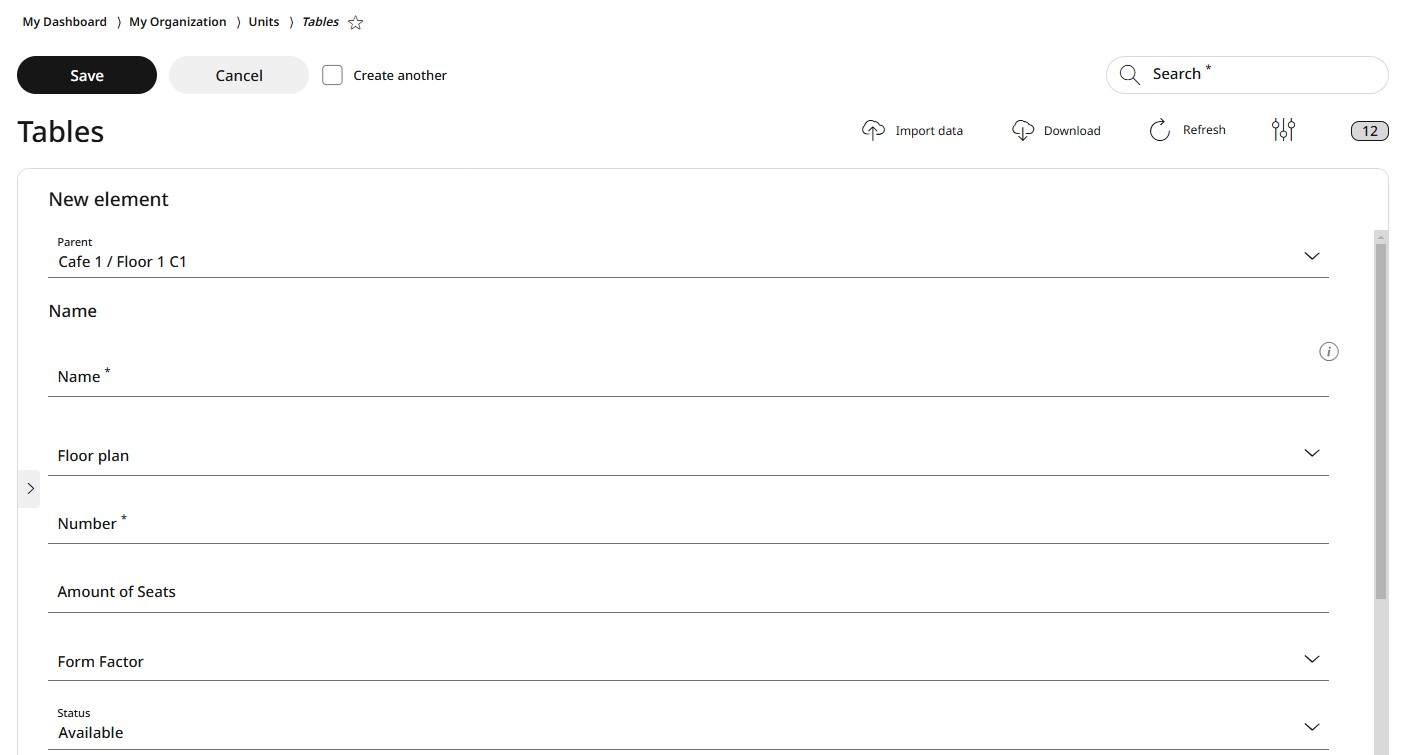
You can also add tables in Management Console by opening menu → My organization → Tables and clicking Add.

Specify the parent element for the table.
By assigning levels, tables are organized in a tree structure. This structure allows you to assign settings to a specific level, which will also apply to all associated sublevels. Once the parent level is assigned and saved, it cannot be modified. To assign the table to a different parent level, you must delete it and create a new table with the desired parent level.
Enter a name for the table.
The name allows tables to be filtered using the search function. Ensure the name is unique and clear to prevent confusion.
Choose the floor plan for the table to be assigned.
Define the table number.
This allows structured work, since each number is assigned once per floor. The number can be determined by the user, so that work can continue using the usual system.
Enter the number of seats.
This gives an overview of how many people can be seated at this table. So it is also possible to plan how many guests can still visit the store.
Select a shape for the table from the roll-down list.
Set the status of each table to indicate whether it is available or not. This feature is particularly useful for improving the predictability of the room's occupancy rate, especially when accommodating more guests.
Enter the Position X and Position Y values to define the spatial placement of the table.
Enter the width and length values to specify the exact dimensions of the table.
For precise positioning, enter the table's rotation angle or flip it horizontally or vertically by selecting the corresponding checkboxes.
Click Save to create the new table or Cancel to discard it.
Editing and deleting tables
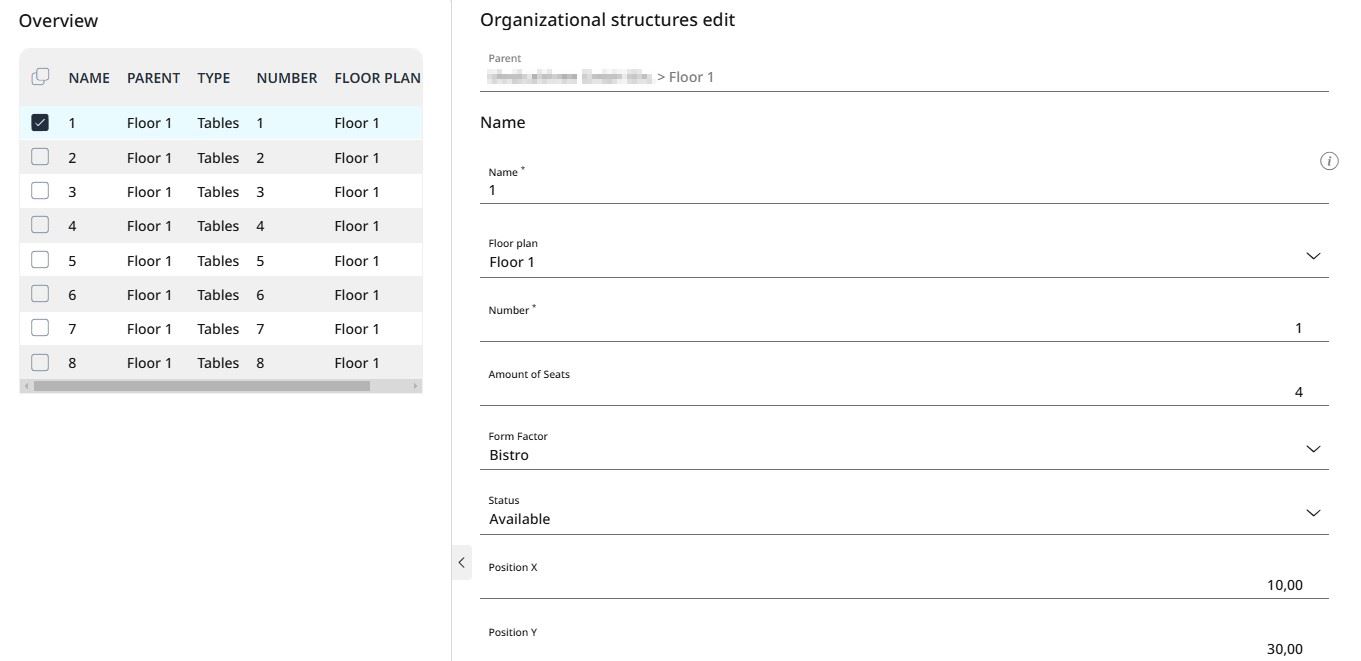
You can edit or delete saved tables at any time. Remove unused tables to keep the system up to date. Be sure to save after making any changes to ensure no information is lost.
Note: Editing or deleting tables is the easiest under the Floor menu (see chapter 8.2.13 Floors), with the Floor Plan editor which, being a graphical tool, helps to visualize the table parameters and placement right away. You can easily add or remove tables, and by clicking on each, you can adjust the table shape, number of seats, and even rotate or flip them to accurately reflect their real-life arrangement in the room.
To edit a table:
Select the desired table from the list and click Edit.
Modify the needed parameters.
Note: the parent element of a table cannot be edited at this stage. To assign a new parent element, you must delete the current table and create a new one.
Select Save to confirm the changes or Cancel to abort the process.
To delete a table:
Select the desired table from the list.
Click on Delete.
Confirm the dialog box with Yes or click No to interrupt the deletion process