10.5.3 Reservation calendar
The reservation calendar in the RETAIL7 system helps hospitality businesses manage table bookings, prevent overbooking, and optimize space. It provides a clear overview, allowing easy modifications and tracking of cancellations.
It also enables seamless event booking for all venues and their rooms, ensuring efficient scheduling. Reservations can be logged via the RETAIL7 POS app or directly in the Management Console. Below is a detailed guide on how this feature works.
When opening the reservation calendar, first select the unit whose calendar entries you want to view. To do this, choose the desired unit from the dropdown menu.
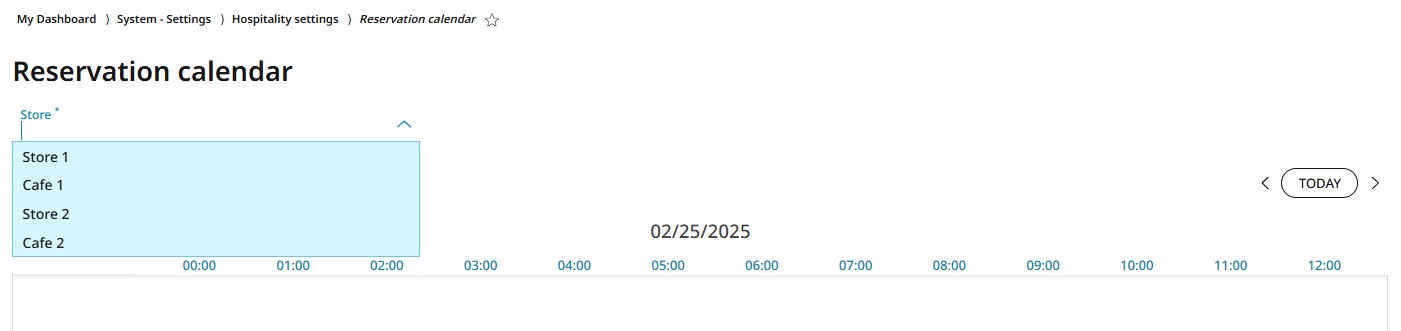
The default view shows the current day’s events as calendar entries for all rooms in the selected unit. You can switch to a different unit at any time using the dropdown menu.

bakdfak
Adding a new calendar entry
To add a new entry to the reservation calendar, navigate to System Settings → Hospitality Settings → Reservation Calendar and click the + icon below the unit selection dropdown menu, next to the Timeline button. You can also create a new enty by double-clicking on the desired time slot in the calendar overview.
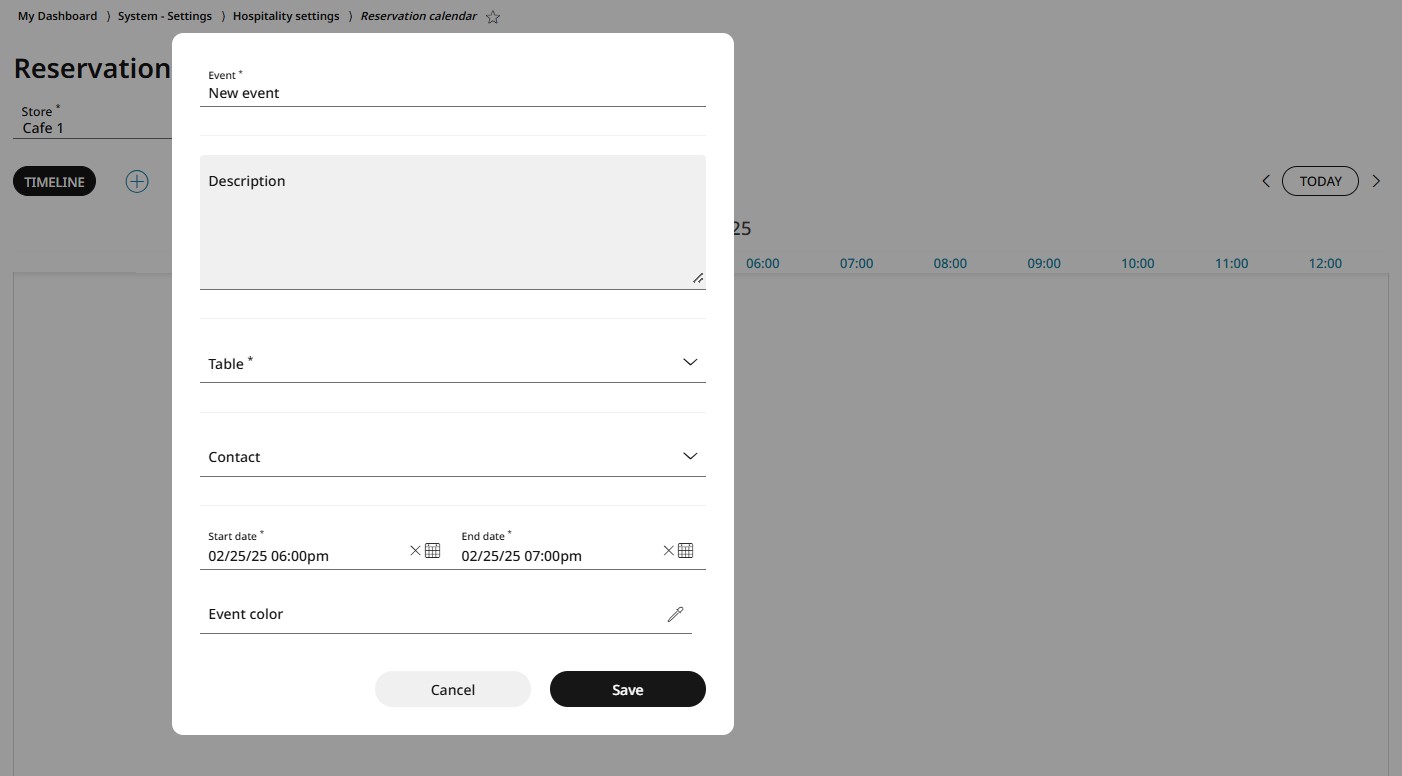
Enter a short name and a description of the event.
Assign a table - what if more than one table is needed?
You can assign a contact to the entry using the dropdown list. Note that these contacts must first be added to the contact list (refer to chapter 4.3.1 Contact list for details on adding contacts).
Set the event’s start date and time as well as its end date and time to ensure accurate scheduling.
Select a colour for the entry if needed. Assigning different colours to event types helps quickly identify them on the calendar. You can choose a colour from the palette using your mouse or enter its HEX code manually.
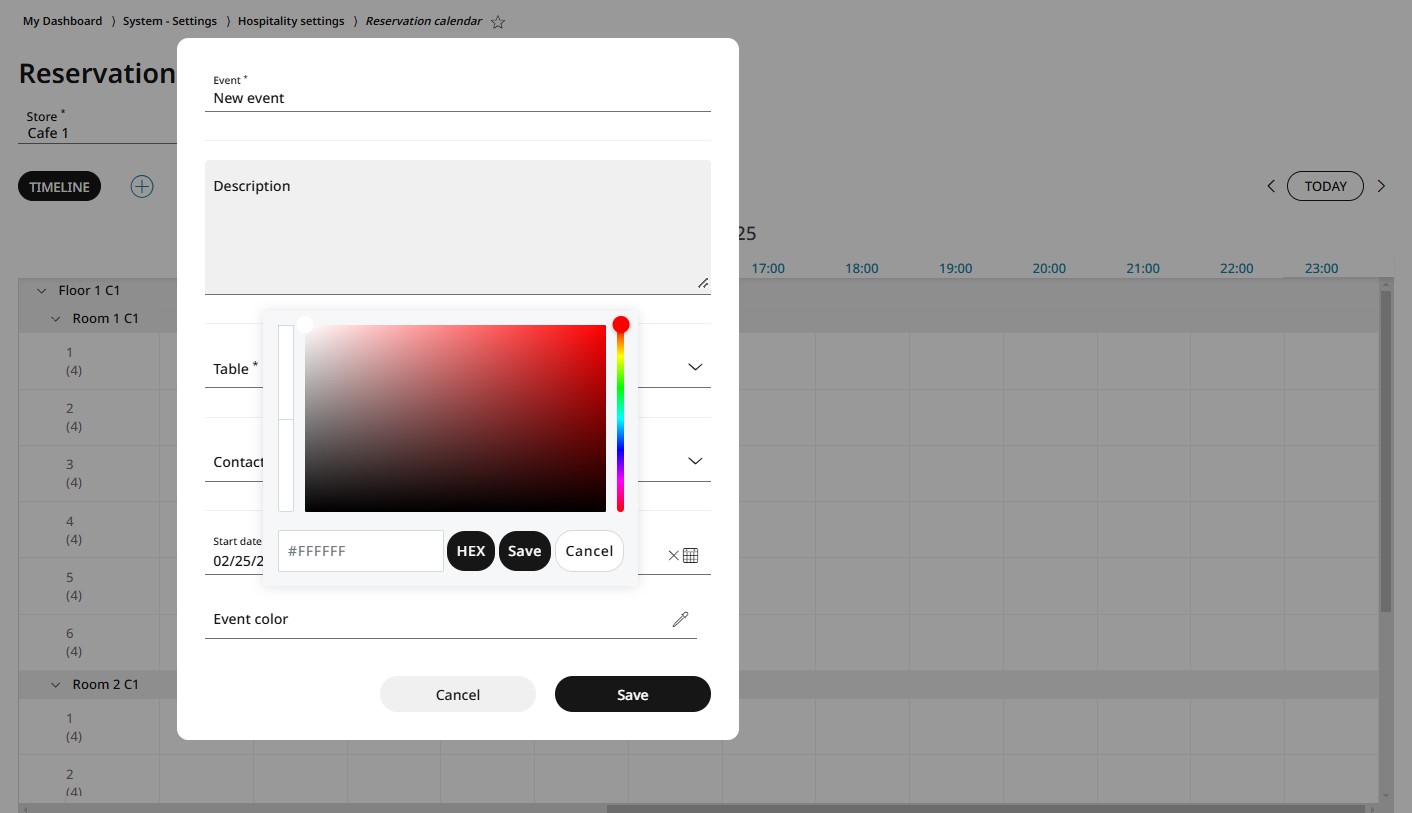
Please note: If you select a colour, you must first save it within the colour tool window before saving the entire calendar entry.
Click the Save button of the entry editing window to add it to the reservation calendar. By clicking Cancel, the entry is dismissed.
Editing and deleting a calendar entry
To modify the date or time of an existing calendar entry, simply drag and drop it. Click and hold the entry (or tap and hold on a touch device), move it to the desired date and/or time, and release to place it.
Editing a calendar entry
In case you need to modify other than the date/time, double-klick on the entry to open it.
Make all necessary changes, e.g. rename the event, change the description, assign another table or contacts, modify the date/time or the event color, etc. and click Save.
Select the desired entry from the calendar and double-klick on it. Click on the Delete button at the bottom of the editor window.
If you click the Cancel button, the event will remain in the calendar without any changes.
Deleting a calendar entry
Select the desired entry from the calendar and double-klick on it. Click on the Delete button at the bottom of the editor window.
If you click the Cancel button, the entry will remain in the calendar without any changes.