4.3.1 Contact list
This function enables you to create and manage a centralized contact list for customers and partners within the system. By assigning contacts to specific groups, you can easily filter them, and different address types, such as headquarters or billing addresses, can be added. This ensures all relevant contacts are organized and visible at a glance.
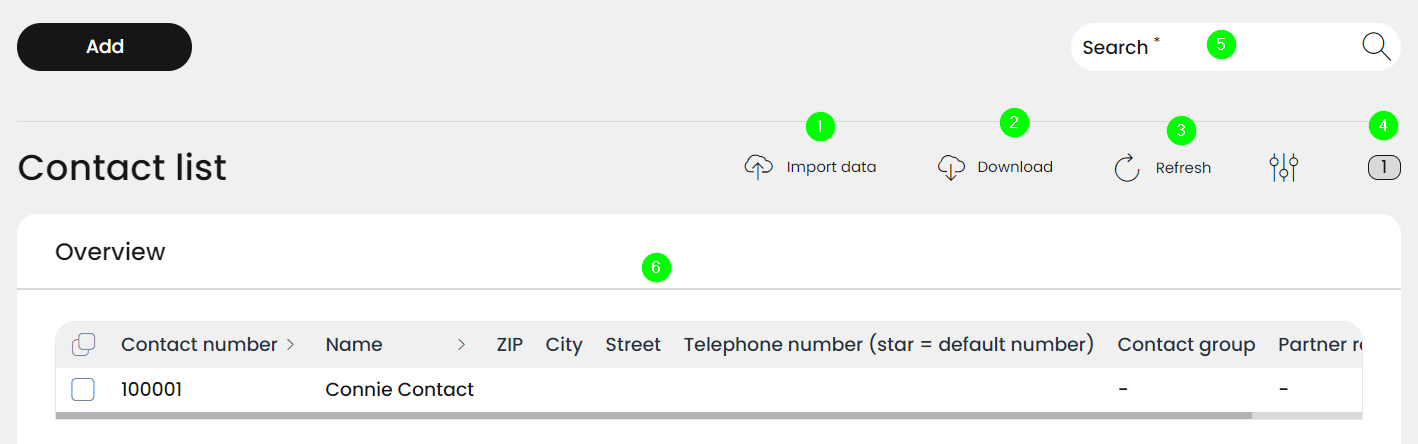
1 You can import your own contact list, thus no need to Add contacts separately
Click Import.
Drag and drop your contact list file into the object import field
Click on Import
2 You also can download all your contacts from the RETAIL7 system
Click on Download
Choose the preferred file type (json or csv)
Click on Export
3 Actualize the view of your contact list
4 Number of your contacts
5 Search your contacts
6 Information about contact list
Managing contacts
In RETAIL7, any type of contacts can be registered into the contact list, e.g. customers, business partners, retailers, etc., and they can be used for various purposes. The contacts can be managed and filtered further by adding them to different contact groups (see chapter 4.3.2 Contact groups about this).
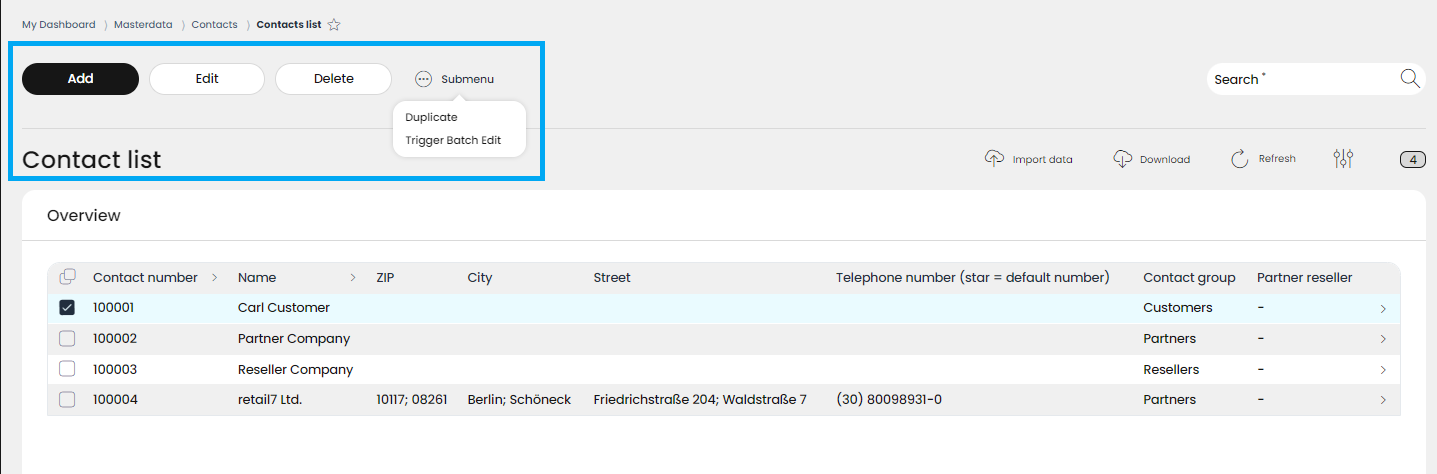
You can add new contacts with the Add button.
If an existing contact must be edited or deleted from the database, first you have to choose it by clicking in the box in front of the name of the item. Now the buttons Edit and Delete will appear.
Of course, besides editing or deleting, other managing options are also needed. For this, a submenu is displayed here, and by clicking on it, the Duplicate function is available.
In case you would like to execute changes on more than one contact, you can use the Trigger Batch Edit function.
Adding new contacts
With this function, additional contacts can be created and stored in the RETAIL7 system. In addition, it offers an ideal overview of all contacts and with the help of the search function, a specific contact can be filtered out, e.g. based on name or city or other details.
If a new element needs to be added to your contacts database, you can create it by clicking on the Add button. Also, if more than one new elements are to be created, there is an option for that by using the Create another checkbox.
Open the Menu → Masterdata → Contacts → Contact list.
Click on Add.
Now the New Contact mask is displayed with 5 tabs:
Masterdata
Contact relations
Notes
Purchased items history
Purchased items summary
On the first tab, called Masterdata the Defaults menu is expanded.
In the Contact number field a contact ID number is already displayed.
NOTE: The contact number ID is automatically generated by the system and cannot be changed. With this number, the contact is uniquely stored in the system, because no other contact receives the same number. In addition, the number can be used to filter out the contact from the overview, using the search function.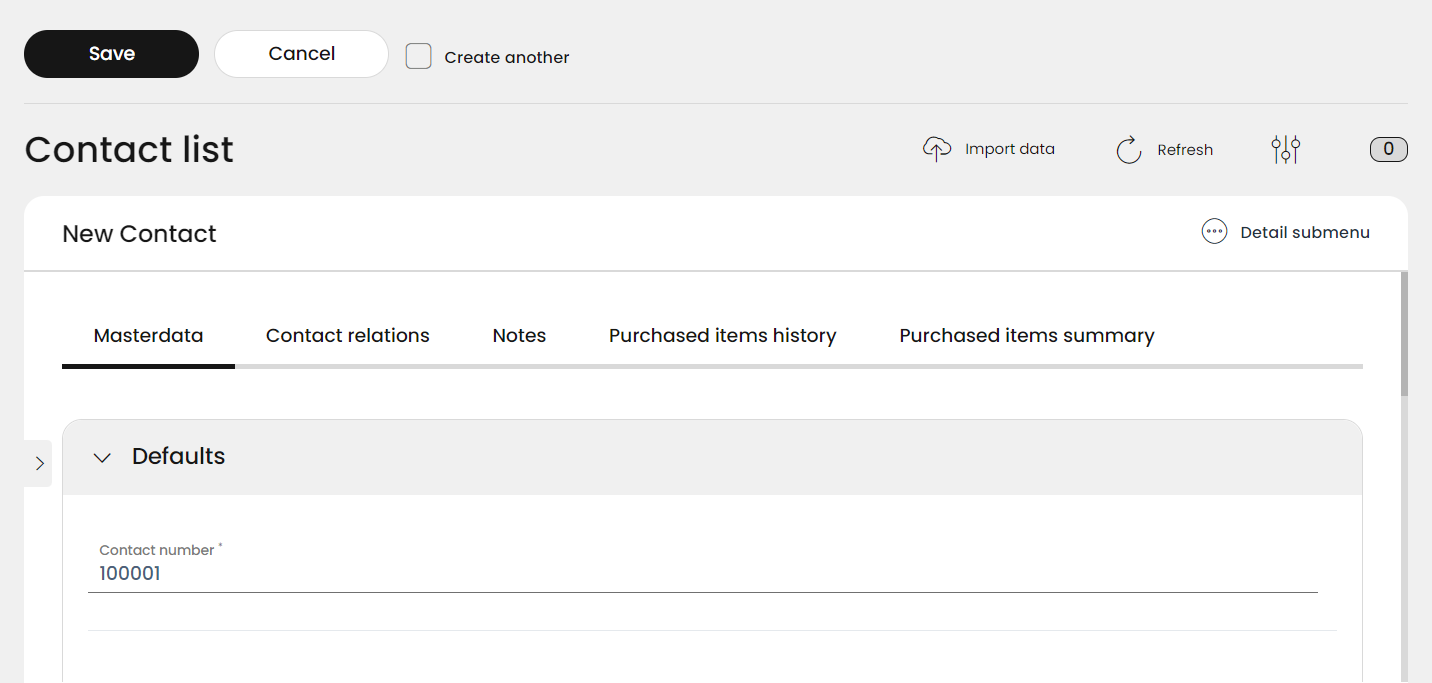
For the next field, enter the preferred Name for the contact.
NOTE: The name can also be used to filter out the contact via the search function, thus it´s advisable to assign a name only once to each contact, to avoid confusion.
Select the required type of address from the menu under Known addresses.
Open the Default address section and choose which Type of address is the one you registering
Default
Invoice
Delivery
Other
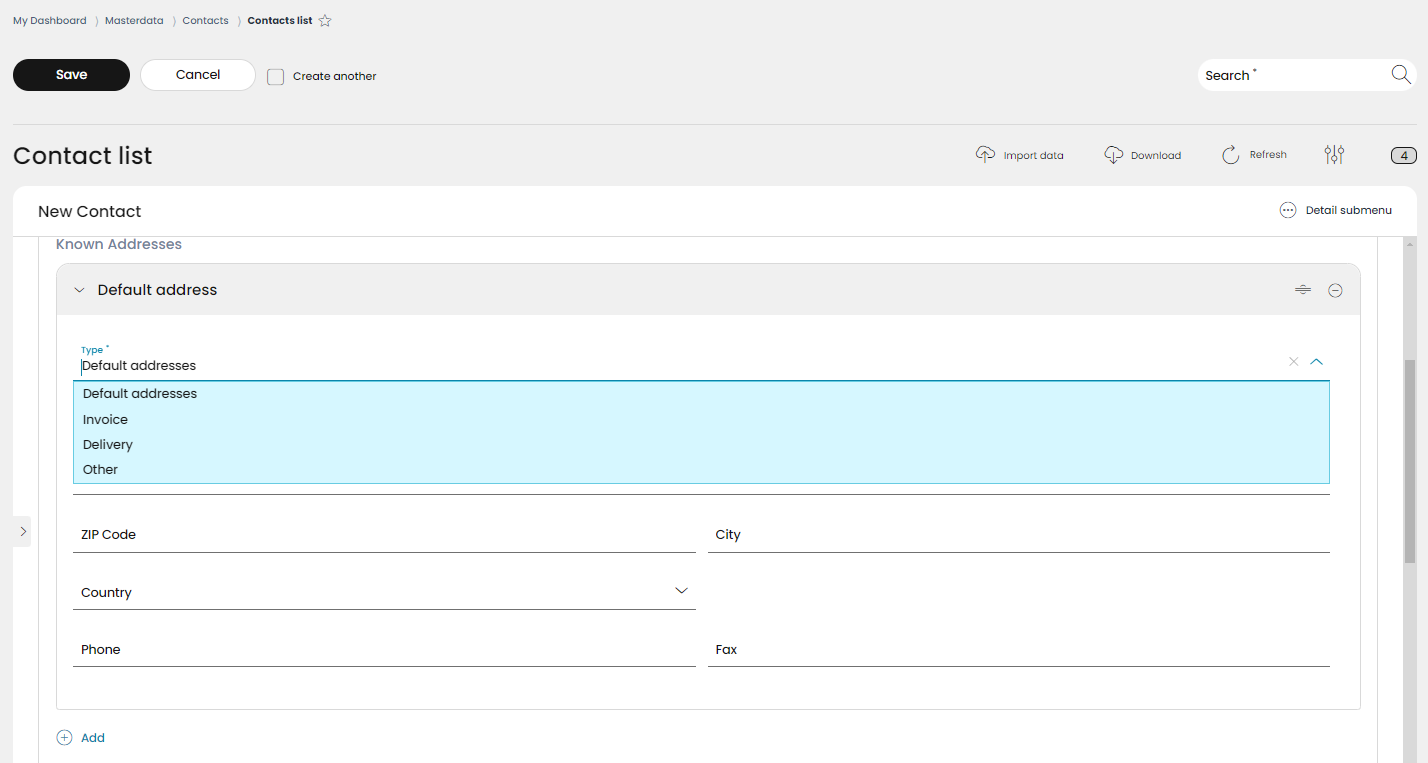
Now register the details of the address according to the fields:
Address (street name and number)
Address addon line (if needed)
ZIP Code
City
Country (chosen from the rolldown menu)
Phone number
Fax number
In case you would like to register another addresses (e.g. a different one for invoices, another for delivery, etc.) you can do it with the Add link here.
Moving forward, the next is the Email addresses section, where you can register one or more e-mail address.
Select the email type from the scroll-down menu.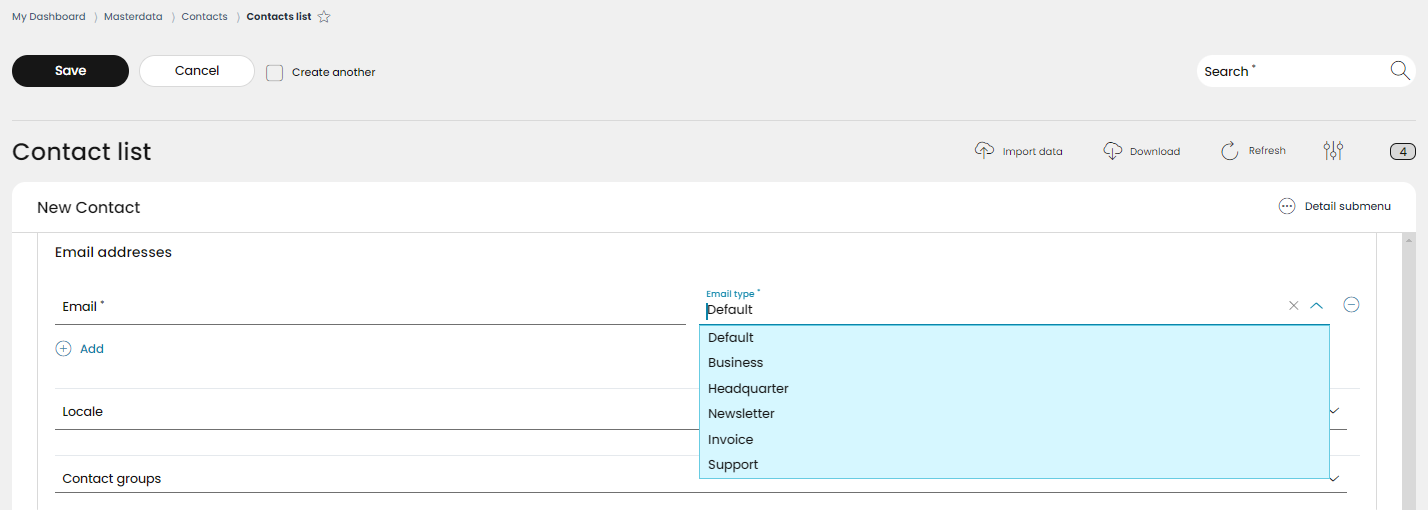
NOTE: It is possible to create several type of e-mail addresses as "default", business", "headquarter", "newsletter", "invoice" and "support". These types can also be used more than once.
In case you would like to register another type of email addresses (e.g. a different one for newsletter, etc.) you can do it with the Add link here.
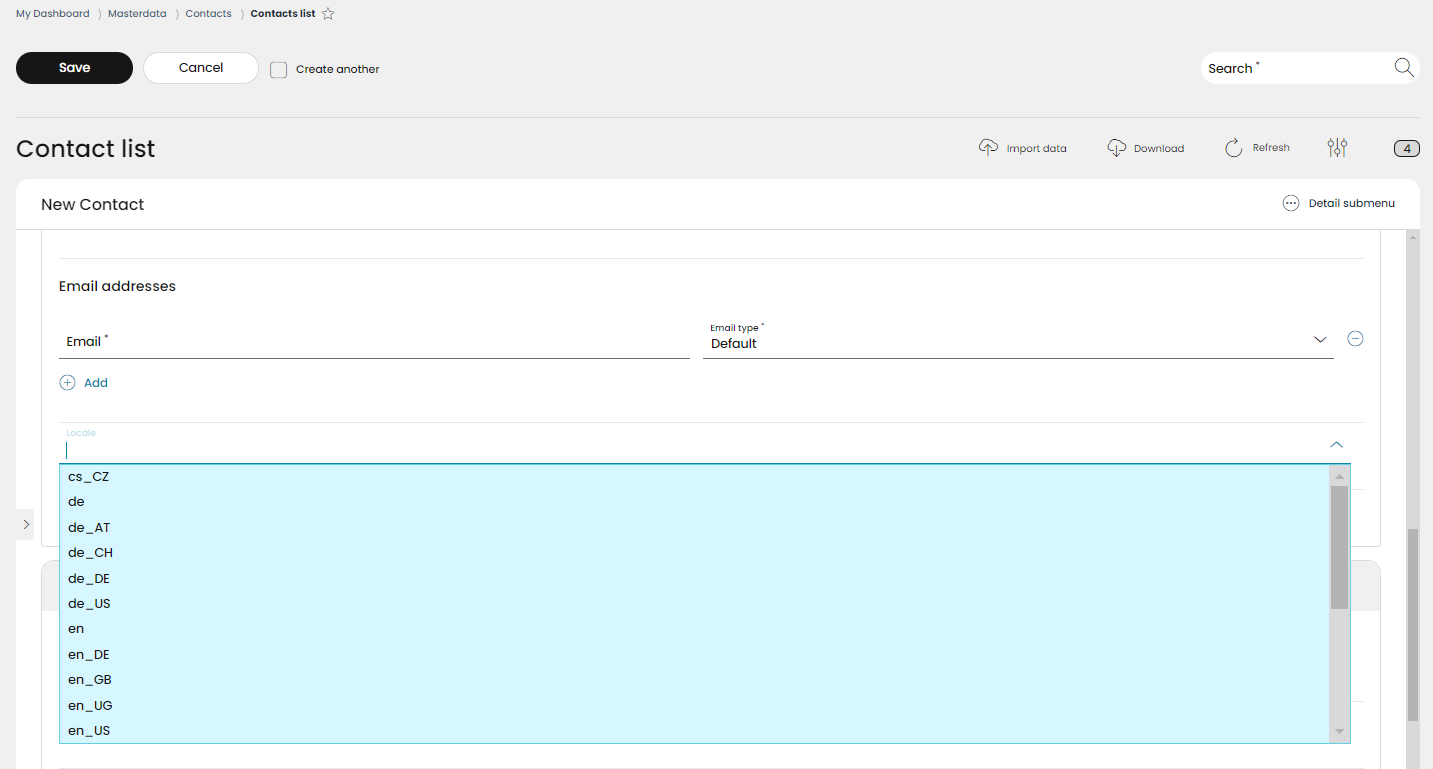
In the next step you can choose the Locale language to be used with this contact. The locale codes are the combination of the language (e.g. de for German, en for English, etc.) and the country (AT for Austria, DE for Germany, US for United States, etc.) abbreviations. You can choose from the scroll down menu the optimal language and country combination.
The Contact groups are an important filtering option to distinguish between your contacts. They can be filtered to customers, business partners, retailers or any other categories which fits best to your business. But to be able to use them, they must be created first under the Contact groups menu (see chapter 4.3.2 Contact groups). After you created your own contact groups, you can add them to your contacts here.
Now open the Advanced section.
Enter the VAT ID and the tax number.
These two financial identification numbers are provided by the client.
Enter the External Contact ID if you use any database out of RETAIL7 system.
Check the box for Dunning block if no reminders are to be sent to the contact.
Next step is entering the URL for the contact, if they have one.
In case the contact is used only for a specific purpose, for a certain period of time (e.g. a marketing campaign), you can set up a DD/MM/YY date when the contact is deleted from the database.
For further help in filtering, the Additional Key / Value pairs can be used. For example, if you need to exclude minors from a search, here you can set up age as a Key and register the numbers in the Value field.
Now that the Masterdata tab is finished, you can Save your new contact. Or, in case the contact is a legal entity, you can move to the Contact relations tab, where you can register the relevant contact persons of the legal entity.
For this, click on Add in the Contact relations section.
Open the New submenu under Sub Contacts.
Enter the First name and Last name of the contact person.
Enter additional URL if needed.
You can add Default address here also, as on the Masterdata tab, consisting the email (with the known different type options) and the Locale to be used with this particular person.
Further down, the position of the person can be specified.
In case you have more contact person at the company, you can register all of them here by clicking on Add.
Moving to the next tab, called Notes you can add any specific information (additional information, notes and warnings) manually.
On the next two tabs, Purchased items history and Purchased items summary the data are generated automatically by the RETAIL7 system, as soon as this contact is assigned to transactions.
You can finish the registration of the new contact by clicking on Save.
If you used the Create another option, the Add new contact mask remains open so you can create and save the next needed new elements. The loop ends only when you remove the tick from the Create another checkbox before the last Save.
Editing contacts
After a successful saving, a contact can be edited at any time. Once all changes have been made, the contact must be saved again, otherwise the information will be lost.

Select the desired contact from the list.
Click on Edit.
Make all the necessary changes.
Click Save.
Delete contacts
After a contact has been successfully created or saved, it can be deleted at any time. Thus, the system always remains up to date, as elements that are no longer needed are removed.
Select the desired contact from the list.
Click on Delete.
Confirm with the Yes dialog box.
By clicking on No, the deletion process is canceled.
Copy contacts
To add another contact that is very similar to another, the copy function can be used. This means that it is not necessary to create the entire contact again, but only to duplicate another one with all the associated settings. Then the desired changes can be made and saved again. It should be noted that the names of the contacts are not repeated, to avoid confusion.

Select the desired contact from the list.
Click More.
Select Duplicate.
Wait for the saving process. The duplicate will be added at the end of the list.
Open the new addition for editing, make the necessary changes and save it.
Trigger batch edit
With this function, you can edit some properties of several contacts at once, aka in one batch.
First you have to check the elements of the list you would like to batch edit, then go to the Submenu button and choose the Trigger Batch Edit menu.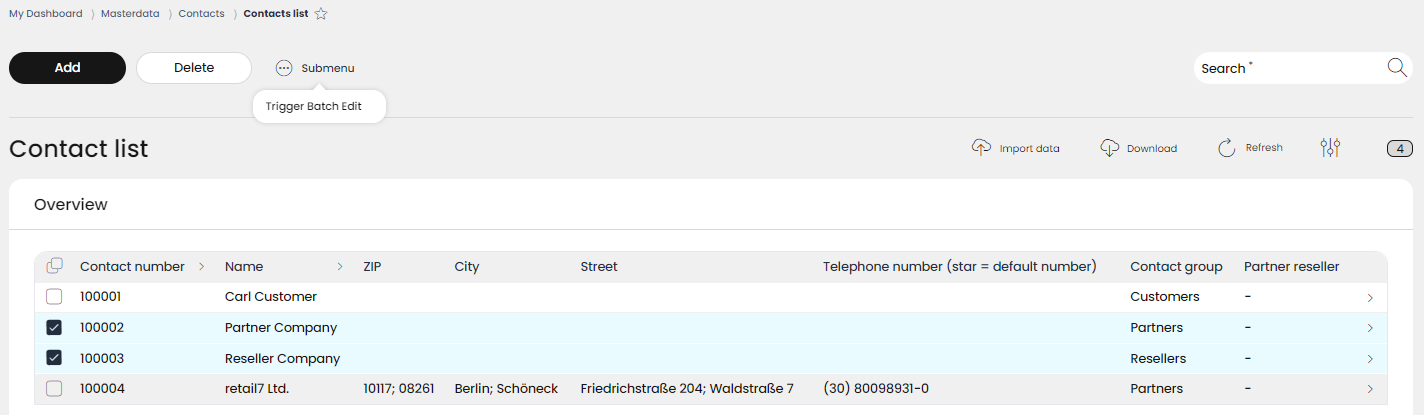
By clicking on this menu, the first panel of the batch editing function, the Entity Selection is displayed. Here you can see the full item list with the originally selected items, but you can still add or (by unclicking it) remove other items here. Also, if you click on the checkbox under the title, you can select all items on the list for editing.
Once you have made the needed adjustments, you can move to the next step of the batch editing by clicking Next.
Please note: at every panel, there is a Back and a Cancel button in the lower left corner. With them, you can return to the previous panels at any time (e.g. to change some adjustment), or just cancel the whole operation.
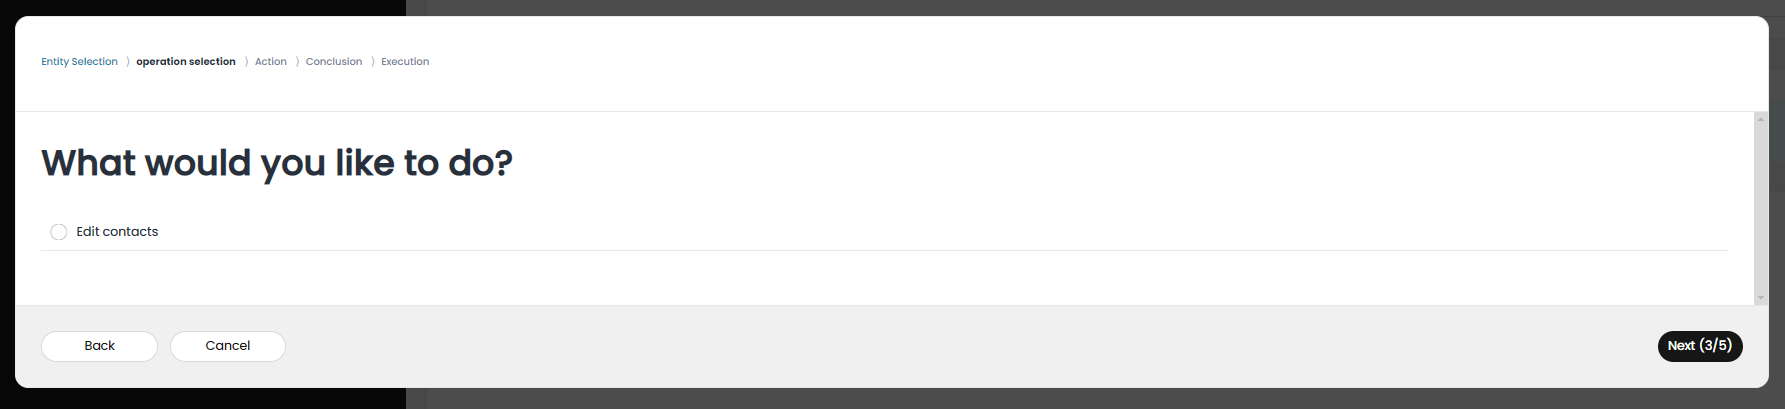
The next step is, to decide, what operation to be executed on the selected items. Under Contact list trigger batch editing, on the Operation selection panel you have only one option: Edit contacts.
You cannot move forward from this panel unless you choose the editing by clicking on the radio button.
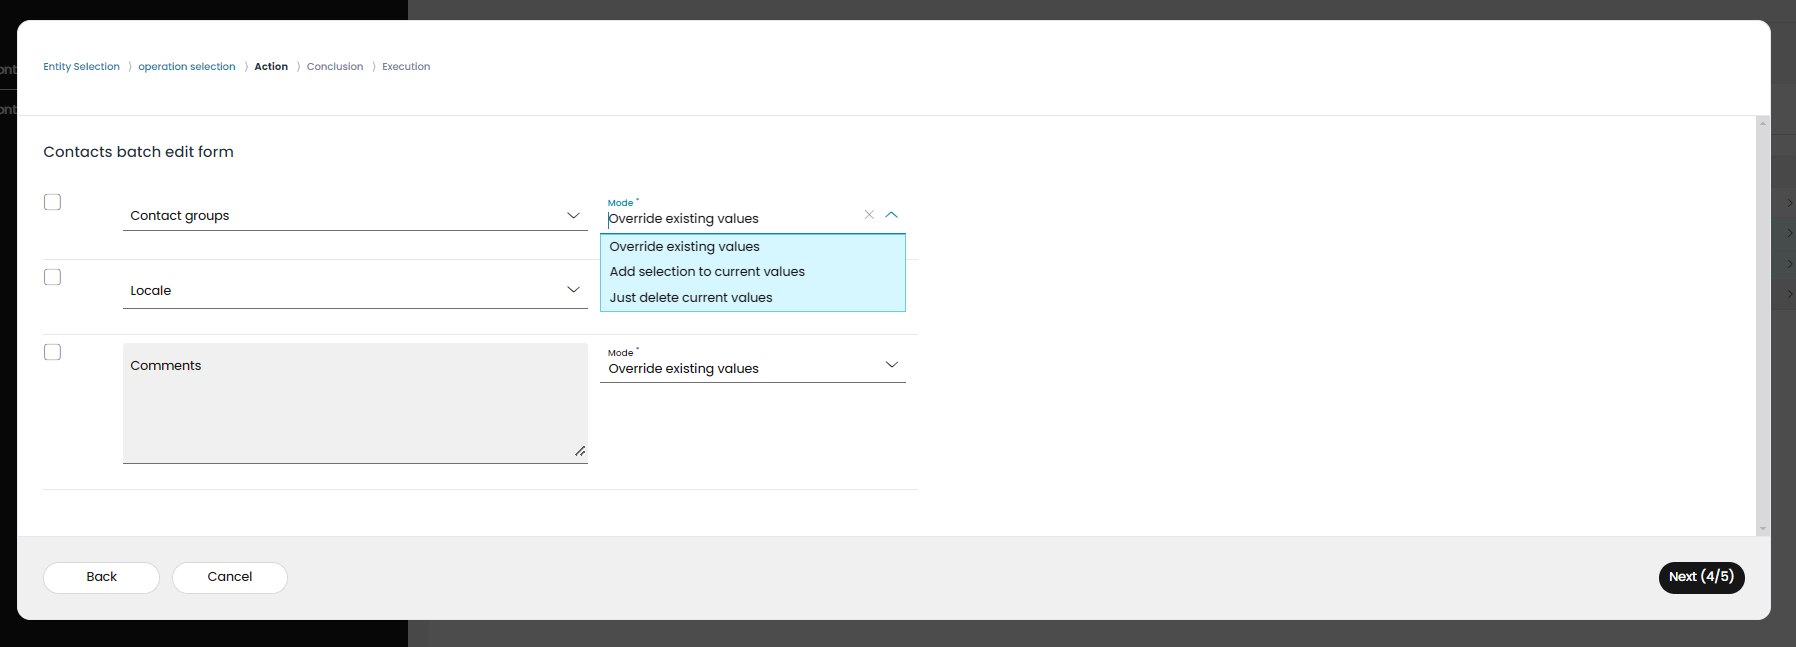
By clicking on Next, the Action panel is displayed, where the possible editing options are listed. These are:
changing the contact groups of all the selected elements
changing locales of all the selected elements
changing the comments of all the selected elements.
You can choose more than one of the actions.
In the next step, on the Action panel you can decide if the implemented changes should override the current values, be added to them, while keeping the originals, or just simply delete the current ones, without adding anything new.
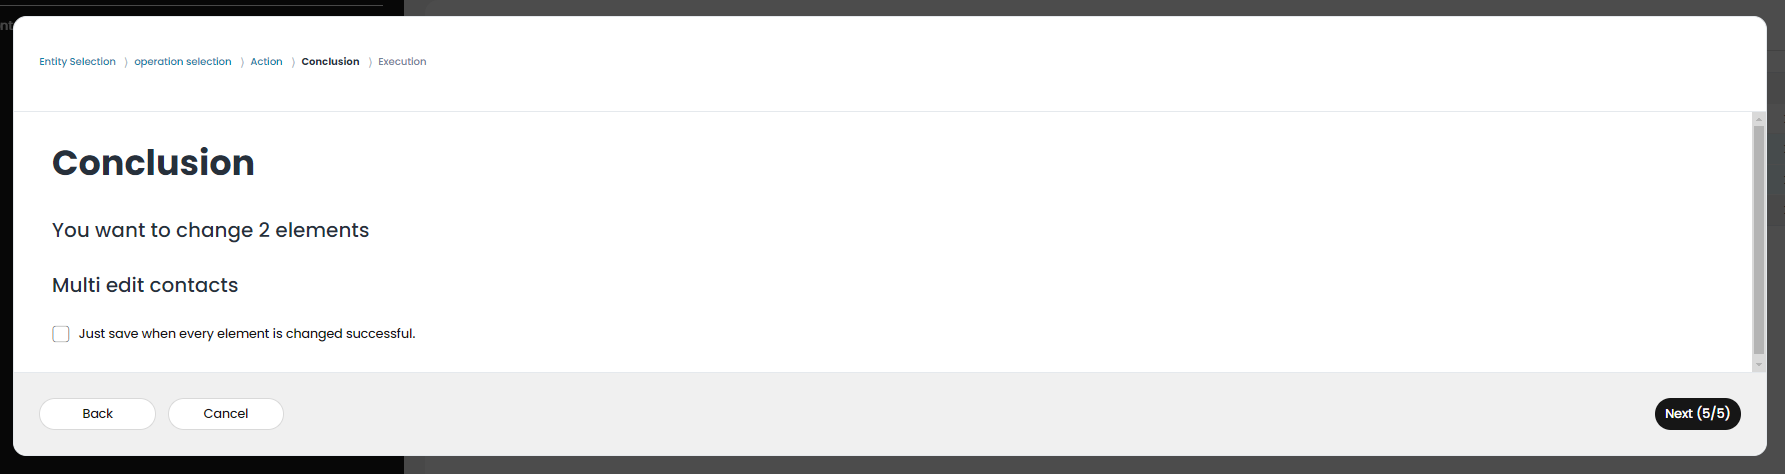
Next, on the Conclusion panel you can see the summary of your previous settings. By clicking on Next, you trigger the batch editing.
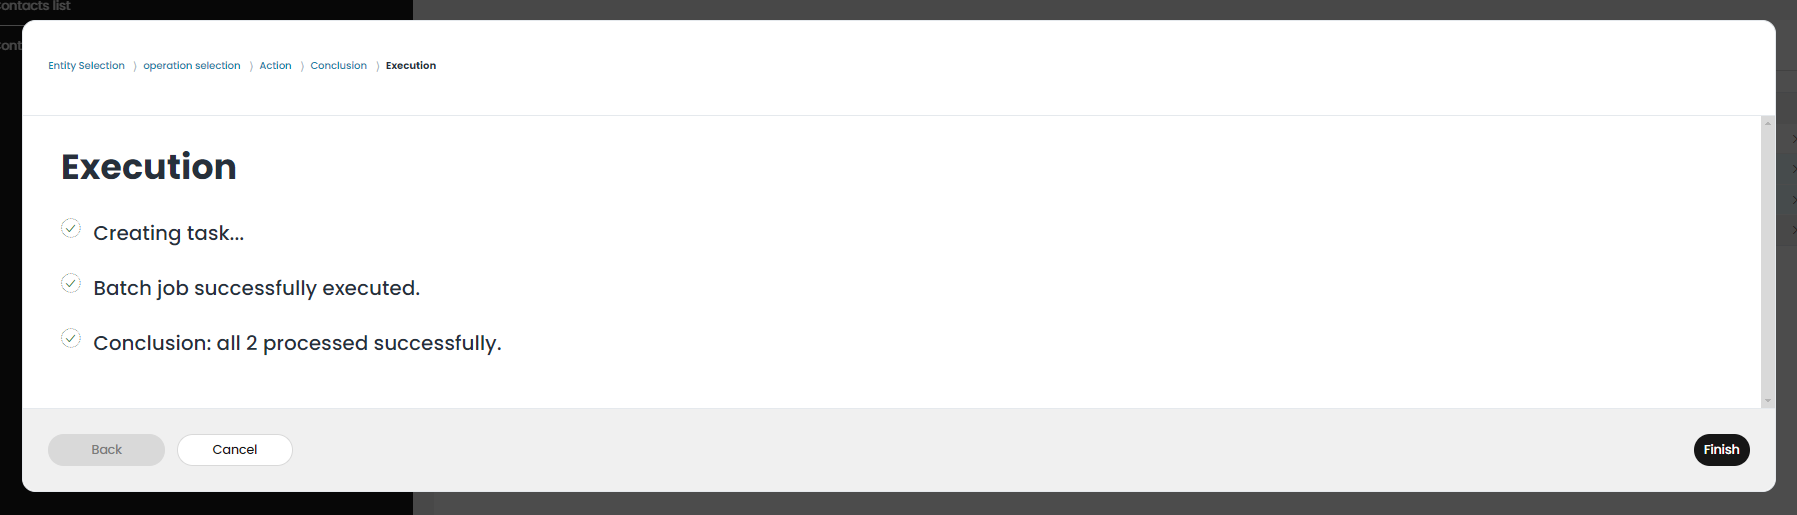
On the final panel, called Execution, you can see the confirmation when the job is successfully executed. Now you can close the panel by clicking on the Finish button.
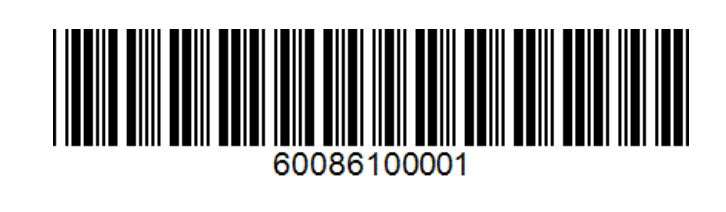
Customer card barcode structure
To be able to register a customer in a transaction as a contact, the customer must be assigned to the transaction at the checkout. This can happen manually, via the search function at the checkout, or by scanning their customer cards.
In RETAIL7 system, customer cards have a different prefix from the other barcodes. Here the prefix 60086 is used for customer number barcodes as a standard. This prefix is combined with the customer number - which in the standard is created in the format 100001 -, and these together mean that the minimum length for such a barcode is 11 characters. The form of the scan code for this can be a barcode or a QR code.
As an example, here is a Code 39 barcode and a QR code.

Should you need any adjustment to this, it is also possible, but it requires at least a "BusinessPlus" business plan (or higher).