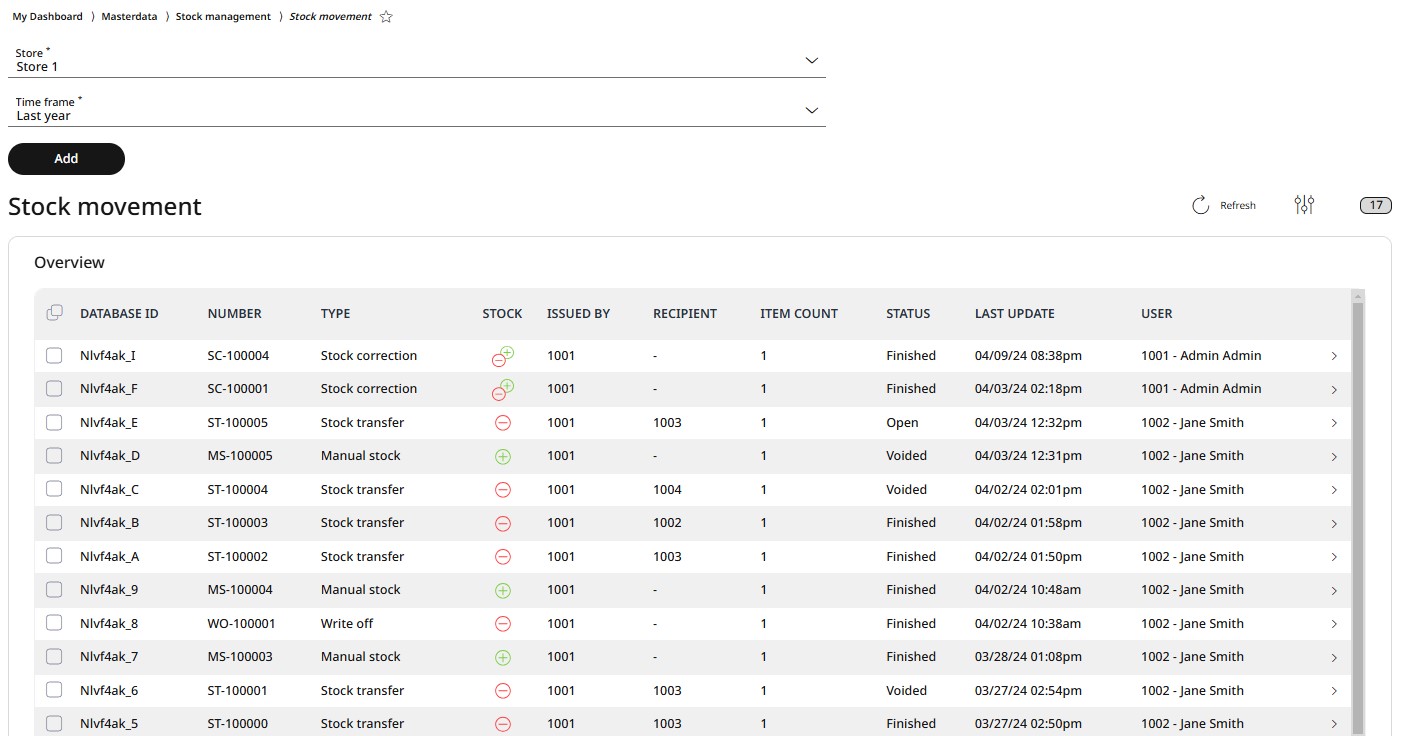
4.5.2 Stock movement
With RETAIL7 POS system, stock movements can be easily tracked and stored digitally. This means that it is possible at any time to move stock between stores and track which movement was carried out when and with which items. It is possible to execute the movement for each store individually.
Managing stock movements
Stock movements can be different types, depending on the reason the items have to be moved to or from stock, or between stores.
If a new delivery has arrived, they can be added it as manual stock.
If items can no longer be sold or used, because they have become damaged, obsolete lost or stolen or expired and no longer usable, they must be written off.
And if one store has run out of an item and needs replenishment from the stock of another store, items can be transferred between them.
Also, there are managing options after a stock movement is saved. For this, choose the stock movement by clicking on the box at the beginning of the row. Now the Edit and the Submenu buttons appear beside the Add button. By clicking on the Submenu button, the option Void becomes available. In some cases, where a stock movement must be closed, the option Finish is also displayed here.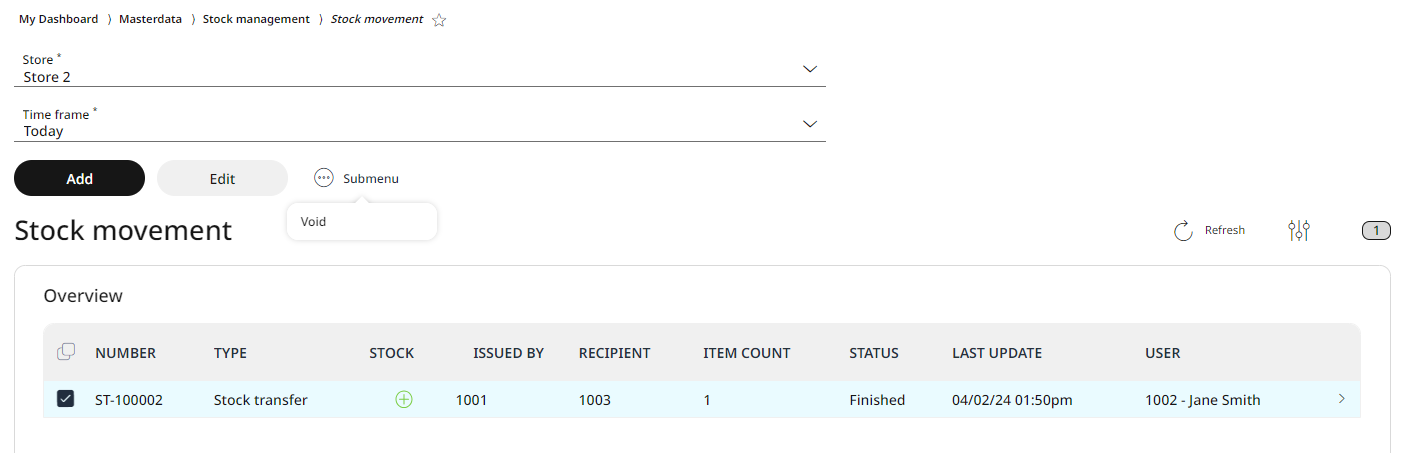
Adding manual stock
Open the Menu → Master data → Stock management → Stock movement.
Select the store to whose stock the item(s) are to be added.
Define the time frame for the stock movement.
Click Add.
Select the type of stock movement from the scroll-down menu, like Manual Stock.
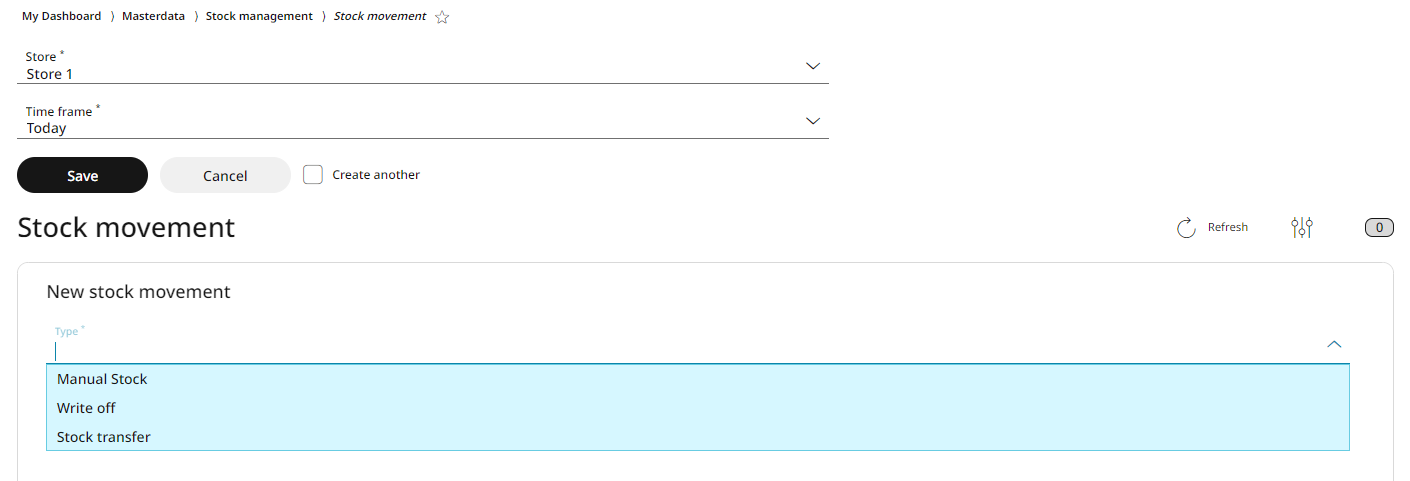
The stock movement types can be:
manual stock: receiving items/adding items to the stock
write off: removing items from stock
stock transfer: moving items from one store to another.
Specify a reason for the movement of items via the scroll down menu.

Please note: the reasons offered here are always different, depending on the chosen type of stock movement.
Select the item ID or name of the item to be added to this type of stock movement from the scroll-down menu.
The information about UOM (Unit Of Measure) is filled in automatically, since these were configured in the Menu → Master data → Items → Item list.
Enter the Quantity of the item.

Select Add to select additional item numbers for this stock movement. Please note, that you can add items only for this exact type of stock movement (e.g. manual stock).
Save the stock movement.
Now this stock movement appears on the store´s stock list, with the type marked as Manual stock, with a green positive sign, with the status as finished, and with the exact date and time and username of the person who registered it.

Writing off stock
Open the Menu → Master data → Stock management → Stock movement.
Select the store from whose stock the item(s) are to be written off.
Define the time frame for the stock movement.
Click Add.
Select the type of stock movement from the scroll-down menu, in this case Write off.
At the next step, select the reason for the write-off.
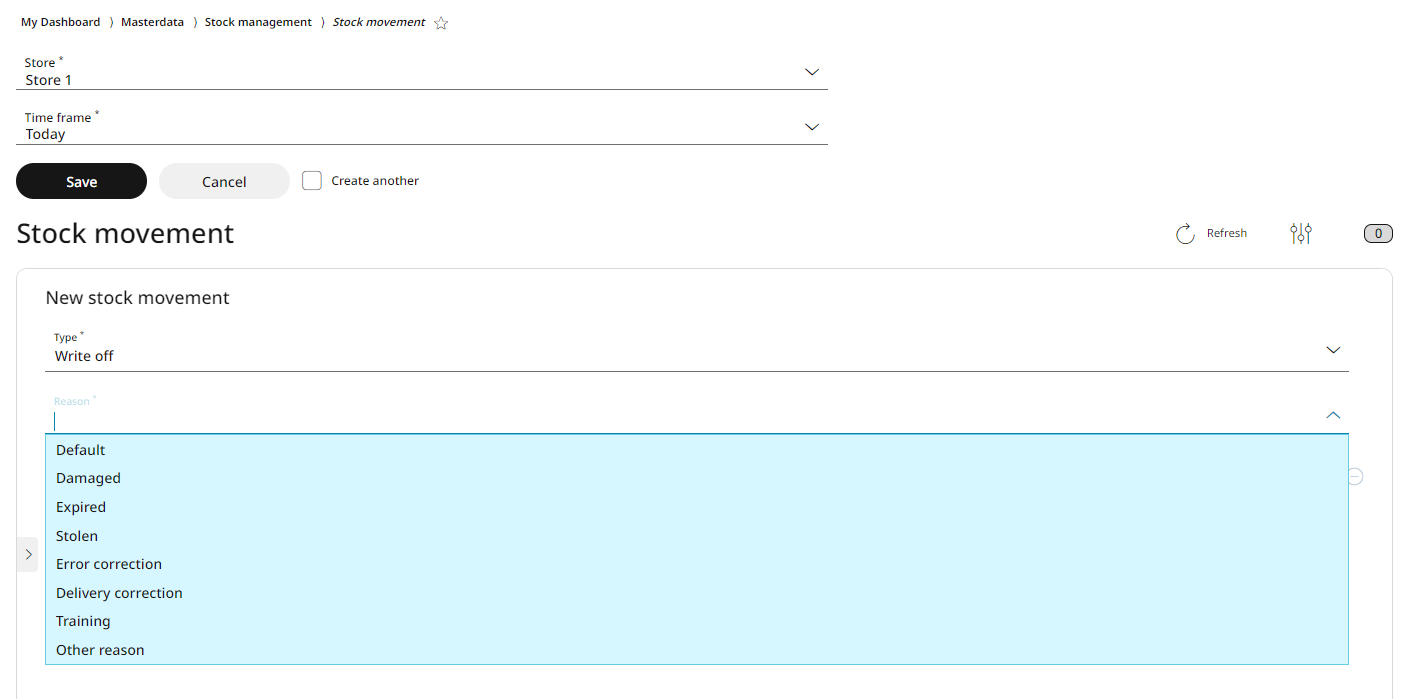
Please note: the reasons offered here are always different, depending on the chosen type of stock movement.
Select the item ID or name of the item to be written off in this type of stock movement from the scroll-down menu.
The information about UOM (Unit Of Measure) is filled in automatically, since these were configured in the Menu → Master data → Items → Item list.
Enter the Quantity of the item.

Select Add to assign additional item numbers for this stock movement. Please note, that you can add items only for this type of stock movement (e.g. in this case, to write off stock).
Save the stock movement.
Now this stock movement appears in the store´s stock list, its type marked as Write off, with a red negative sign, with the status as finished, and with the exact date and time and username of the person who registered it.
Transferring stock
Moving stock from one store to another can be registered and executed in the RETAIL7 system via the stock transfer function.
Open the Menu → Master data → Stock management → Stock movement.
Select the store where the stock of the item(s) are to be moved from.
Define the time frame for the stock movement.
Click Add.
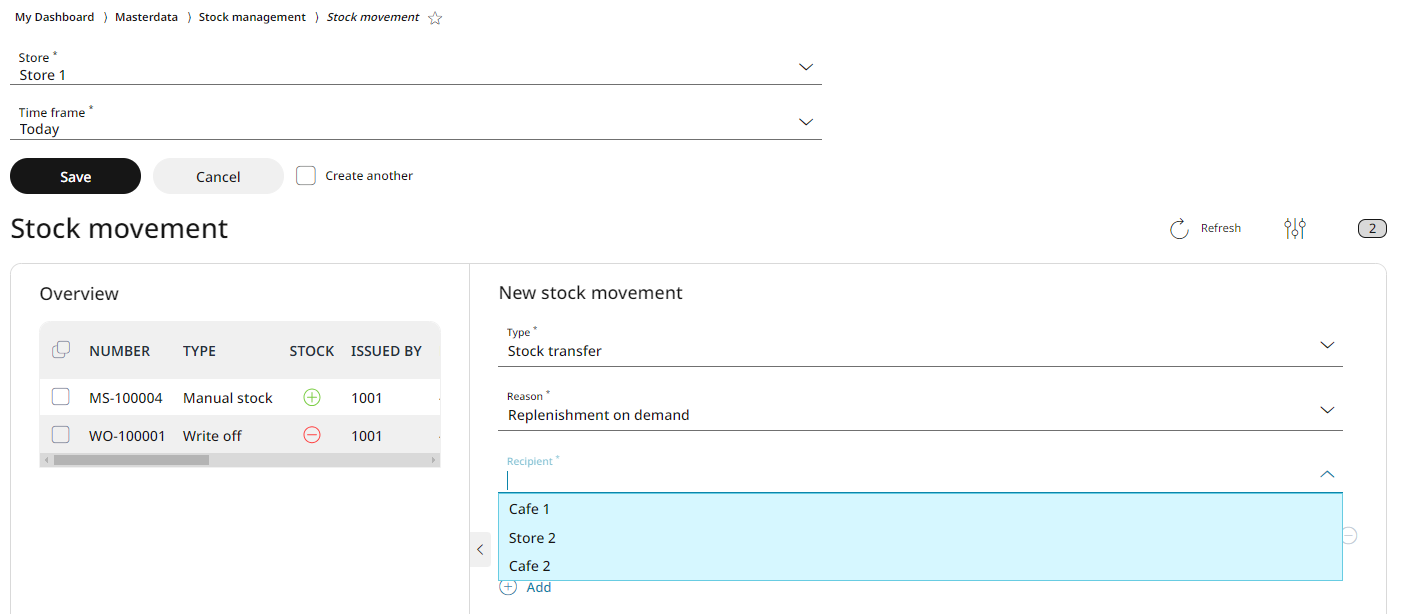
Select the type of stock movement from the scroll-down menu, in this case Stock transfer.
At the next step, select the reason for the stock transfer.

Please note: the reasons offered here are always different, depending on the chosen type of stock movement.
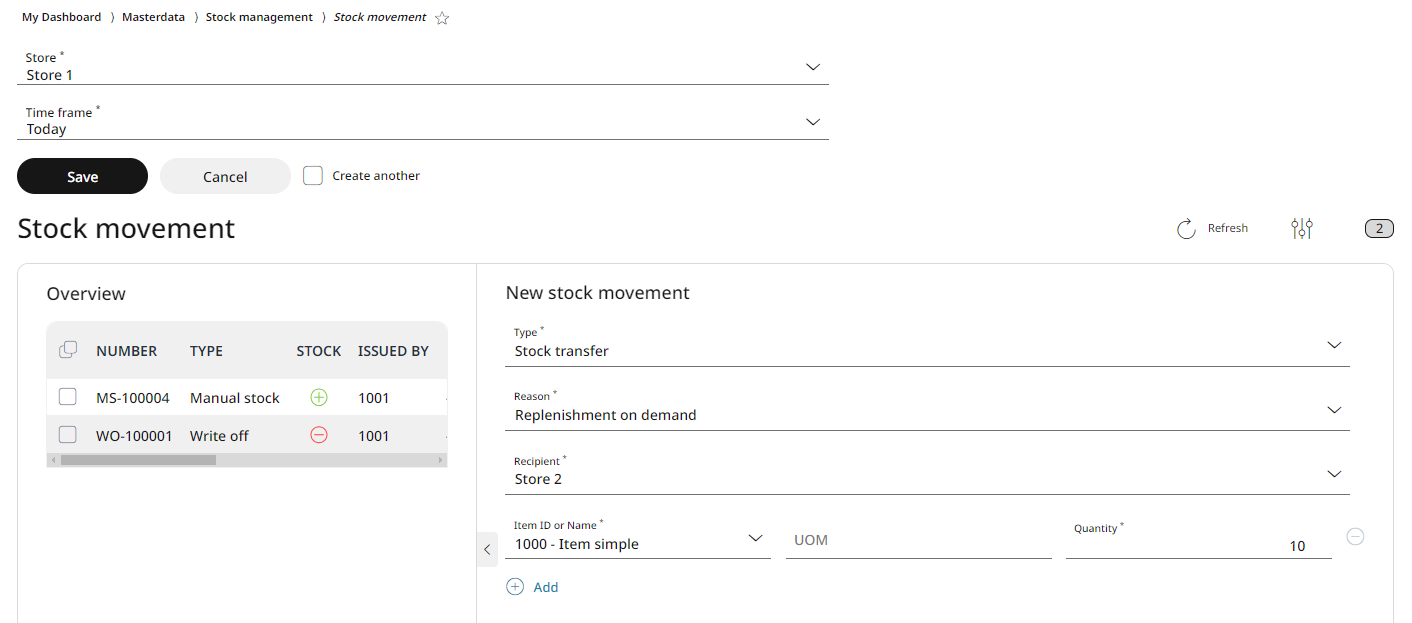
Select the item ID or name of the item to be added to this type of stock movement from the scroll-down menu.
At transferring stocks, there must be a recipient, to whom the stock is transferred to. At the Recipient field, you can choose the store from the rolldown menu, where the stock to be moved to.
The information about UOM (Unit Of Measure) is filled in automatically, since these were configured in the Menu → Master data → Items → Item list.
Enter the Quantity of the item.
Select Add to select additional item numbers for this stock movement. Please note, that you can add items only for this type of stock movement (e.g. in this case, to transfer stock).
Save the stock movement.
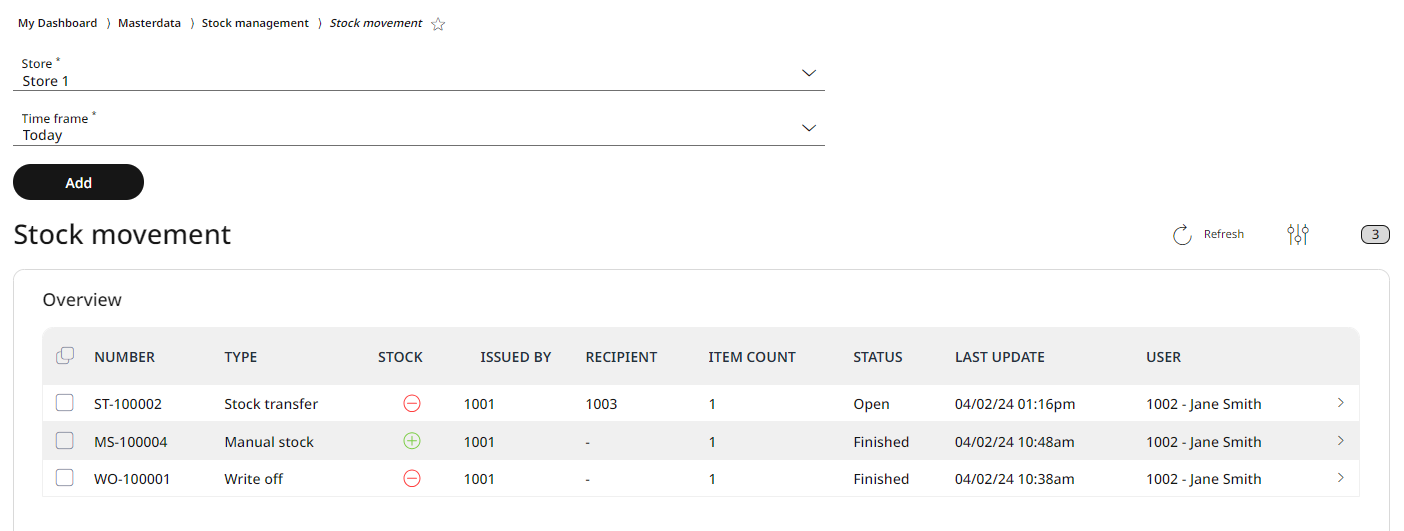
Now the stock which is ready to be transferred appears in the store´s stock list, with the type defined as stock transfer, marked with a red negative sign - as stock to be removed from this store -, issued by the current store number, with the chosen other store number as recipient, with the status as open, and with the exact date and time and username of the person who registered it.
As you can see from the Open status, this type of transaction needs closing. You can do this by switching to the store where the transfer is directed to, and receiving the transfer.
Click on the Store field and choose the recipient store from the scroll-down menu. Now the new stock transfer appears in the stock movement list for this store, as a future addition to the stock, thus with a green positive sign, with its status still as open.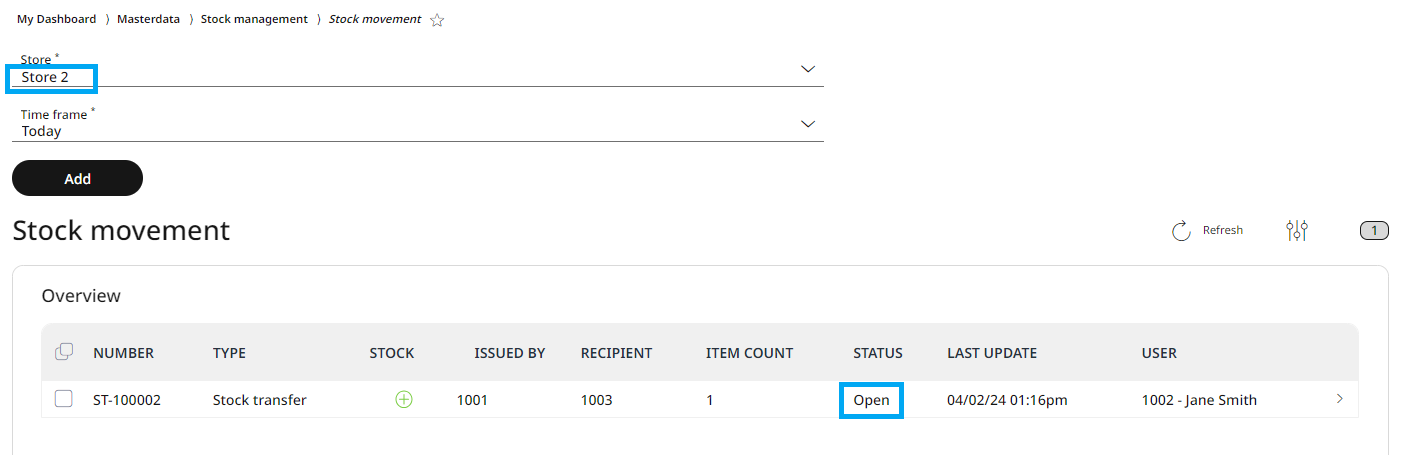
To close the status of this transfer, click on the box at the beginning of the row.
Now the Edit and a Submenu button appears beside the Add button. Clicking on the submenu button, the Finish option is displayed.
Clicking on the Finish option will close the transfer, the stock movement is received and the stock is added to the stock of the recipient store. The status of the stock movement is now changed to Finished on the list view.
Edit and delete stock movement
After a stock movement is saved, it can viewed or voided at any time, but not edited.
In case you would like to view the exact details of a stock movement:
Select the needed stock movement from the list.
Click to Edit.
In the editing window you can see all the relevant information, but you cannot change it.
To close the view, click Cancel.
In case you would like to void a stock movement:
Select the stock movement from the list.
Click on Submenu.
Select Void.
Define the reason, such as e.g. user error.
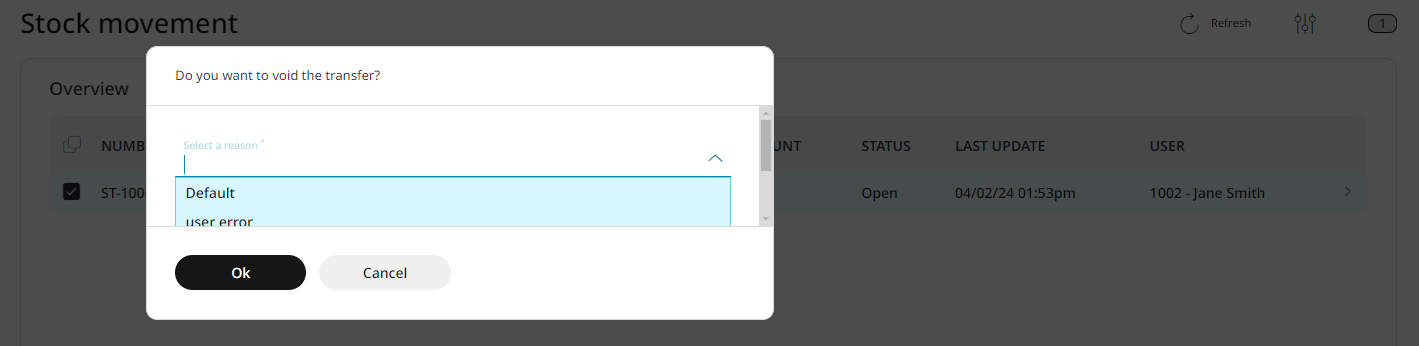
Confirm the dialog box with Yes.
Selecting No will cancel the deletion process.