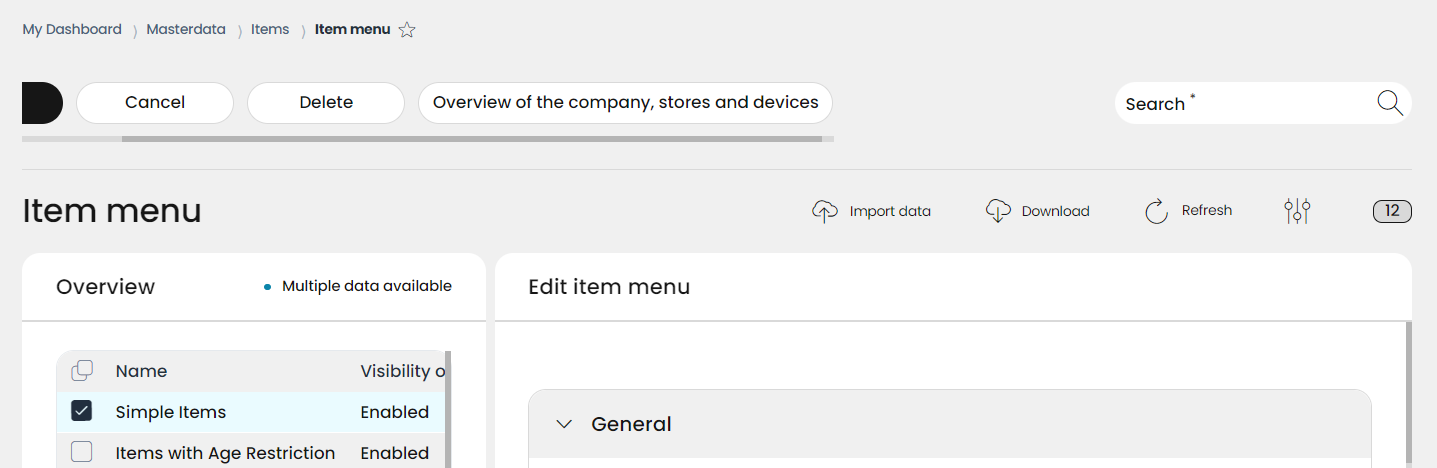
4.1.2 Item menu
Item menus are categories or groups that help organize items within the system. They allow for a structured approach to managing items, especially in a retail or hospitality context. For example, a store selling stationery products might create an item menu named "Stationery," where all related items such as pens, notebooks, and folders are grouped together. This helps in the checkout process by allowing users to easily navigate and select items based on their category.
The RETAIL7 system allows you to create as many item menus as needed, ensuring a flexible and scalable structure for item management. This organization simplifies the process for both staff and customers, as items are logically grouped and can be accessed quickly during transactions.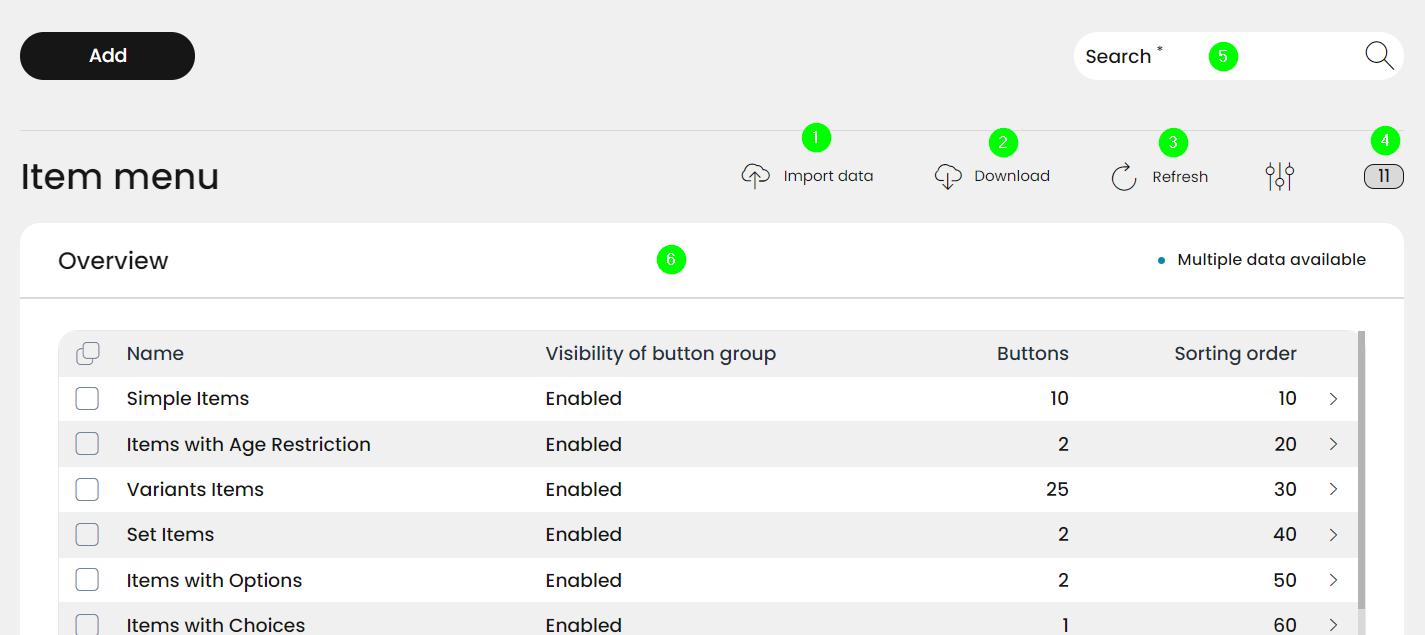
Import your own item menus to the RETAIL7 system
Download all item menus from the RETAIL7 system
Refresh the view of your item menu list
Number of your item menus
Search your item menus
Information about item menu list
Managing item menus
You can always add new item menus with the Add button. But when an already existing item menu must be edited or deleted, first you have to choose it by clicking in the box in front of the name of the item menu list. Now the buttons Edit and Delete will appear. Besides these three buttons, item list managing also have the submenu, but this one contains only one option: the changing of the structure assignment of the chosen item menu.

Add new item menus
If you need a new item menu, you can create it with the Add function. Subsequently, individual or several menus can be filtered out with the help of the search function, e.g. by entering the name of the item menu and starting the search.
Also, if more than one new elements are to be created, there is an option for that by using the Create another checkbox.
Mandatory fields are marked with a * and must always be filled in so that the entry can be saved successfully.
Open the Menu → Masterdata → Items → Item menu.
Click Add.
Now you can see the following fields of the Add item menu mask.
These are:
Name of the item menu
Sorting order
Visibility of button group
Main button configuration (colors and image)
Overall button properties (colors and type)
Buttons (Button data and advanced settings)
(Since these are all mandatory fields, here is no configuration option for the mask.)
First thing to do is to create a name for the new item menu.
Please be aware to assign a unique and clearly distinguishable name to the new item menu, so it can be filtered out by the search function.
For next step, create a number as sorting order number in the item menu list.
The item menus in the list are sorted according to their numbers. Each number can only be assigned once, because one item menu can be only in one position. Any item menus created without sorting order numbers are added to the end of the list, in the order of creation.
Choose the visibility of button group.
Open the Main button menu.
Buttons are the user interfaces of the cash register. For example, a Button Total is the button that triggers the transaction completion. In case of the item menus, the main button is displayed directly in the app as soon as the menu is opened.
Click on the Main button background color and enter the hexadecimal code for the color.
For this, select the color pipette at the end of the line. Here you can enter the hexadecimal code of the color and make a detailed adjustment using color sliders. In addition, a color can be created using the color sliders if no hexadecimal code is available as default. Click on Save when all entries have been made.
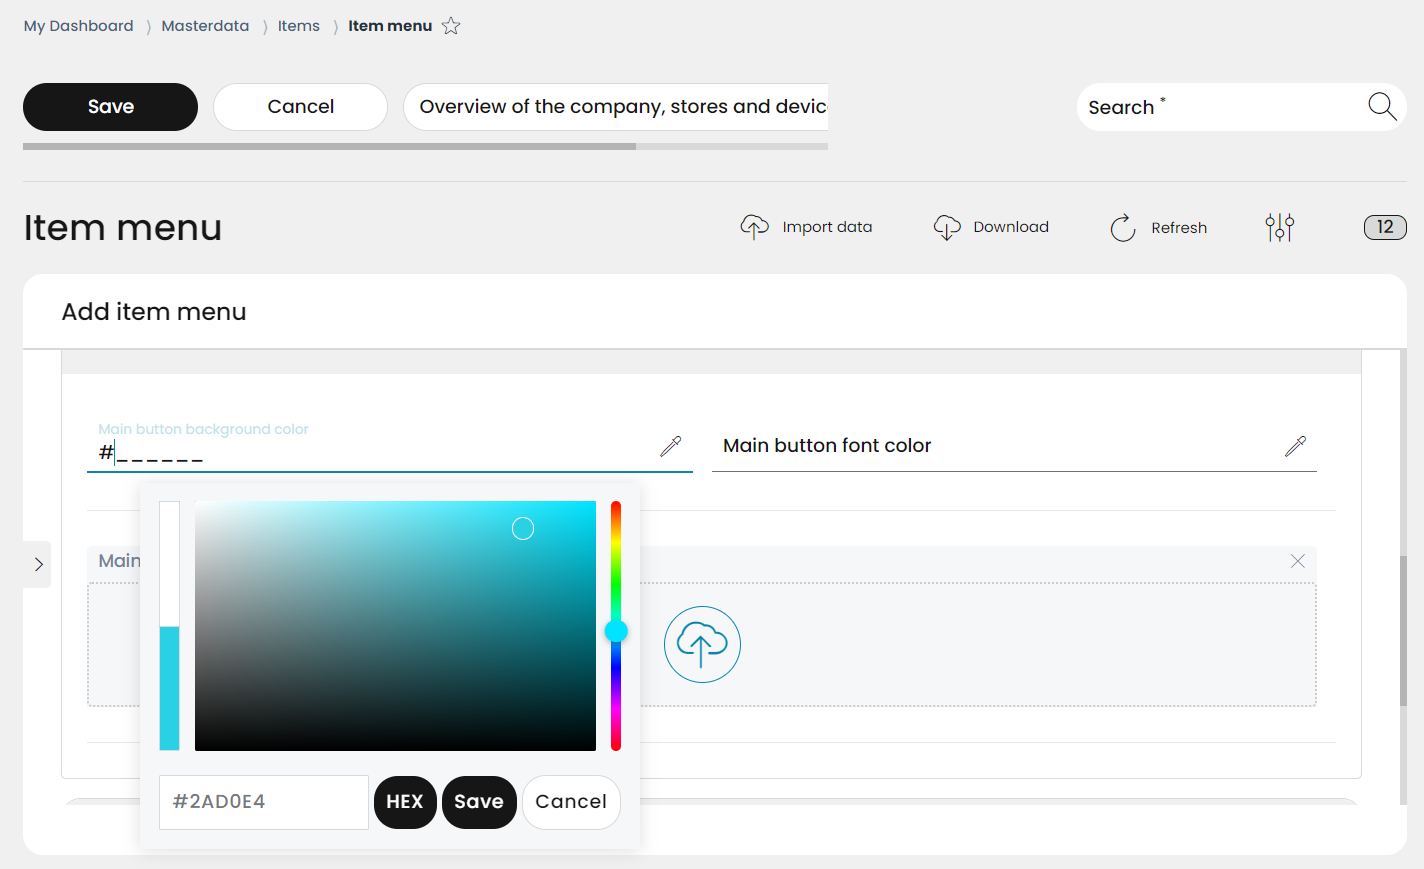
The hexadecimal code of the color is composed of the basic colors red, green and blue. The mixing ratio of the colors to each other is described by the numerical ratio of the individual areas.
Next step is to open the Main button font color menu box and enter the hexadecimal code for the desired color.
For this, first select the color pipette at the end of the line. Here you can enter the hexadecimal code of the color and make a detailed adjustment using color sliders. In addition, a color can be created using the color sliders if no hexadecimal code is available as default. Click on Save when all entries have been made.
The hexadecimal code of the color is composed of the basic colors red, green and blue. The mixing ratio of the colors to each other is described by the numerical ratio of the individual areas.
You can insert an image with a maximum size of 520 x 150 pixels by dragging and dropping it into the image area.
The image can also be inserted by clicking on the cloud. This opens the file browser of your system, where you can choose the image, click on it, and it is then uploaded to the RETAIL7 system. After the successful upload, the image will be available for the button.
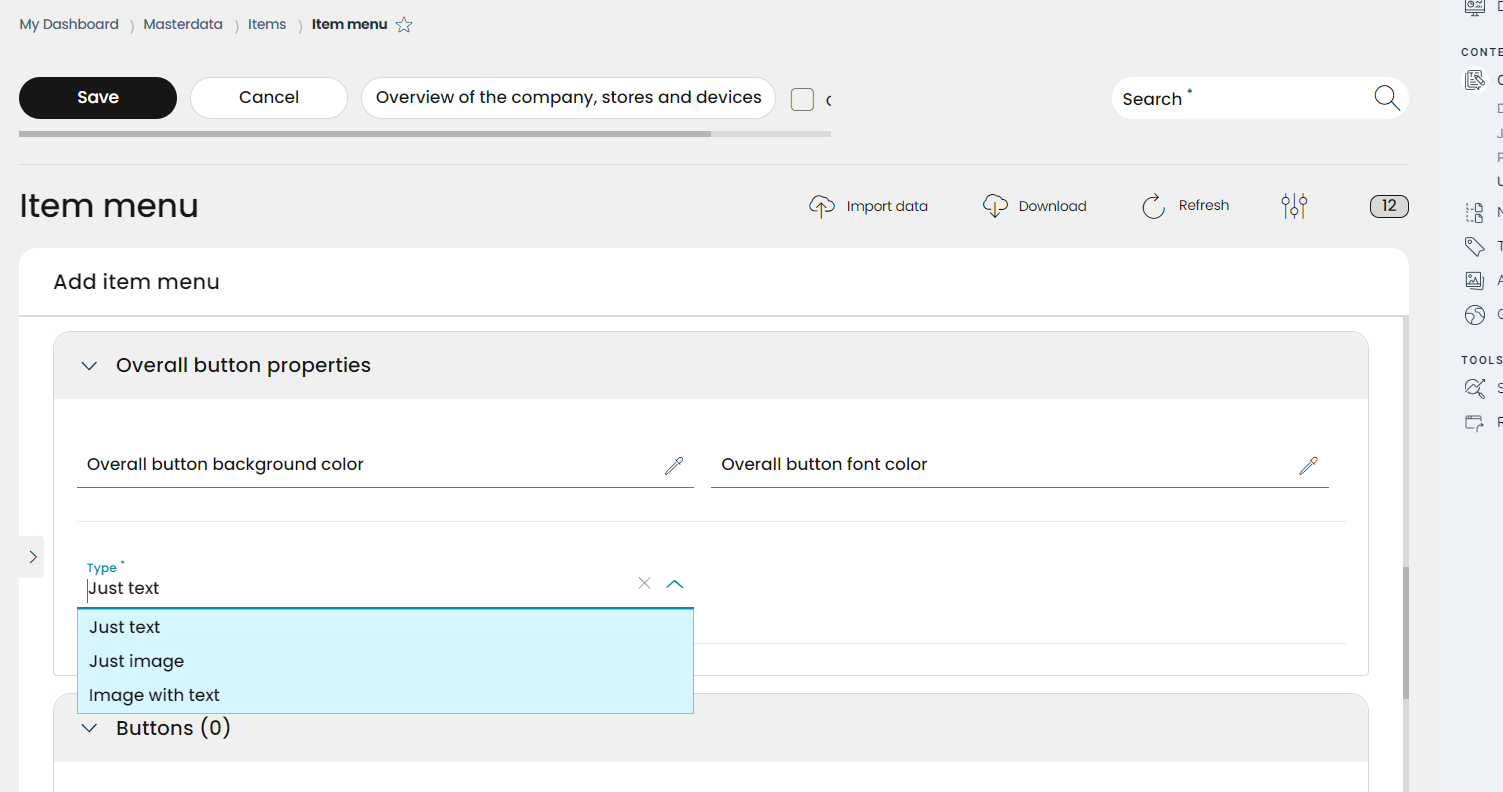
Now open the Overall button properties menu box.
Click on Overall button background color and enter the hexadecimal code for the desired color.
For this, select the color pipette at the end of the line. Here you can enter the hexadecimal code of the color and make a detailed adjustment using color sliders. You can also use the color sliders to create a color if no hexadecimal code is available by default. Click on Save when all entries have been made.
The hexadecimal code of the color is composed of the basic colors red, green and blue. The mixing ratio of the colors to each other is described by the numerical ratio of the individual areas.
Select the Overall button font color and enter the hexadecimal code for the color.
Here again, select the color pipette at the end of the line. Now you can enter the hexadecimal code of the color and make a detailed adjustment using color sliders. In addition, a color can be created using the color sliders if no hexadecimal code is available as default. Click on Save when all entries have been made.
The hexadecimal code of the color is composed of the basic colors red, green and blue. The mixing ratio of the colors to each other is described by the numerical ratio of the individual areas.
Define the type for the item buttons.
For the item button you can display Just text, Just image and Image with text.
Text only means that only the name is displayed on the button. For example, the button for transaction completion will have the word Total on it.
If Image only is active, only the image of the item is shown. For example, an apple can be displayed, but no description is shown.
When Image with Text is combined, both the image and the associated text are displayed. Thus, in this case, the image of the apple is shown and below it the description Corn Apple.
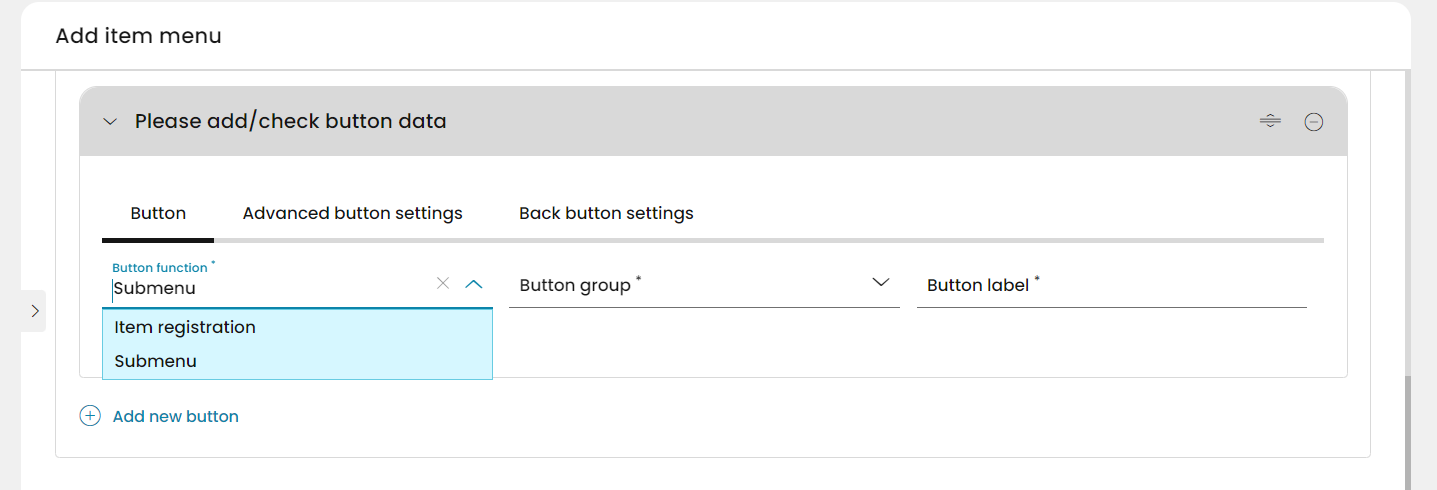
Now you can assign the buttons to be used for this item menu. For this, open the Buttons menu and the Please add/check button data within.
Here you can see a tab called Button and another one for the Advanced button settings.
First, on Button tab, choose the Button function you want to assign. These can be Item registration or Submenu.
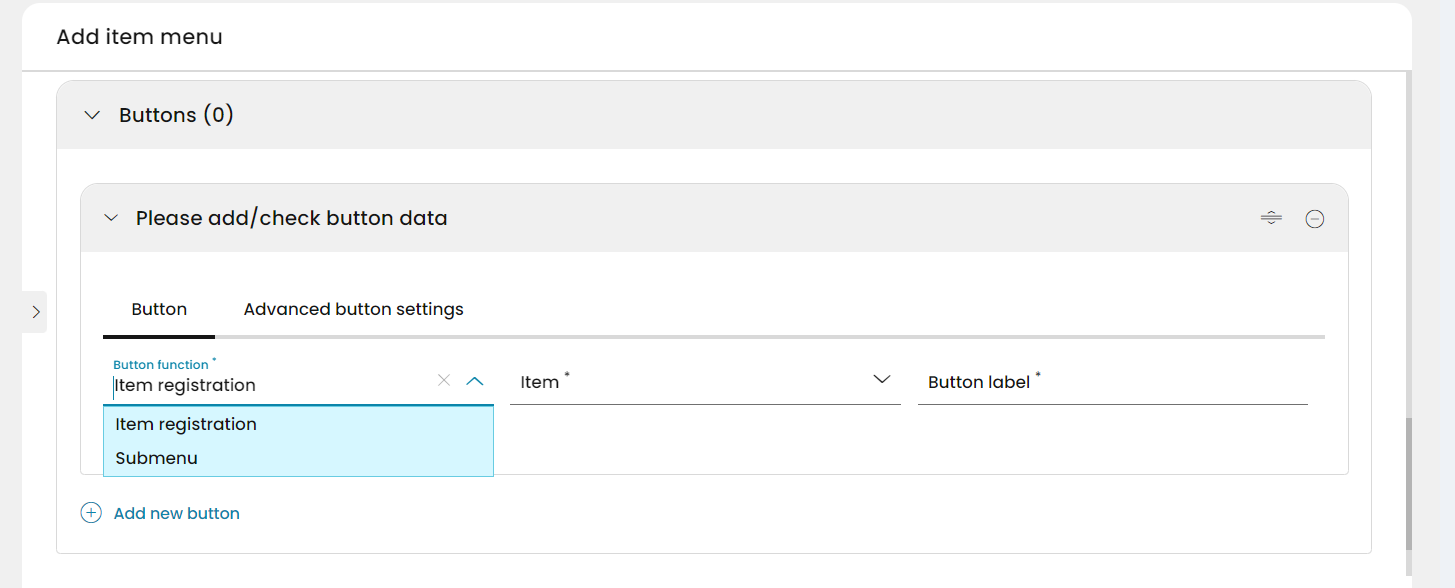
If you choose Item registration, you are offered to choose the desired item category from the Item rolldown list, and you can manually enter a name for them at Button label. Then, on the Advanced button settings tab, you can define the Button background color, the Button font color and the Type (Just text, Just image, Image with text), as it was previously explained.
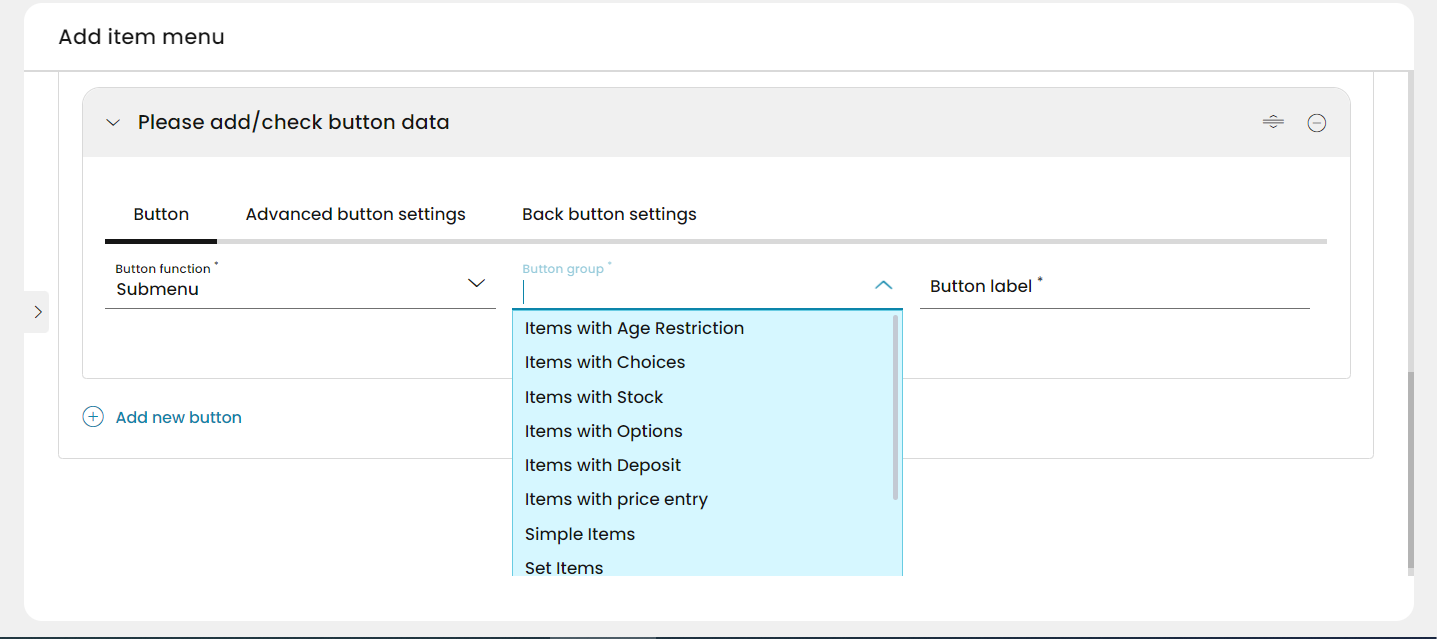
If you choose the Submenu option, you will see different rolldown options, and an extra tab besides the Advanced button settings, called Back button settings.
First, open the Button group rolldown menu, where you can choose the preferred item menu to be assigned to this particular submenu button. E.g. if you decide, you need an own separate submenu button on your POS display for age restricted items, just click on this category in the rolldown menu. Finally, enter the desired button label, which will be displayed on the button.
Now you can move forward to the Advanced buttons settings, where you can define the Button background color, the Button font color and the Type (Just text, Just image, Image with text), as it was previously explained.
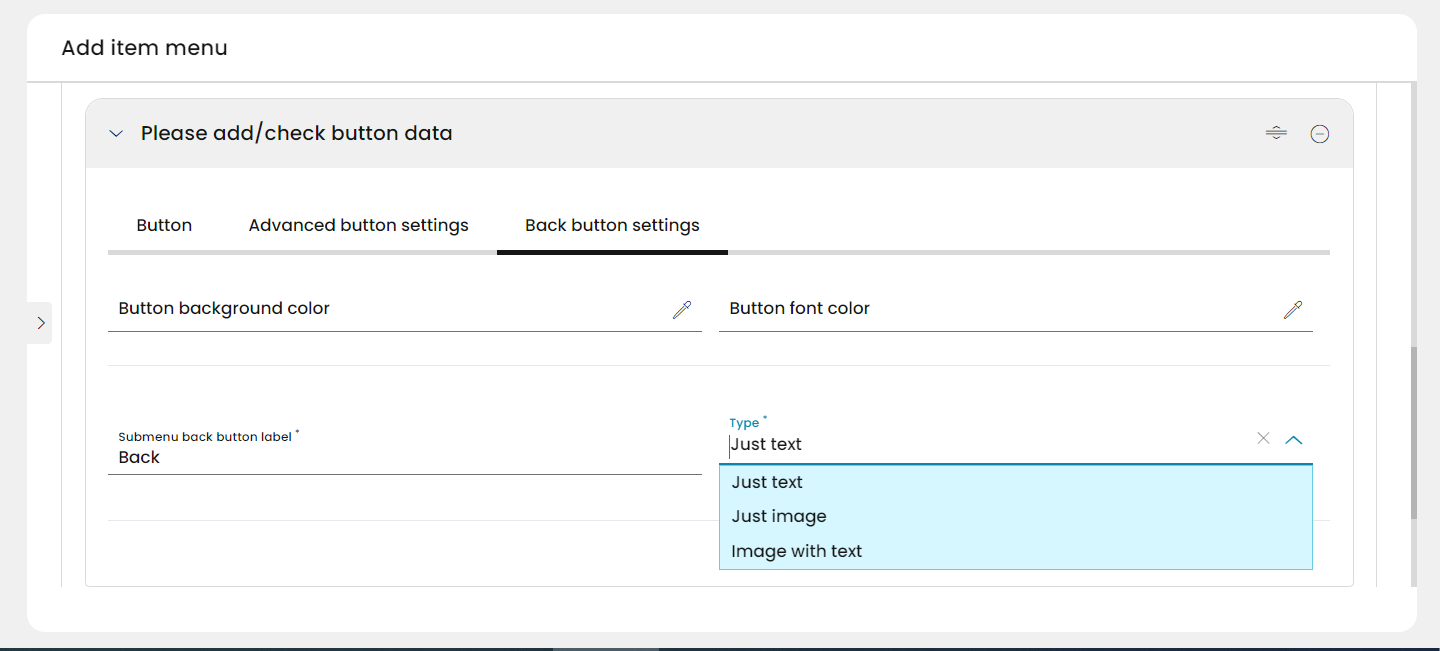
Finally, you have to define how the back button in this submenu should look like. That´s what can be configure on the Back button settings tab, where you can set the button background color, the Button font color, and the name and type of the submenu back button label.
Should further translation menus created, just click on the Add button link.
With all these steps executed, you can click on Save.
If you used the Create another option, the Add item menu mask remains open so you can create and save the next needed new elements. The loop ends only when you remove the tick from the Create another checkbox before the last Save.
Edit and delete item menu
After an item menu has been successfully saved, it can be edited or deleted from the overview at any time. This keeps the system up to date, since unnecessary elements are removed. When configuring an item menu, re-saving is especially important, so not to loose the updated information.
In case of editing an item menu:
Select the desired item menu from the list.
Click on Edit.
Make all necessary changes.
Click Save.
In case of deleting an item menu:
Select the desired item menu from the list.
Click on Delete.
Confirm the dialog box with Yes, or select No to cancel the deletion process.
Import item menus
You can import your own item menus, thus no need to create them separately:
Click Import.
Drag and drop your item menu list file into the object import field
Click on Import
Download item menus
You also can download all your item menus from the RETAIL7 system:
Click on Download
Choose the preferred file type (json or csv)
Click on Export
Changing the structure assignment of an item menu
Each item menu can be assigned to the organizational structure (for example, to one or more stores) - either in its entirety or individual fields can differ (for example, the price). Reasons for this, for example, that different prices can be applied to an item in your snack stand or street window, or because food and drinks are sold with a different price than in your connected café, with service.
Please note: changing the organizational structural assignment is part of a more complex system function, which you can find under the My Organization -> Units menu of the Management Console, and you can learn about it more under the My Organization chapter of this user documentation. Also: changing the structural assignment of an item menu works the same as with an item itself (see the previous chapter called 4.1.1. Item list).
You can change a structure assignment of an item menu by selecting the item menu and clicking on the three dots Submenu to get the option Change structure assignment. Now you get the tree overview of the units, to which this particular item menu is assigned to.

As you can see, the "system-level" setup is pre-selected here, which means that the item is available and has the same data in all stores.
First de-select them by clicking on any of the checkboxes.
Now click on the desired store(s) where you would like the item to be available and click Finish.
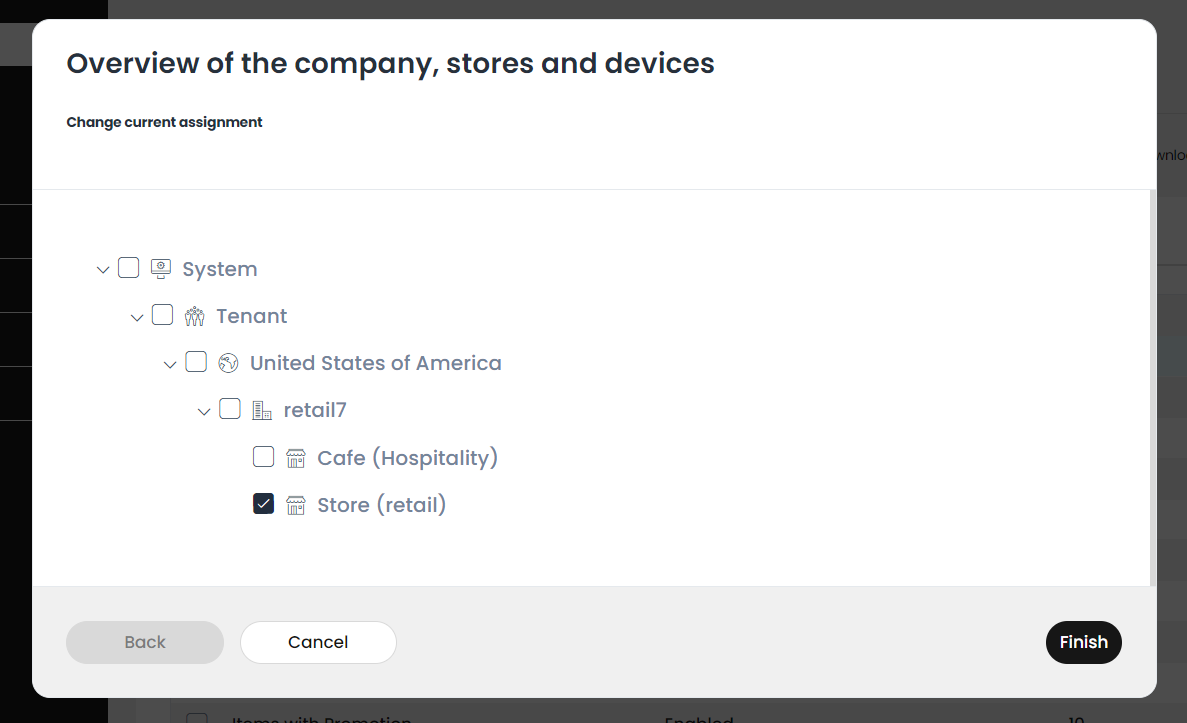
Your adjustments are now active only in the selected units. The configuration of the item menus remains unchanged in all other stores.
Note: you can also change the structure assignment when editing an already existing item menu. For this, beside the Save, Cancel and Delete buttons, there will be an Overview of the company, stores and devices button displayed, which has this same function.
The only difference in this case is, that after clicking on the Finish button, you still have to click on the Save button, for the changes to be registered.