4.1.4.2 Variant item groups
Variant item groups are designed to categorize the distinguishing features of different variants of the same item. They allow you to manage items with multiple variations efficiently.
For example, if you are selling a particular model of a mobile phone that comes in different storage sizes — 32 GB, 64 GB, and 128 GB — you can use the following structure:
The mobile phone itself is the variant item have to be added to the item list (for this, see Chapter 4. Item list -> Adding variant item)
The "storage size" has to be created as the variant definition (see chapter 4.1.4.1 Variant definitions).
The specific options, such as 32 GB, 64 GB and 128 GB can be added as the variants.
This structure ensures that each variation is properly categorized while still being linked to the primary item, allowing for a streamlined inventory system that captures all available options for your customers.
In this chapter we explain the last step, creating and managing the variant item groups.
Overview of the main functions of the variant item groups
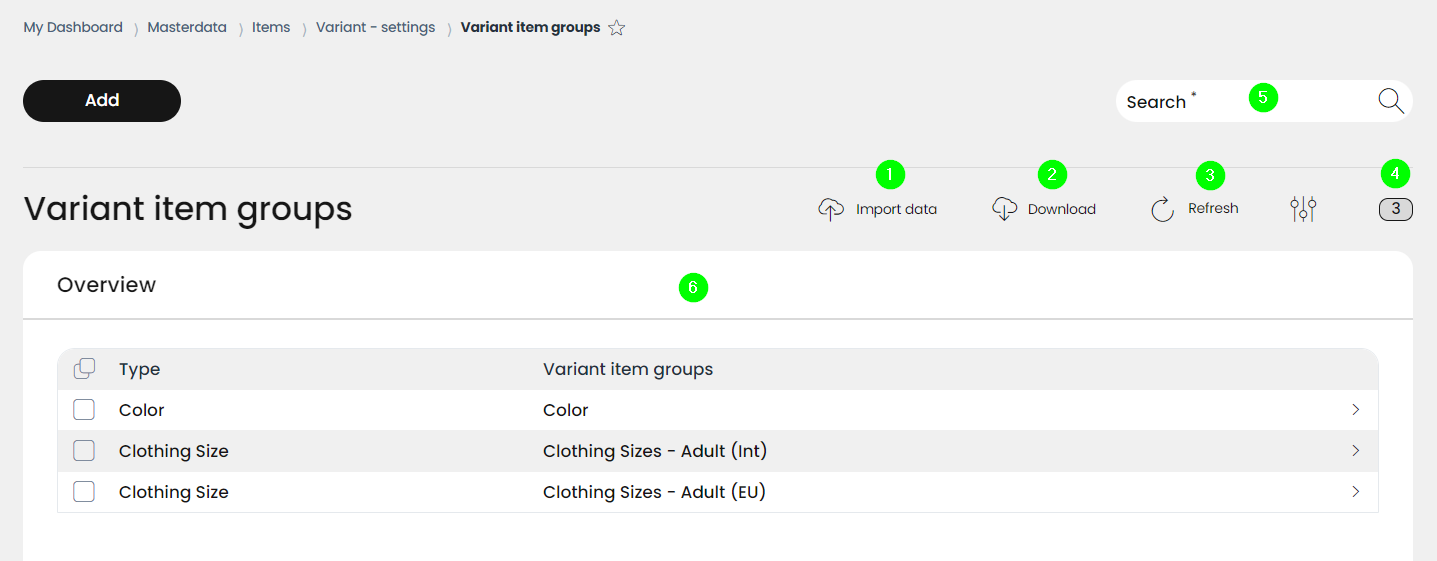
Import your own variant item groups to the RETAIL7 system
Download variant item groups from the RETAIL7 system
Refresh the view of variant item groups list
Number of variant item groups
Search variant item groups
Information about variant item groups
Managing variant item groups
You can always add new variant item groups with the Add button. But when an already existing variant item group must be edited or deleted, first you have to choose it by clicking to the box in front of the name of the needed variant item group. Now the buttons Edit and Delete will appear. Besides these three buttons, managing also have the submenu, but this one contains only one option: duplication.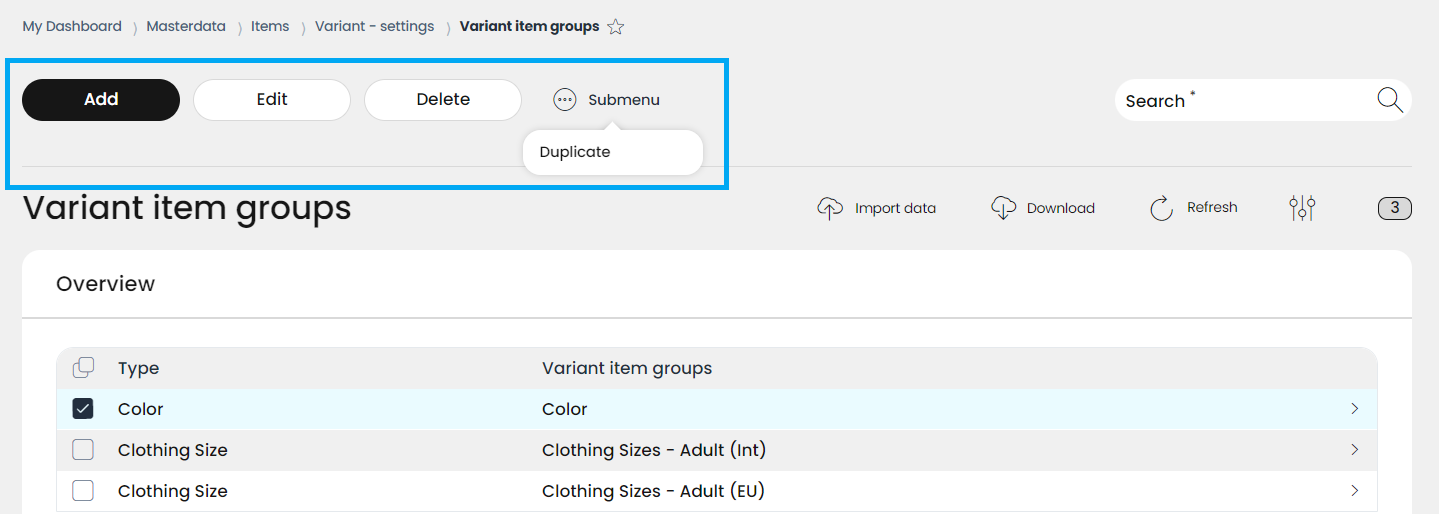
Add new variant item groups
If a new element needs to be added to your variant groups database, you can create it by clicking on the Add button. Also, if more than one new elements are to be created, there is an option for that by using the Create another checkbox.
Please note that all mandatory fields are marked with *, i.e. these fields must be filled in to create an item.
Open Menu → Masterdata → Items → Variant-settings → Variant item groups.
Click Add.
Now the Add variant group mask is displayed, which has two tabs: Default and Variants. First you need to fill the basic data on Default.
Choose a definition type for the new variant from the scroll down menu. There are some types already in the system, but you can add your own variant definition types anytime in the Variant definitions menu (see chapter 4.1.4.1. Variant definitions). 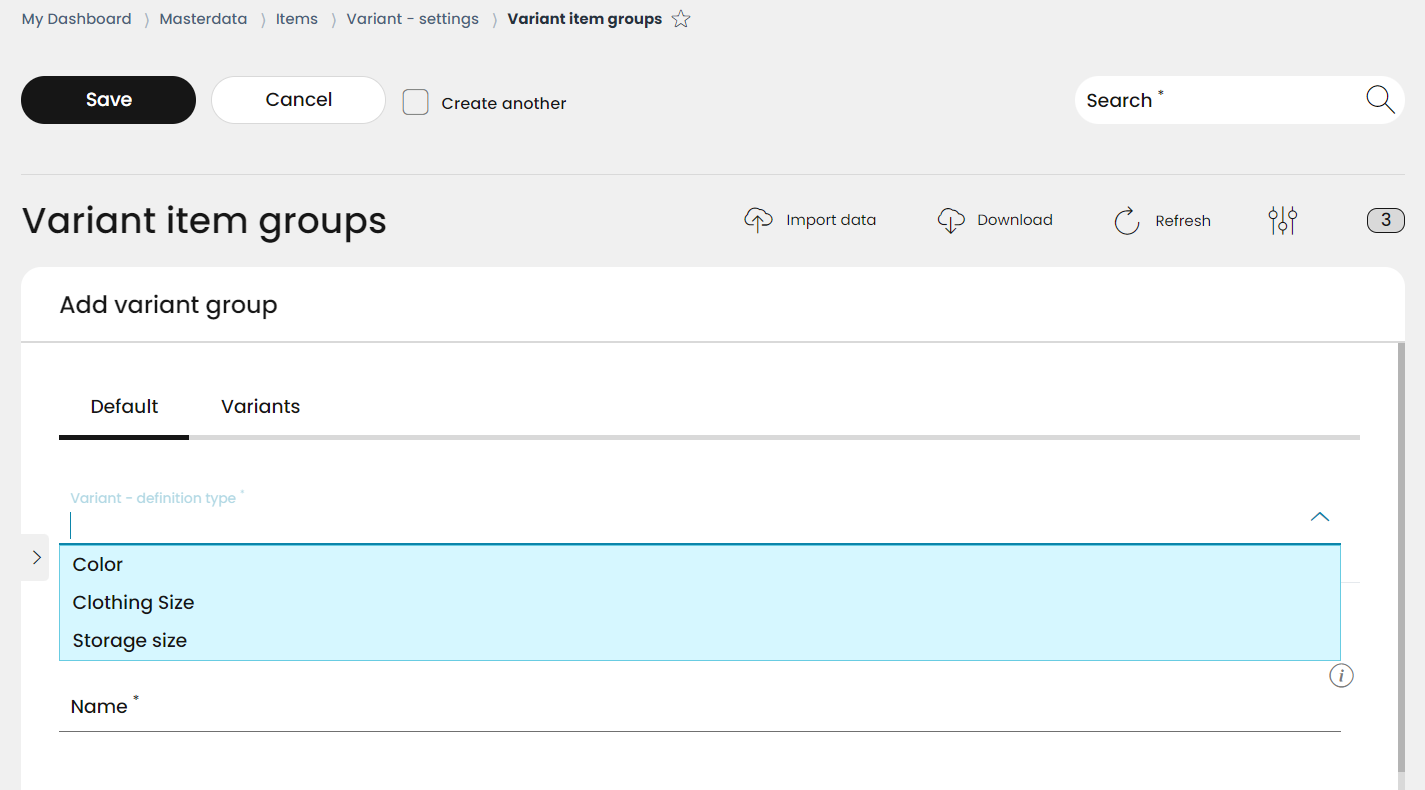
Give the new variant group a name.
The group name can be chosen freely, but it is important that a name with recognition value is assigned so that the group can be assigned after saving. With the name, the item group can be filtered out via the search function. The search is available after the item group has been successfully saved. This name is also be displayed on the cash register and the customer display, and also printed on the receipt.
Now move to the Variants tab and list the names of the possible different versions of the item to the new new variant group. E.g. if your variant item is a mobile phone, the variant definition is the storage size, here you can list the different storage sizes which could appear. You can register the new variants with the + Add, and remove the ones not needed anymore by clicking on the the - sign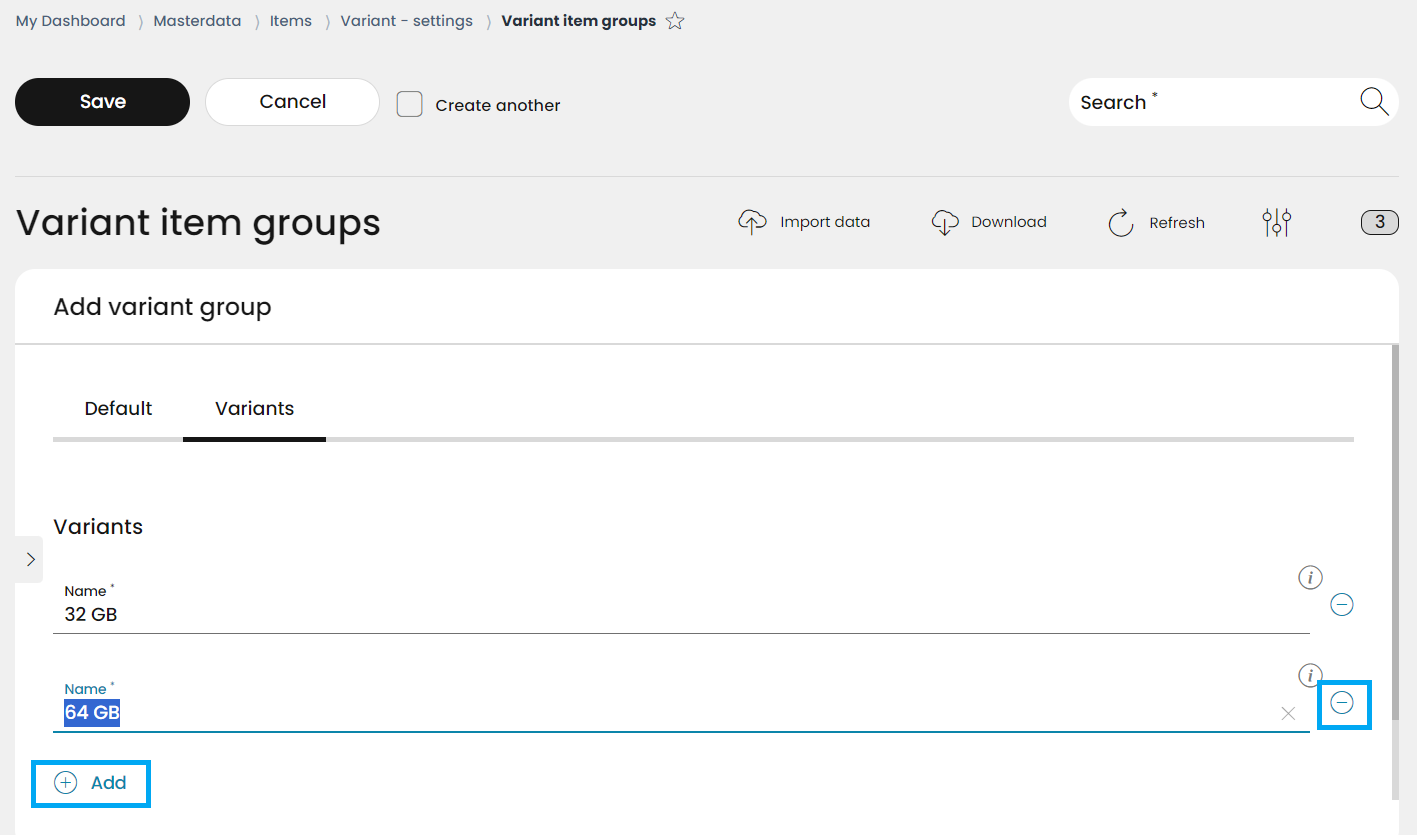
When finished with listing the different variants, click Save.
If you used the Create another option, the Add variant group mask remains open so you can create and save the next needed new elements. The loop ends only when you remove the tick from the Create another checkbox before the last Save.
Edit variant item group
Please note that all mandatory fields are marked with *, i.e. these fields must be filled in to create an item.
With the help of this function, variant item groups can be configured after they have been created and successfully saved. Thus, it is possible to make changes to the groups at any time.
Select the desired variant item group and click on Edit.
Make all necessary changes, which can be the following:
editing the variant definition type: please be aware that you can choose only from definitions which are previously added to the variant definitions list in the Variant definitions menu
editing the variant group name
editing the Variants (add or remove them on the variants tab)
Click Save.
Delete variant item group
Please note that all mandatory fields are marked with *, i.e. these fields must be filled in to create an item.
It is always possible to delete any groups, if you decide to order your items another way.
Select the desired variant item group.
Click Delete.
Confirm it with Yes.
If you select No, the deletion process will be canceled.
Duplicate variant item group
When you have a variant item group, and you need an (almost) identical new one, you have the option to, instead of creating one from scratch, just duplicate an already existing one, and set it up with the needed differences.
For this, besides the Add, Edit and Delete buttons, there is a Submenu button on the top of the page, which has one function hidden under it: Duplicate.
When choosing a variant item group and clicking on Duplicate, a new variant item group is created, which is identical to the original one. This duplicated item group will be added to the end of the item group list.
In case you would like to change any of the attributes of the new variant item group - which is recommended -, you can use the Edit function, as it was already described above.