8.2.6 Stores
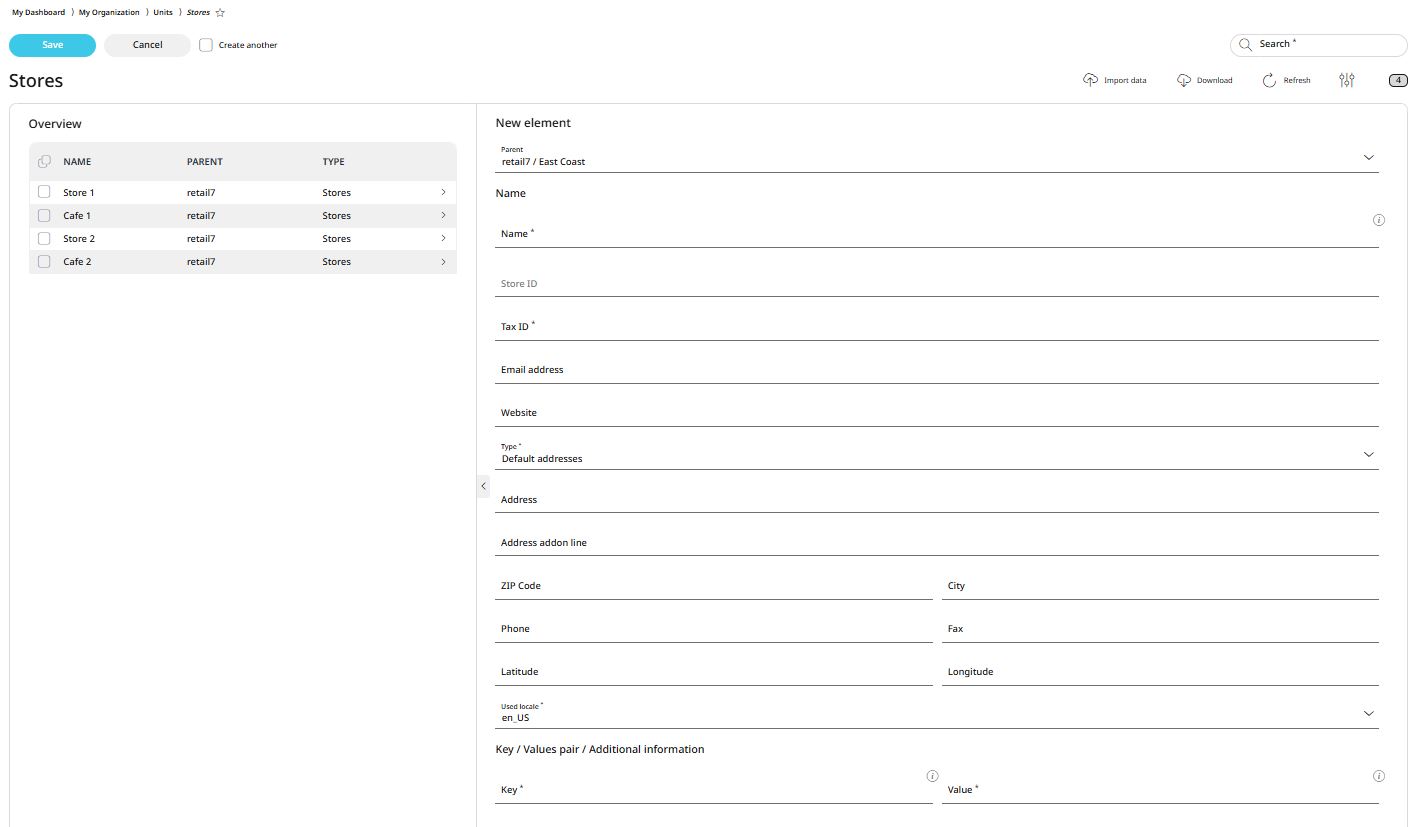
With the RETAIL7 system, multiple stores can be created within a single setup. These stores can be assigned to specific regions or countries, providing a well-organised and structured overview of the system. Settings can then be configured at various levels within the tree structure, and these settings will automatically apply to all associated sublevels, streamlining management and ensuring consistency across the hierarchy.

Import data or own configuration
Download data or configuration to your own system
Update the list view
Activate/deactivate table fields
Number of list items
Search
Information about the stores
Adding stores
For adding a new store go to Dashboard → My organization → Organizational units → Stores.
Select the parent element.
Assigning a parent element ensures that stores are systematically organised within the tree structure. In this structure, settings can be configured at each level individually. These configurations will automatically apply to all subelements under the selected level, streamlining management and maintaining consistency across the hierarchy.
Enter a name for your store.
This name will allow the store to be easily located using the search function. To avoid confusion, ensure that each store has a unique name. Additionally, the name should be distinctive enough to make the store easily recognisable in the future.

The store ID cannot be manually entered, the system will assign it when saving the entry.
Each store must have a distinct ID, as duplicates are not allowed. The store ID can also be verified within the app for reference and confirmation.
Enter the tax number of the store.
Assign a unique tax number to the store, which serves as its exclusive identifier for tax purposes. It is advisable to consult your tax advisor for additional guidance and compliance requirements related to the store’s tax number.
Enter the e-mail address and website of the store.
This enables direct communication and allows others to contact the store easily, whether through email or via the website, such as by using a contact form.
Select an address type.
Choose the appropriate address type from the dropdown menu. Options include default address, invoice, delivery, or other address types. Each type can only be assigned once, to ensure clarity and proper categorisation.
Enter the address and an address add-on if required. To add more details, click add new address add-on to create further entries.
Add the ZIP code, the city, the phone number and the fax number.
Optionally, specify the longitude and latitude for the store.
This allows you to store precise geographic coordinates, ensuring the store can be accurately located worldwide. As geographic coordinates are unique to each location, this ensures no ambiguity in identifying the store's position.
Select the localization from the list.
Click Save to add the new store, or click Cancel to discard it.
Editing and deleting stores
In RETAIL7, stores that have already been saved can be edited or deleted at any time. To keep the system up to date, it is advisable to delete stores that are no longer needed. If any changes are made, remember to save them to ensure the updated information is not lost.
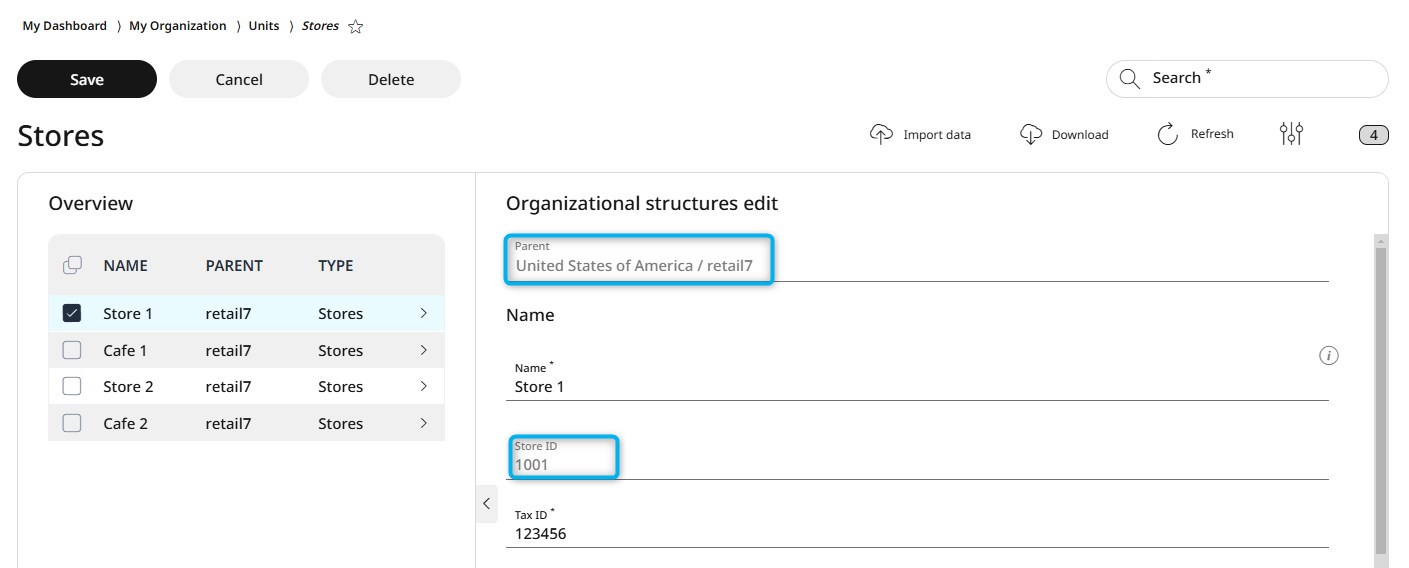
Note: The parent level and the store ID of the entries cannot be edited, the fields are inactive. The store ID was automatically assigned by the system to ensure uniqueness and prevent duplicates, thus it cannot be changed. If you need to change the parent level of an element, you will need to delete the existing entry and re-create it with the correct parent level.

Edit a Store
Select the desired store from the list.
Click Edit.
Make the necessary changes.
Click Save to confirm the updates.
Delete a Store
Select the store you want to delete from the list.
Click Delete.
In the confirmation dialog box click Yes to confirm and delete the store, or click No to cancel and keep the store.