2.2 Initial setup
After purchasing retail7, you receive a license. This is valid for one cash register end device, which can be installed and set up via the app. If more than one cash register is to be used, this is no problem. To do this, purchase another license in the Management Console. Note: if you would like to set up a customer display, that needs a separate license, which you can also purchase there.
2.3.1 Initial setup of the POS app as a cash register
First of all, registration on our website at https://retail7.io/ is necessary. Click on the Register button in the upper right corner. We will then provide instructions on how to set up the Management Console of the retail7 POS software. This is an interface through which all the settings relating to the retail7 system and all the connected end devices can be configured. At the first login, you have to set up your account and provide the payment data, otherwise you cannot use our product.
After setting up the Management Console, it is time to download the app from the store of your preferred end device. Once the download is complete, the retail7 POS app can be launched.
In the following, we explain how to configure your app as a POS cash register end device. When all is set up, you can start selling right away!
ATTENTION: After the successful registration you will receive a license for 1 (one) retail7 POS software, which means, you can configure your end device as a cash register. If you need more more cash registers (on another end device), this is no problem! You just have to purchase another license in the Management Console. To do this, log in to the console and select Add another license in the center tile of the start screen. Then select a model and confirm the purchase.
Start the retail7 app on the end device.
Click on Log In.
Enter the login data.
The login credentials are the email and password you have already set up when registered at the Management Console.
4. Select your business type and click Next.
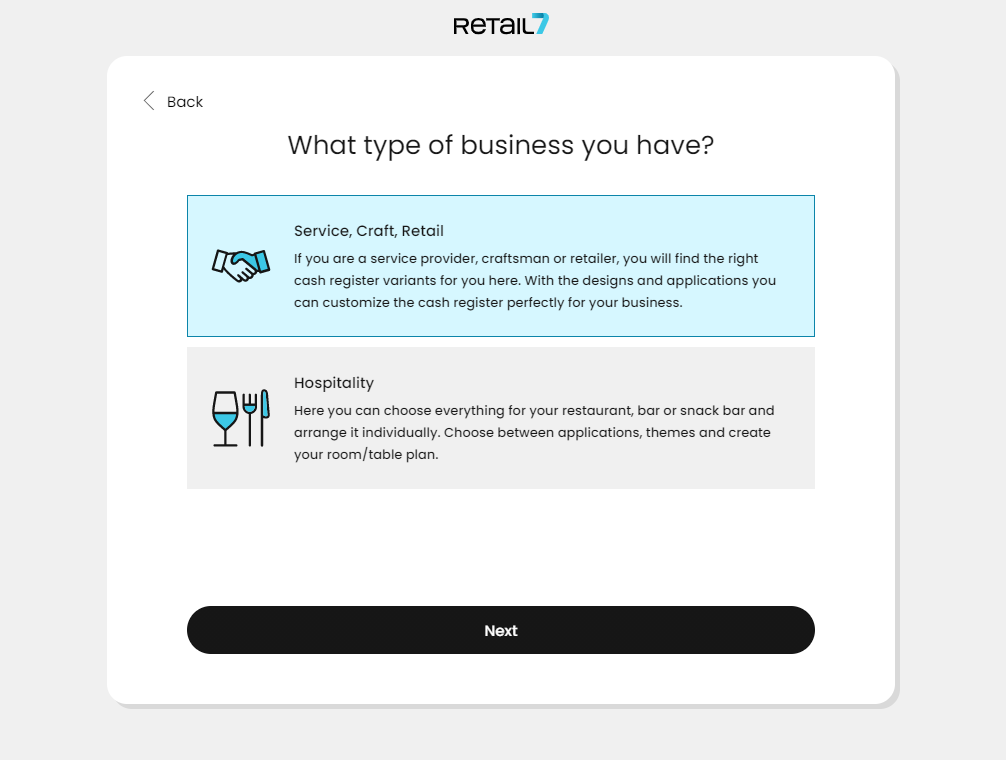 Based on the business types, the user interface of the cash register is different.
For the Service, craft, retail type, you get the functional scope of a classic cash register, as used, for example, in a supermarket.
With the Hospitality type, a cash register displays service areas (floors) and tables. Thus individual orders for each floor, table and customer can be taken up and/or cashed separately.
5. Now you can choose the type of the end device and select Next.
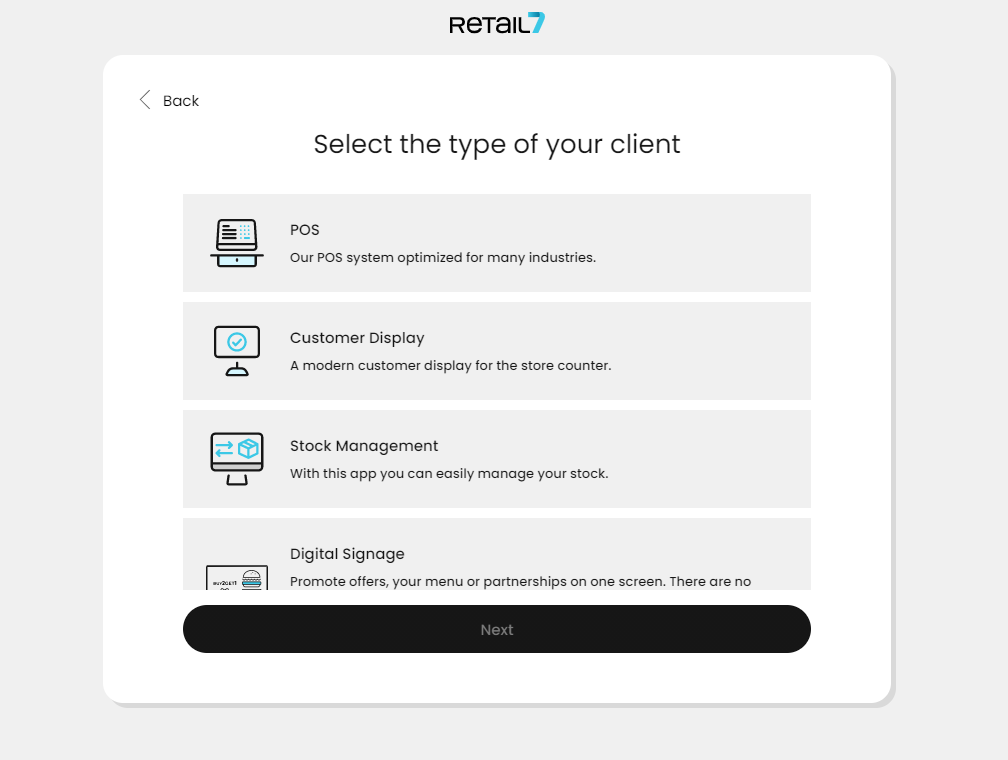 With the retail7 POS app you can configure several different end device type with several different functions. The first and most important is the POS, aka cash register, which must be always configured first, and it´s already involved in your first license. But you can also configure your end device as a customer display, or a stock manager device, and also as other optional and useful accessories to your business. In the following steps, we will explain how to further set up the cash register.
6. Select a Template and click Next.
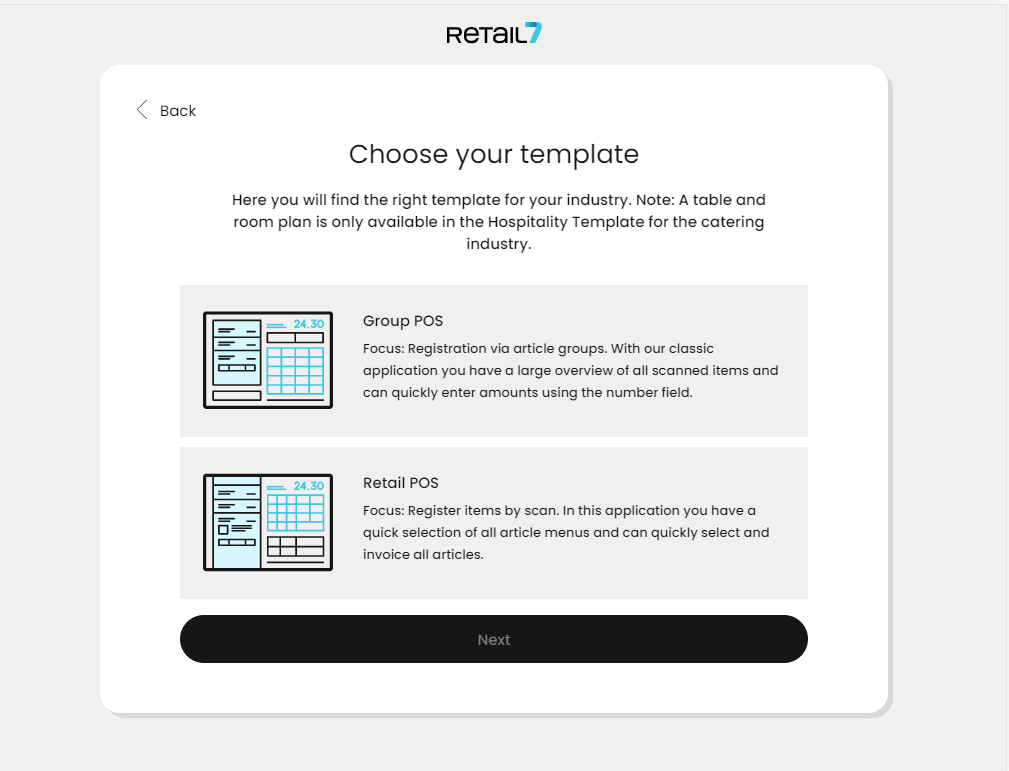 A template is not the graphic design, but the layout of the display: based on the different needs, you can choose different arrangement of buttons and functions here.
7. Decide on a Theme and choose Next.
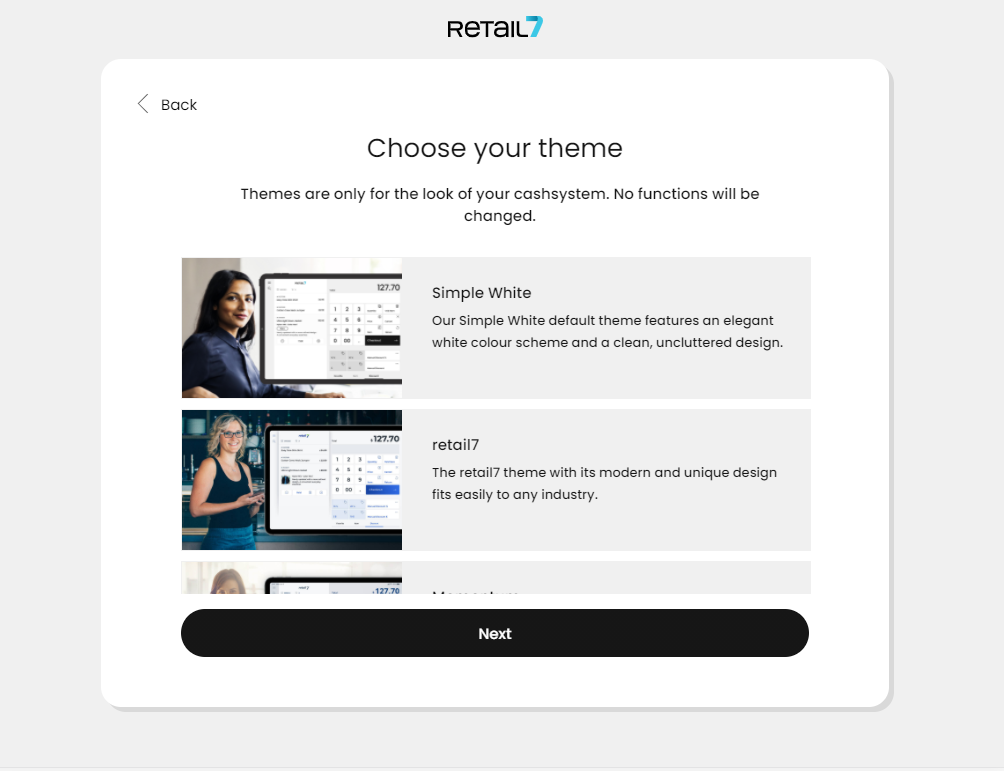 The Theme will add the visual design of the POS app, but won´t influence the functional layout of the user interface, you have just set up in the previous step with the Template. Retail7 offers several different themes, for configuring the visual element of your cash register to match the profile of your business. For example, we can recommend the Coffee Theme to owners of a café, the Flowers theme to a florist, but even with retail industry profile you can choose between different colour palettes.
8. Now, if you have already done so in Management Console, you can choose in which of your stores you will use this end device.
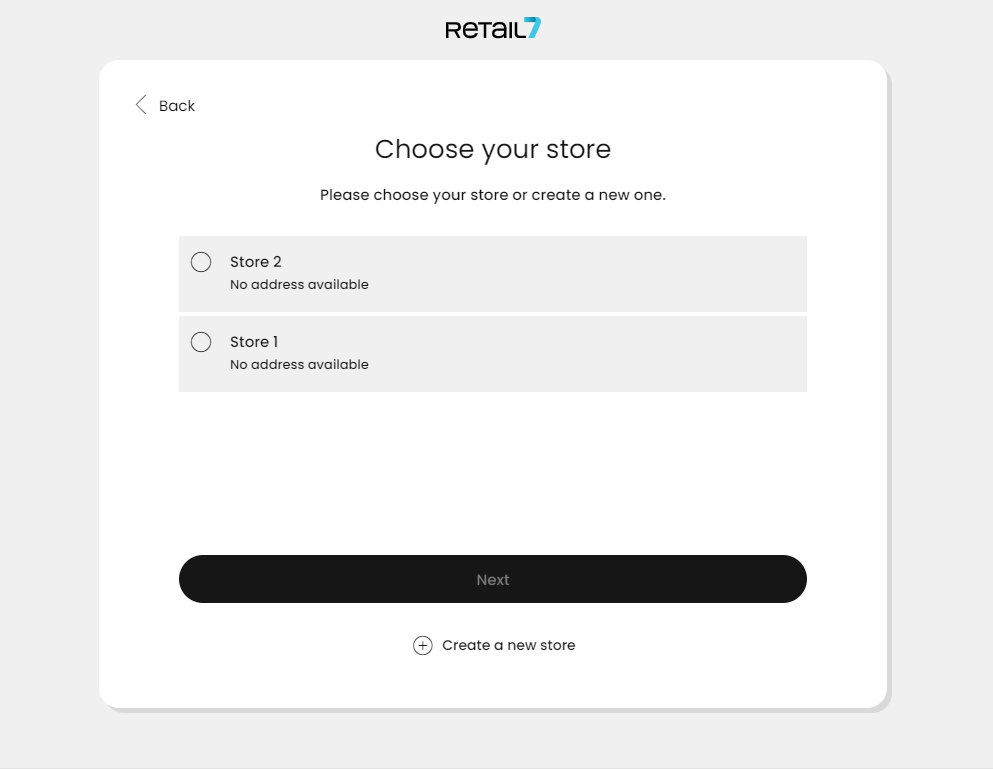 9. Or, if you haven´t created your store in the Management Console yet, now it´s time do it via the set up. Click on the Create a new store option!
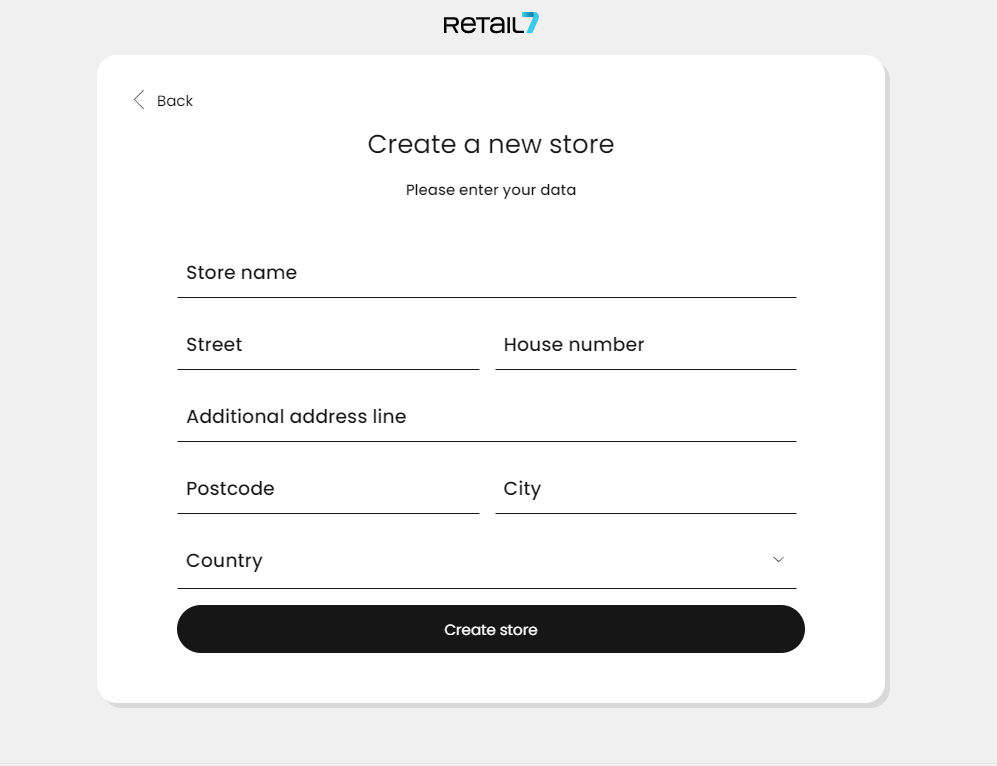 Fill all the respective data and click Create store - your first store is created!
From now on, this store appears also in the structure diagram of the Management Console after the saving process. With the help of the structure diagram in the Management Console, individual settings can be set up for each store. For example, if you have a store in New York, and another one in San Francisco, with partly different item assortments, you can create an item and assign it only to the store in San Francisco. This means that on the end devices it will be available for sale in the San Francisco store, but not in the New York one.
According to this principle, almost every setting can be configured via the retail7 Management Console. More information about the structure diagram is available under My organization.
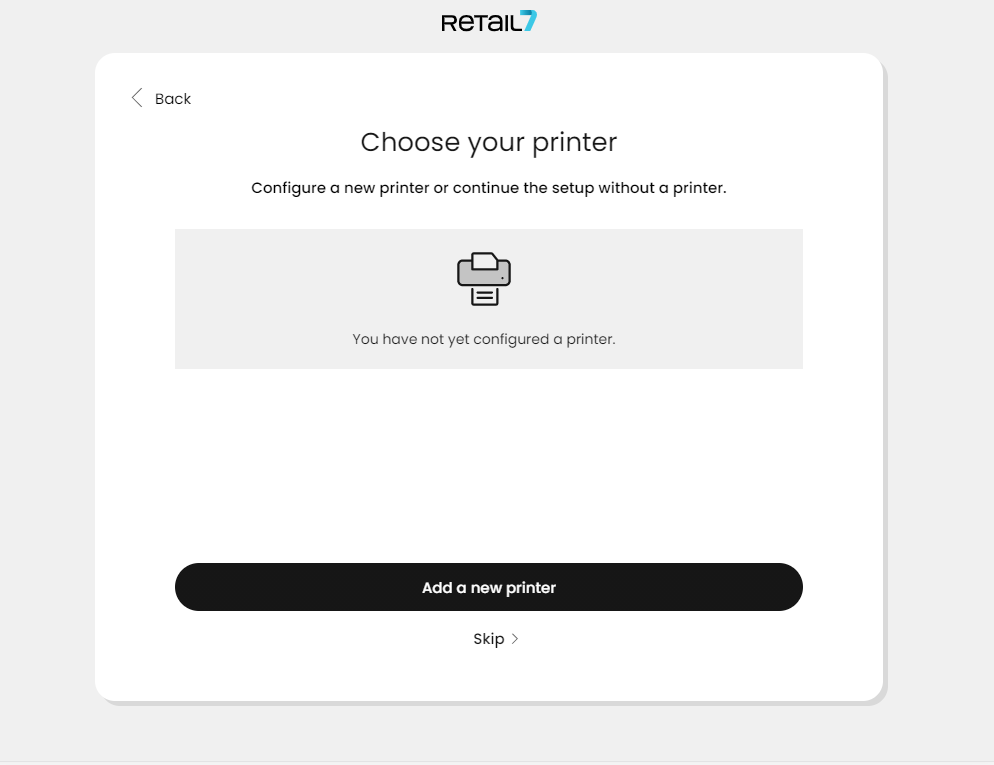
10. Since it´s useful to be able to print receipts and invoices (or in Hospitality, orders for the kitchen), now you have to set up the printer your POS app is connected to. Select Add a new printer.
 The retail7 POS app offers a list of compatible printers at this point.
It´s also possible that no printer is needed, in this case you can Skip this step. Note: this option is only available if it´s already defined in the Management Console that no printer is required. More information about this can be found under Printers. However, a printer is always necessary unless the receipt is not generated digitally, or sent to the customer via email, since it is mandatory to offer the customer the receipt generated by the POS system.
All other information regarding printer setup can be found on the printer manufacturer's website or at https://retail7.io.
11. Select your Printer from the list.
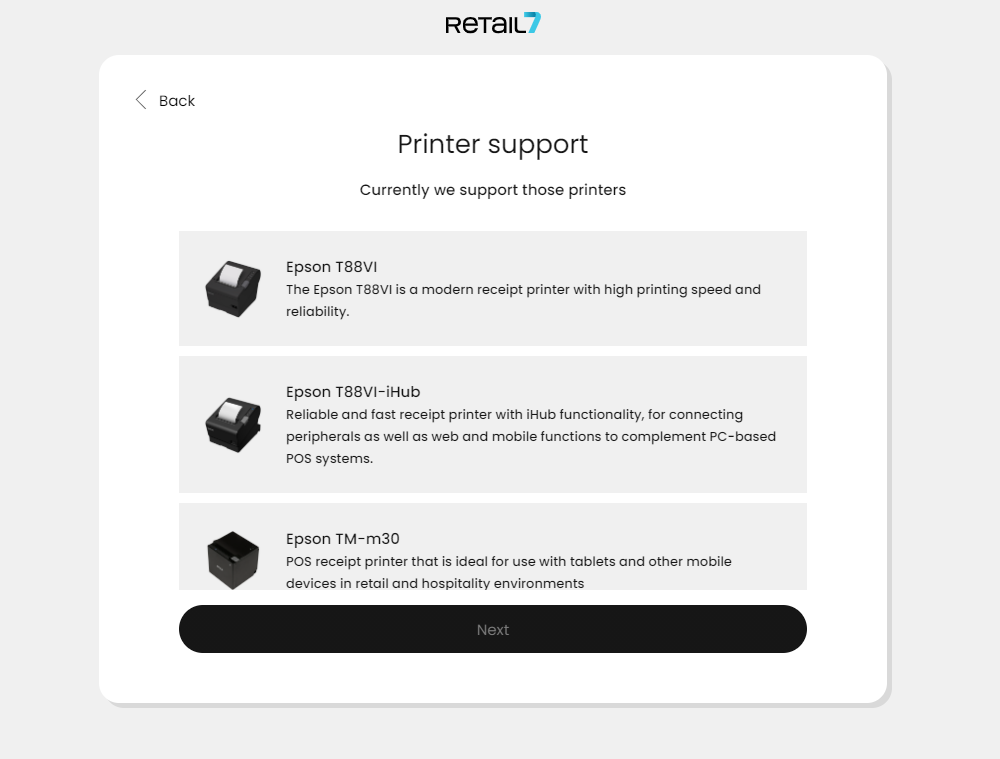 All printers compatible with retail7 software are listed here. For more information, see the Printers section or visit our website at retail7.io.
12. Confirm the Automatic printer search.
Here, the printer must be connected to the network, otherwise the search would fail. See the Hardware section for more information on the hardware available for the retail7 POS system. However, if the network search fails, you can define the name and the IP address of the printer manually, as well as whether a real cashdrawer device is connected to the system, and click Next.
13. Select the fiscalization service provider and click Next, or set up one, if you already haven´t done so.
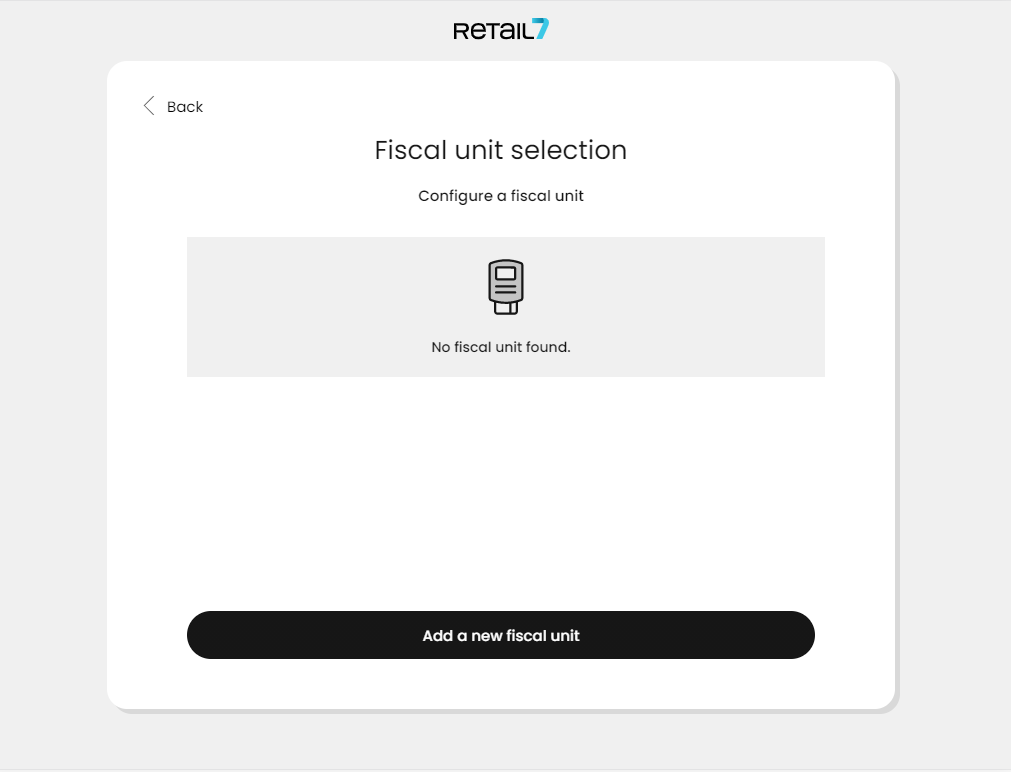 If a fiscal security technical device has already been configured, it can be selected from the list displayed. If it´s not configured yet, you can do it manually by adding the needed data manually.
The fiscal security technical unit device records all transaction processes of the cash register. This data is then forwarded at the relevant tax authorities. For details and all needed data, consulting a tax advisor is recommended.
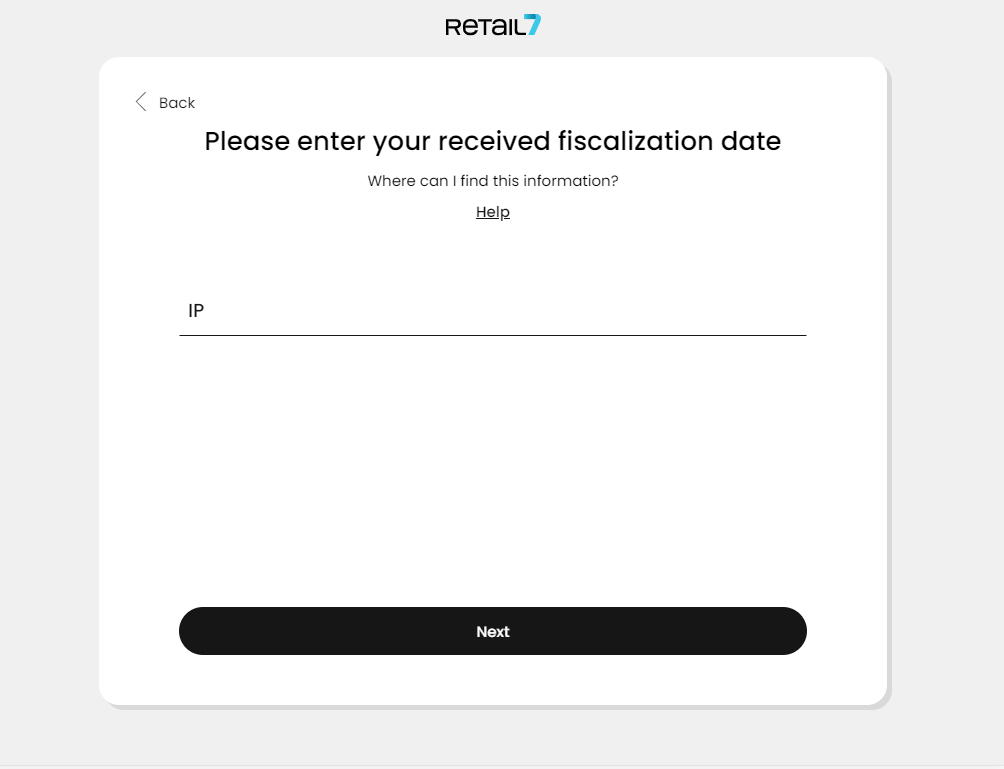
14. Enter the fiscalization data.
 NOTE: The PUK is then printed out. This printout must be kept in a safe place, otherwise the fiscal security technical device can no longer be accessed.
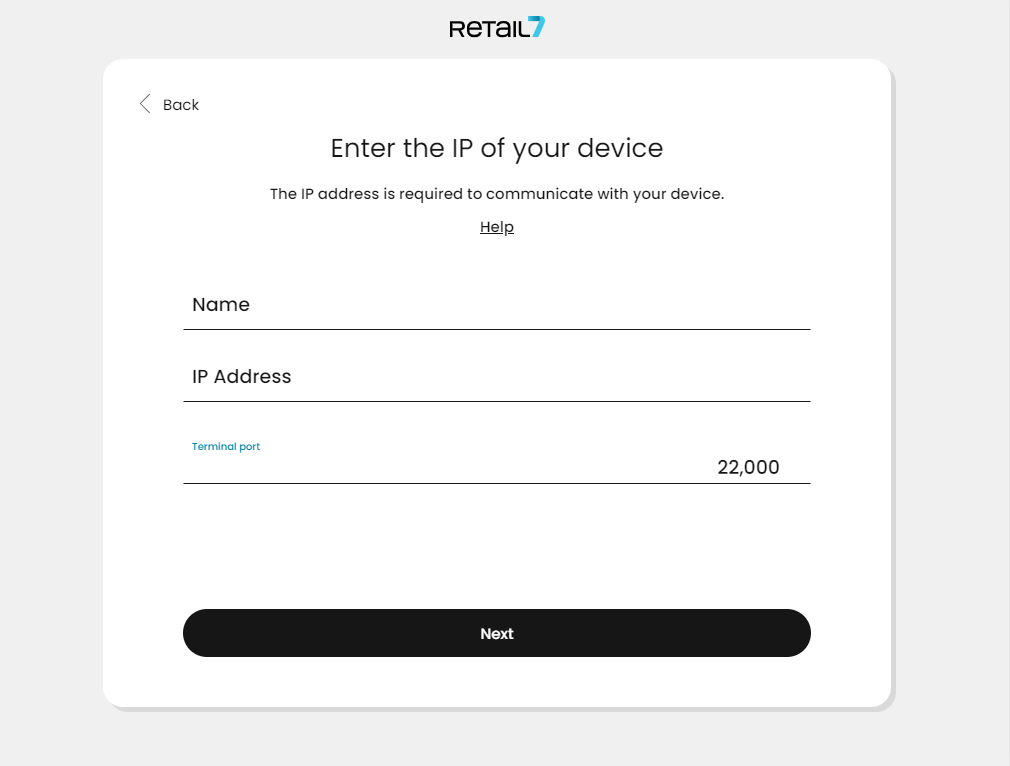
The Epson fiscal unit printer data is automatically filled in when the printer is detected on the network. If the system does not recognize the printer, the information such as IP address can be entered manually.
Additionally, this data can also be found in the Management Console under the menu → My Organization → Organizational Units → Fiscal.
15. Go to Next.
16. If you would like to enable card payment, here you have to Configure a new terminal.
 If no terminal is needed, you can just click Skip. But this means, that your customers can pay only by cash. However, it is also possible to add a terminal later via the Management Console, or in the app System settings.
18. Define a device name and finish the setup.
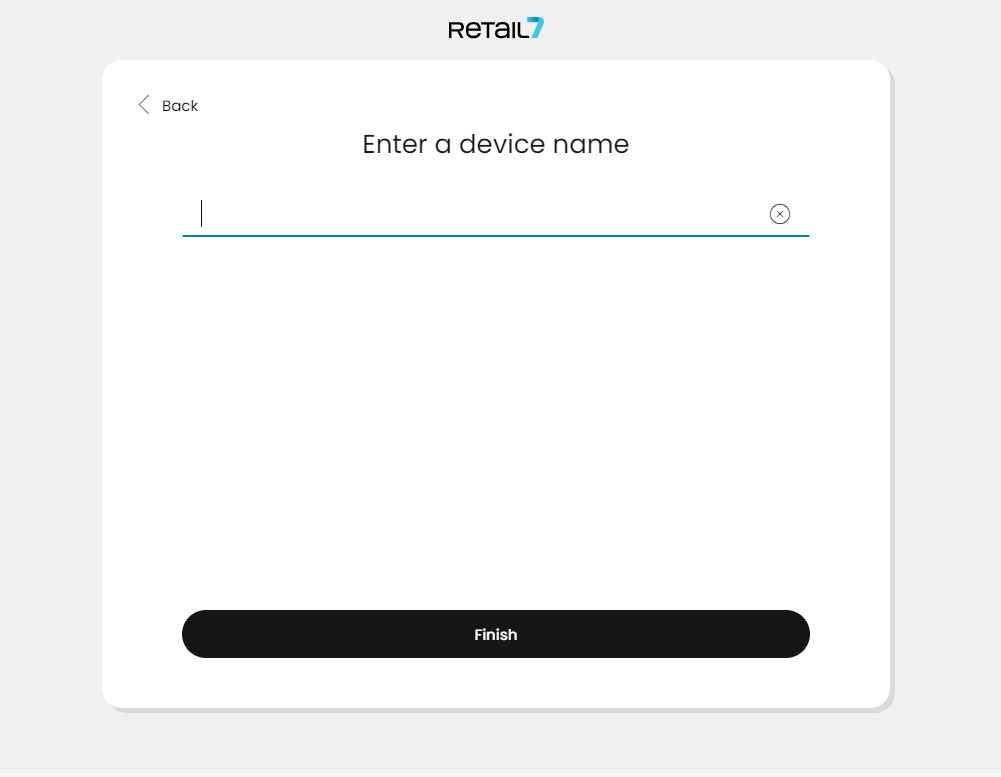 It´s useful to add the end device a unique name, so that later, in case of any change needed, it can be easily found with the Search function in the Management Console.
Now wait a few minutes until the cash register is downloading the data it needs for the setup. When it´s ready, you can see the login page, and start selling right away!
2.3.2 Initial setup of the customer display
Before a customer display can be set up, the retail7 app must be already installed and set up as cash register on the end device, which the customer display device is connected to. To do this, download the app via the respective app store. Then log in with the login data that was created during registration.
ATTENTION: It is only possible to create the customer display after at least one cash register has been set up. Another end device is required for the customer display.
1. Log in with the data.
These data are defined during registration and are valid for the management console as well as for the retail7 app.
2. Select the business type.
The store type influences the template that is defined after the customer display is selected. More information regarding the store types is available under Industry selection.
3. Select the type for the end device.
At this point, you can choose between the cash register and the customer display (and several else). Since you have already set up one end device as cash register, this time you can choose the customer display.
Note: for doing so, first you need to buy the Customer Display license in the Management Console. With registration, you have already got a license for a POS end device, but for setting up another end device, another license is needed.
4. Specify the template.
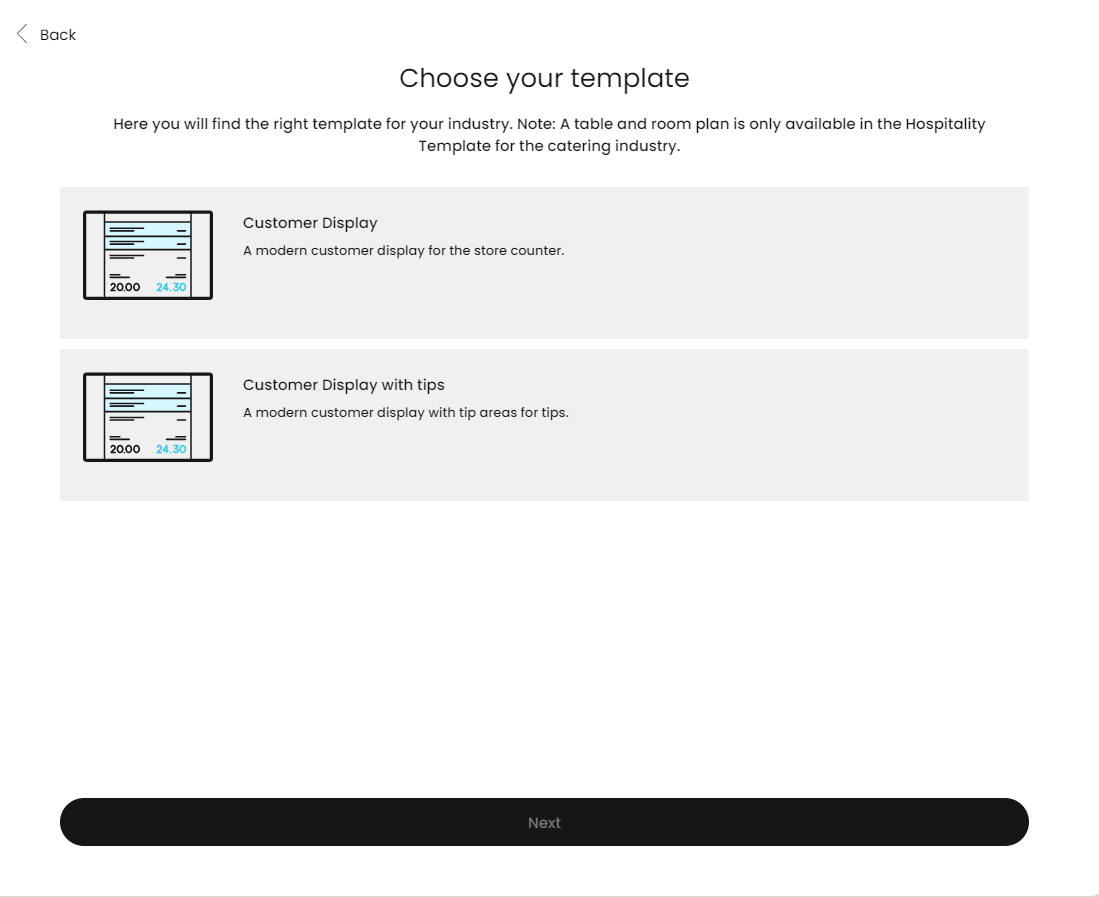 The template of the customer display is different from the template of the cash register. More information about the cash register template is available under Templates.
The main difference here is, that it is possible to create a customer display or a customer display with tipping options. If you would like this second one, a touch-enabled terminal is a prerequisite, otherwise the customer cannot navigate on it.
5. Choose the right theme.
Just as at the POS theme setup, here it´s also valid that the Theme will only add the visual design of the POS app, but won´t influence the functional layout of the user interface, you have just set up in the previous step with the Template. More information about themes is available in the Themes section.
6. Log in to the cash register.
Use the credentials defined during the registration process.
7. Open the user menu and select Settings → Connect customer display.
8. Enter the connection code displayed on the cash register.
Make sure that the cash register and the customer display are on the same network.
9. Click Next on the customer display.
Wait until the system has completed all steps. After that, you can see your own, customized interface on the your display.