4.2 Media playlist
Displaying media content on digital signage clients, such as monitors, projectors or other multimedia devices, is a way of powerful modern communication to show dynamic and visually engaging content, information, messages or presentation to customers and visitors on digital screens. This helps engaging with the customers, promoting products and services, and also, contributing to brand building. Thus, using digital signage clients is a versatile and dynamic tool that can be tailored to various settings to achieve specific communication and marketing goals.
RETAIL7 system offers the opportunity to use digital signage tools, and the content to be displayed can be configured in the Managing Console. In this chapter we show how to use it.
Note: for using this function, first you need to buy a license for the digital signage client. You can do it right on the Dashboard/License tile, by clicking on the Select new device package link. 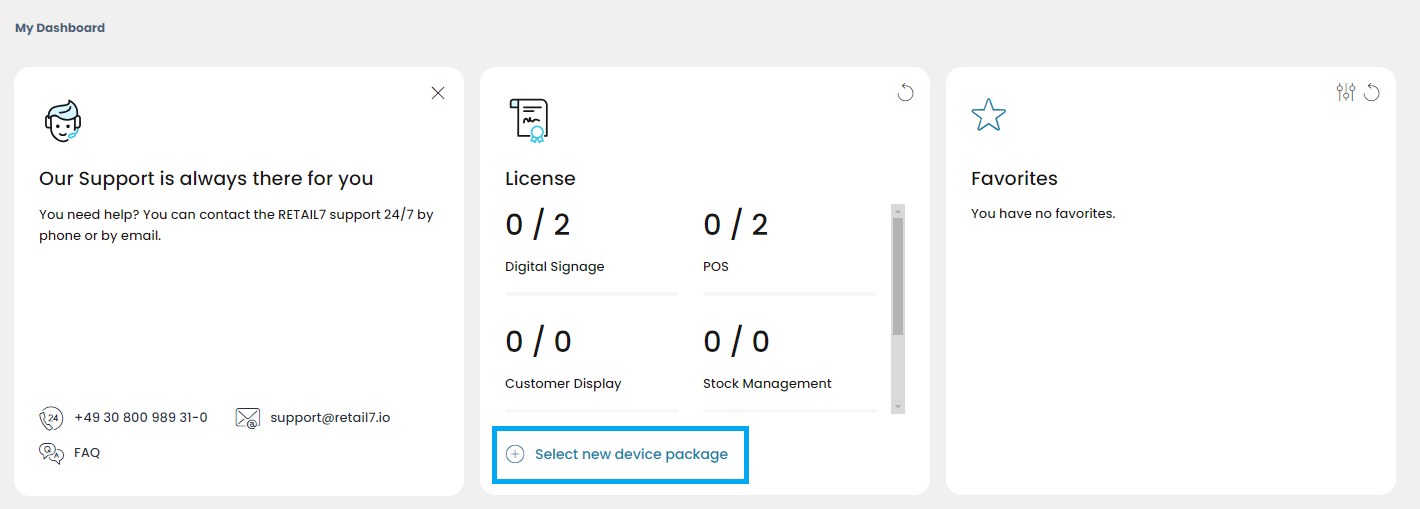
After choosing the Digital Signage package and clicking the Order it chargeable now button, the license for the new client will be displayed on the License tile and can be used right away.
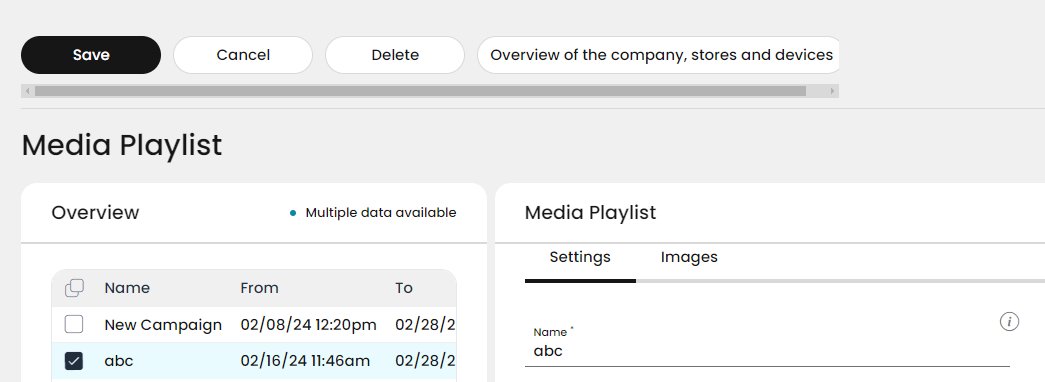
For adding content to your digital signage client, open Masterdata -> Media Playlist. Below you can find the functions and explanation of symbols of the Media Playlist overview:
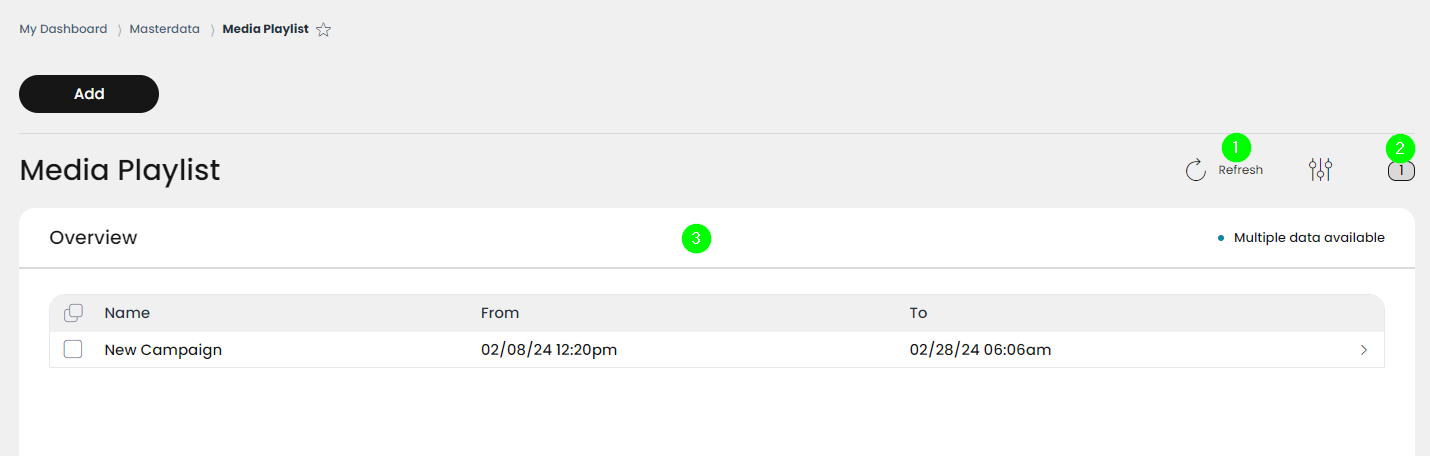
Update overview
Number of list elements
Information about the elements of the media playlist
Managing media playlists
RETAIL7 system currently able to handle several common picture formats, like .jpg, jpeg, png, and also .gif, but not videos. One playlist can consist maximum 10 images, but the images can be different formats even within one playlist. With the following functions, you can easily manage all media playlists in the system.
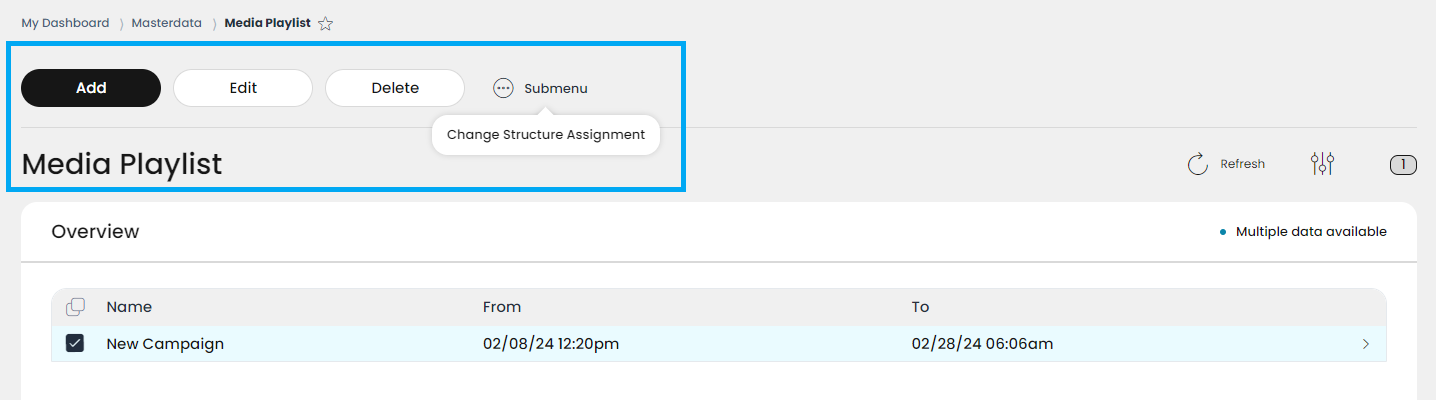
New playlist can be created by clicking the Add button.
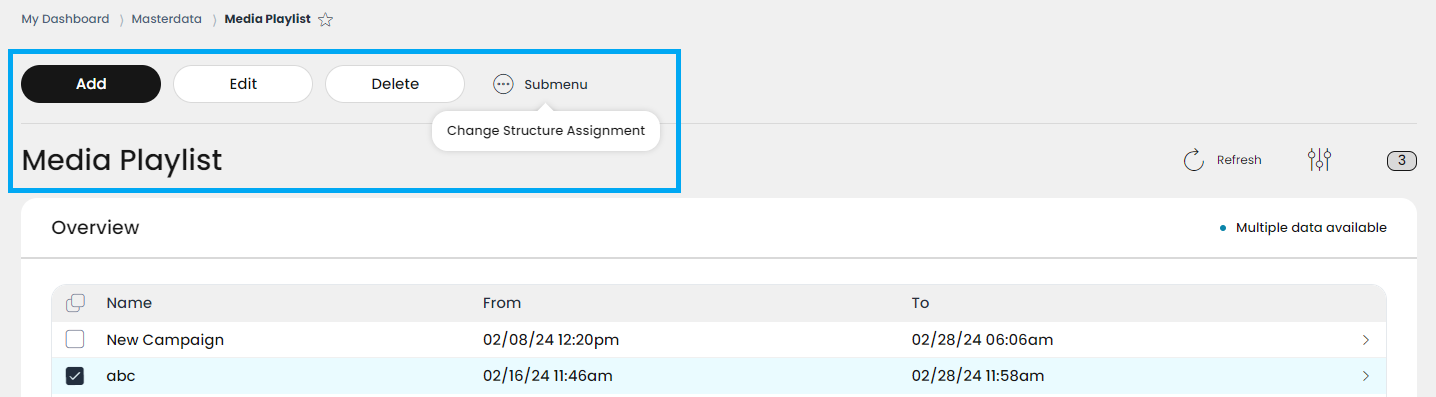
If an existing media playlist must be edited or deleted from the database, first you have to choose it by clicking in the box in front of the name . Now the buttons Edit and Delete will appear.
Of course, besides editing or deleting, other managing options are also needed. For this, a submenu is displayed here, and by clicking on it, the Change structure assignment function is available.
Adding a new media playlist
If a new element needs to be added to your media playlist database, you can create it by clicking on the Add button. Also, if more than one new elements are to be created, there is an option for that by using the Create another checkbox.
Please note that all mandatory fields are marked with *, i.e. these fields must be filled in to create an item.
Open Menu → Masterdata → Items → Media Playlist.
Click Add.
Now the Playlist settings mask is displayed with two tabs. First you have to fill the basic data on Settings, then by moving to the Images tab, the visual content can be added.
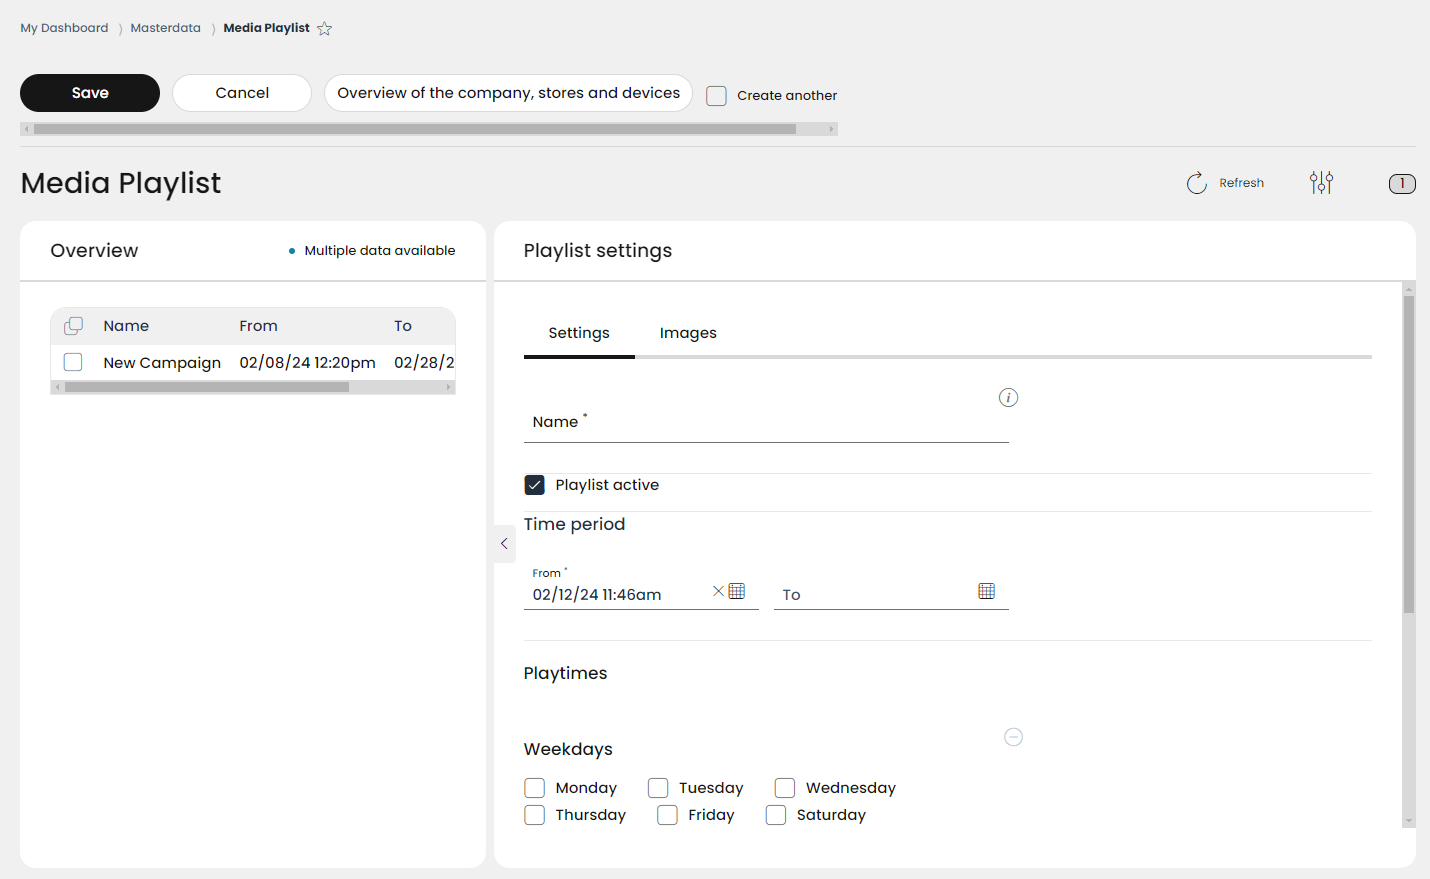
First, define the title of the new playlist in the Name field. The title can be entered manually, and although the system allows saving new elements even with the same name as an already existing one, we highly recommend to use individual and distinctive names.
You can choose if the new playlist should be displayed right away on the signage client after saving, by clicking the Playlist active checkbox. This function can also be used when a media playlist should be disabled from displaying on the digital signage client, but still kept for later use. When unchecked, it makes the media playlist inactive, so it won´t be shown on the digital signage client, but still remains available in the system.
Under the Time period section, the exact duration can be defined, when the media playlist should be displayed.
When clicking on the From / To fields, you can set up the exact running date in a calendar popup, followed by the time in hours/minutes, a.m or p.m.
In the Playtimes section, by checking the preferred checkboxes, you can define which days of the week the media playlist should be displayed on the signage client. Also, here you can define the exact time to start and time to end hours on the chosen day(s). Should you need different or more time periods for each day, you can set up different playtimes and days by adding new playtime sets with the + Add link.
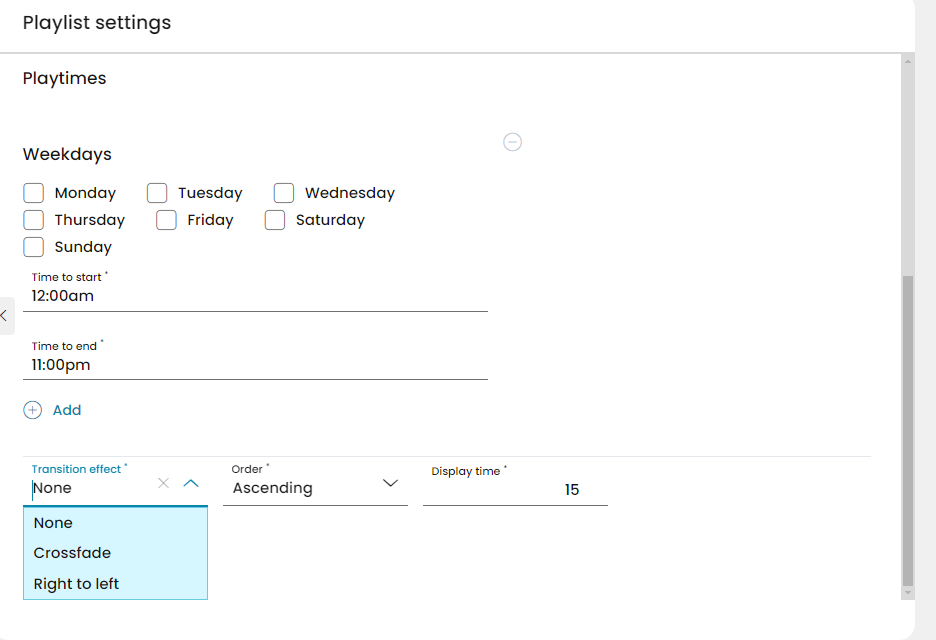
Finally, the applicable Transition effect, the Order of the media elements and the Display time of each element can be configured. The transition effects offers three options in a rolldown menu, the order can be ascending or descending, and the seconds of display time can be set manually.
Now move to the Images tab to upload the images of the new media playlist to the Image gallery.
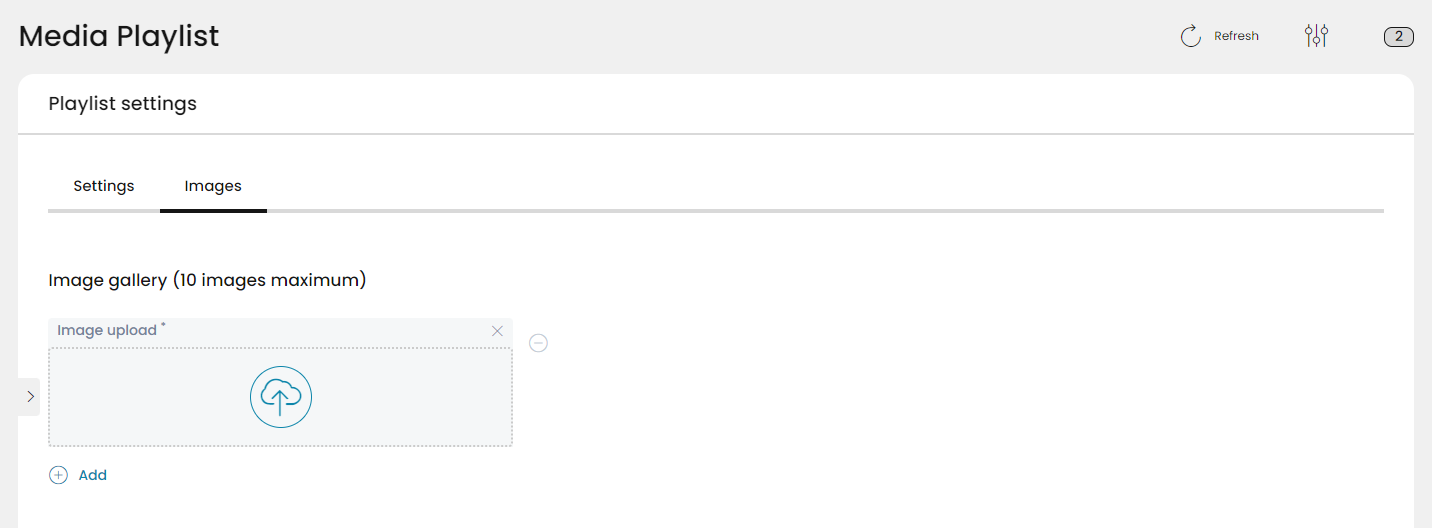
Click on the Image upload field to browse your files on your computer.
Select the corresponding image from your hard disk and upload it by clicking on it, or move the image file to the upload field directly with your mouse from your hard disk (Drag & Drop). You can use several types of image files, like .jpg, .jpeg, .png and .gif, but no video.
By clicking on the Add link, you can upload it as the next image of the playlist. Please be aware that the maximum number of images in a playlist is 10.
You can upload every image file one by one with the + Add, and remove the ones not needed anymore by clicking on the the - sign.
After clicking on Save, your new media playlist will be added to the end of the list on the list view.
If you used the Create another option, the Playlist setting mask remains open so you can create and save the next needed new media playlists. The loop ends only when you remove the tick from the Create another checkbox before the last Save.
If you would like to assign the new media playlist to a special store, you can do it here with the Overview of the company, stores and devices button.
Editing and deleting a media playlist
After a media playlist has been successfully saved, it can be edited or deleted from the overview at any time. This keeps the system up to date, since unnecessary elements are removed. When editing an element of the list, re-saving is especially important, so not to loose the updated information.
In case of editing a media playlist:
Select the desired media playlist from the list.
Click on Edit.
Make all necessary changes, e.g. re-schedule time periods or days of display, add or remove images, etc.
Click Save.
In case of deleting a media playlist:
Select the desired media playlist from the list.
Click on Delete.
Confirm the dialog box with Yes, or select No to cancel the deletion process.
Changing the structure assignment of an item menu
As with items or item menus, media playlists are also can be assigned to the organizational structure (for example, to one or more stores). Reasons for this, for example, that different stores have different discounts, items or actions in different times, and digital signage clients are especially useful and informative to to draw attention of the customers to current promotions in a particular store.
Please note: changing the organizational structural assignment is part of a more complex system function, which you can find under the My Organization -> Units menu of the Management Console, and you can learn about it more under the My Organization chapter of this user documentation.
You can change a structure assignment of a media playlist by selecting it and clicking on the three dots Submenu to get the option Change structure assignment.
Now you get the tree overview of the units, to which this particular media playlist is assigned to.
As you can see, the "system-level" setup is pre-selected here, which means that the playlist is available and can be displayed in all stores.

First de-select them by clicking on any of the checkboxes.
Now click on the desired store(s) where you would like the media playlist to be available and click Finish.
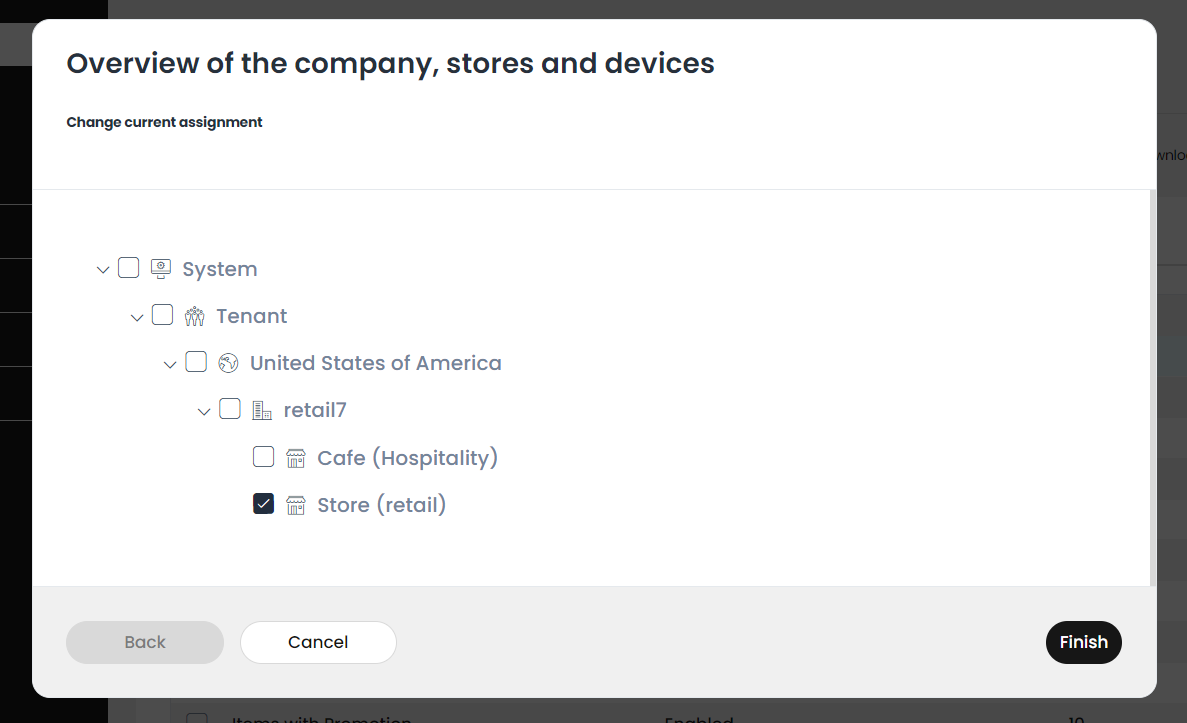
Your adjustments are now active only in the selected units. The configuration of the media playlist remains unchanged in all other stores.
Note: you can also change the structure assignment when editing an already existing media playlist. For this, beside the Save, Cancel and Delete buttons, there will be an Overview of the company, stores and devices button displayed, which has this same function.
The only difference in this case is, that after clicking on the Finish button, you still have to click on the Save button, for the changes to be registered.