7.4.2 General
All generally valid settings, such as password rules or settings regarding the logo, are defined here. The configuration defined here can be assigned to the structure diagram. This can be created under My Organization.
7.4.2.1 Logo
The logo is the recognition feature of a store. Thus, the logo can be deposited on the receipt and at the same time acts as advertising.
![]() 1 Search function
1 Search function
Enter the desired search term in the search.
Click on the magnifying glass.
Wait for the result and select a desired setting.
2 Editing window
3 Structure diagram
4 Save entries
5 Close editing window
7.4.2.1.1 Add logo
In retail7 system, a new logo can be added at any time. Thus, it is possible to replace the already created logo with another one. This logo can be printed, for example, on the receipt that is created by the POS system.
Open the menu → System settings.
Click Logo under the General menu.
Using the drag & drop principle, place an image for the default logo and the logo for printing.
Drag & Drop is the principle by which an image is placed from one browser window to another using a computer mouse.
4. Click Save
The next time a receipt is printed on this printer, the logo should be displayed on the receipt.
7.4.2.1.2 Assign Logo Structure Diagram
In retail7 it is possible to assign settings to a structure diagram. This means that configurations can be assigned to one level that do not apply to another. Note that the assignment also applies to all sublevels.
Open the menu → System settings.
Click on Logo under the General menu.
Open the structure diagram.
All created organizational units can be seen here. These can be configured under Menu → My Organization.
4. Select the level to which you want to assign the logo.
All sublevels are automatically selected and thus the logo is assigned here as well.
5. Using the drag and drop principle, place an image for the default logo and the logo for printing.
Drag & Drop is the principle by which an image is placed from one browser window to another using a computer mouse.
6. Click Save.
7.4.2.2 Password rules
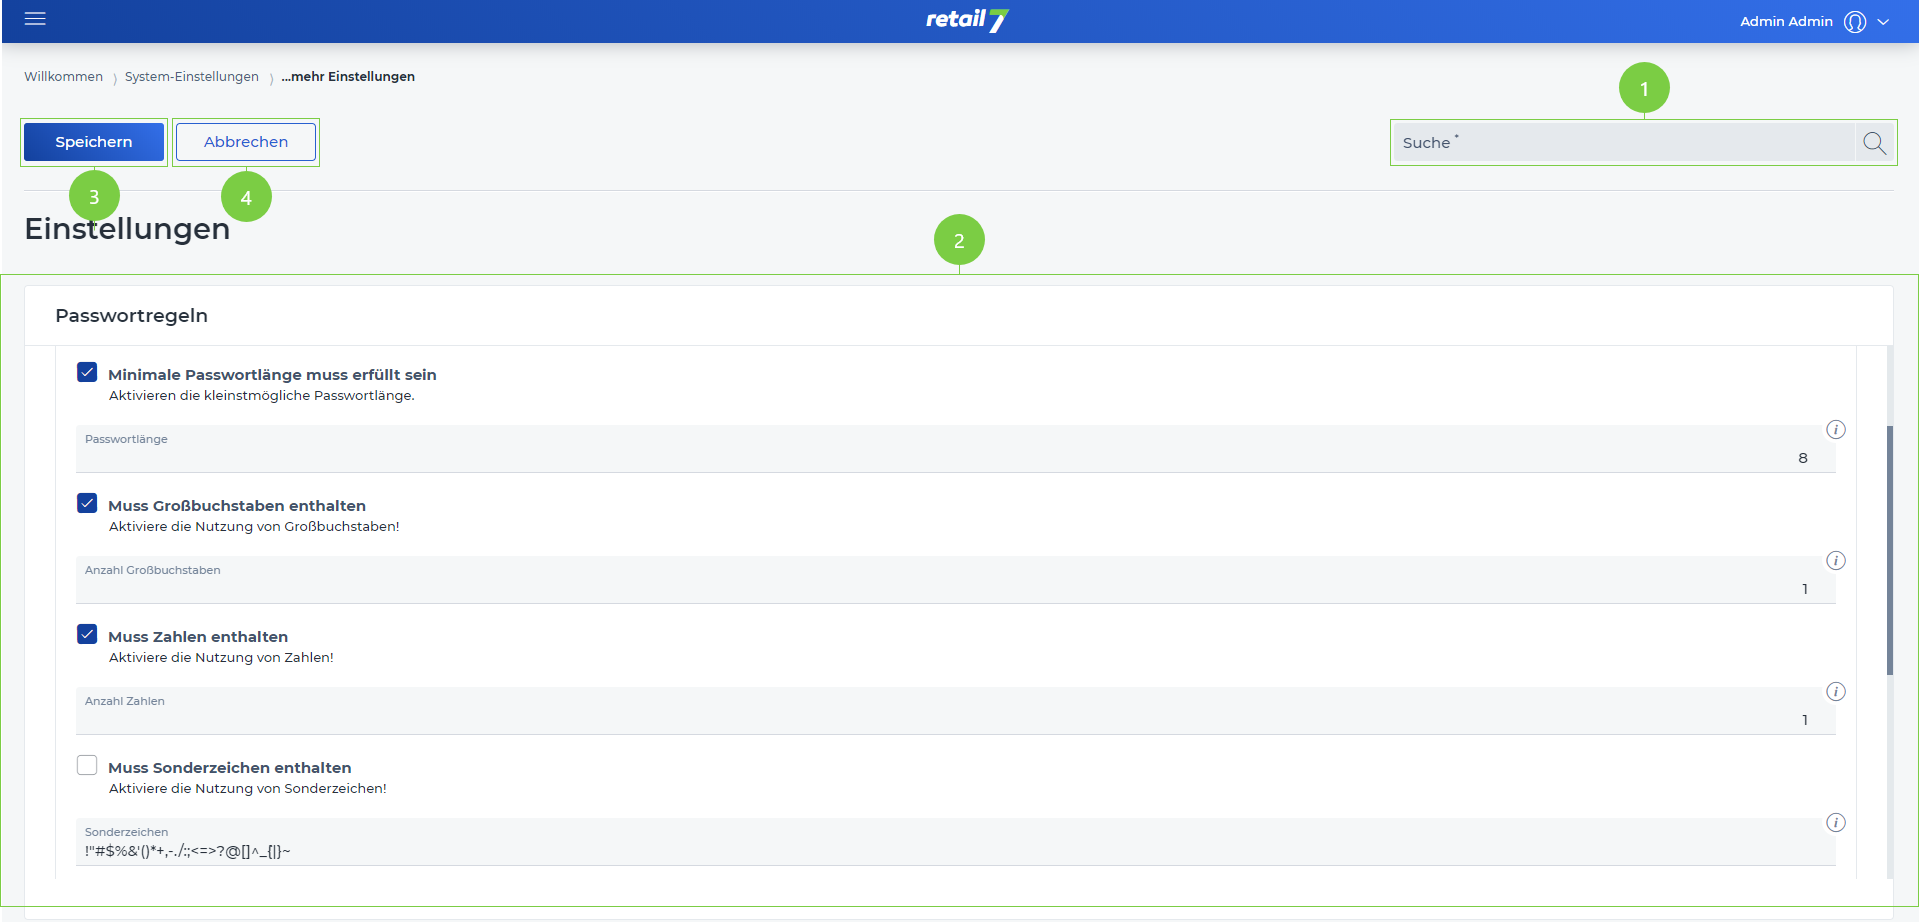 1 Search function
Enter the desired search term in the search.
Click on the magnifying glass.
Wait for the result and select a desired setting.
2 Editing window
3 Save entries
4 Close editing window
7.4.2.2.1 Add password rules
Password rules support the security of the system. The more precisely these are defined, the more secure the system is against unauthorized access. For security reasons, never write down the password.
Open the menu → System settings.
Select Password Rules under the General menu.
Expand the Password Rules submenu.
Specify a rule name.
With this function it is possible to assign the defined password rules more easily in the system. Therefore, assign a unique name.
5. Check the box if the minimum password length must be used.
Minimum password length means that the password must have 8 characters, for example, but it can also be 12. Thus, the password will be allowed even if the minimum length is exceeded.
6.Set the password length.
Specify here how long the password must be mandatory. If the password must be at least 8 characters long, the system will indicate to the user if it is too few or ask him to enter a longer password.
7. Check if uppercase letters must be used for the password.
If this function is active, at least 1 capital letter must be included in the password.
8. Define how many uppercase letters must be in the password.
This is where you specify how many uppercase letters must appear in the password.
9. Check the box if numbers must be included in the password.
If this function is active, at least one number must be included in the password.
10.Specify how many numbers should be included in the password.
This is where you specify how many numbers must appear in the password.
11. Enable special characters.
If this function is active, at least one special character must be included in the password.
12. Specify which and how many special characters are used.
This is where you specify how many special characters must appear in the password.
13. Define whether the password must be updated after a time x.
This function is important, because thus the defined password is always updated after a certain period of time and is thus better protected against unauthorized access.
14. Specify after how many days the password must be updated.
When this time expires, the user will be prompted to update the password.
15. Set a number for the password update attempts.
After all attempts are used up, the password can no longer be updated by the user and is locked for him.
16. Define how long the forgotten password link is valid.
After this time expires, the link cannot be used for password update. If a user clicks the link after the time has expired, he will receive the information that it has expired and a new link must be generated.
17. Open the submenu Password change.
18. select whether the password should be changed after hours or days.
After this time, the user will be prompted to change his password.
19. Set the maximum time.
This time specifies how long the password change link is valid.
20. Click Save.
7.4.2.3 System notifications
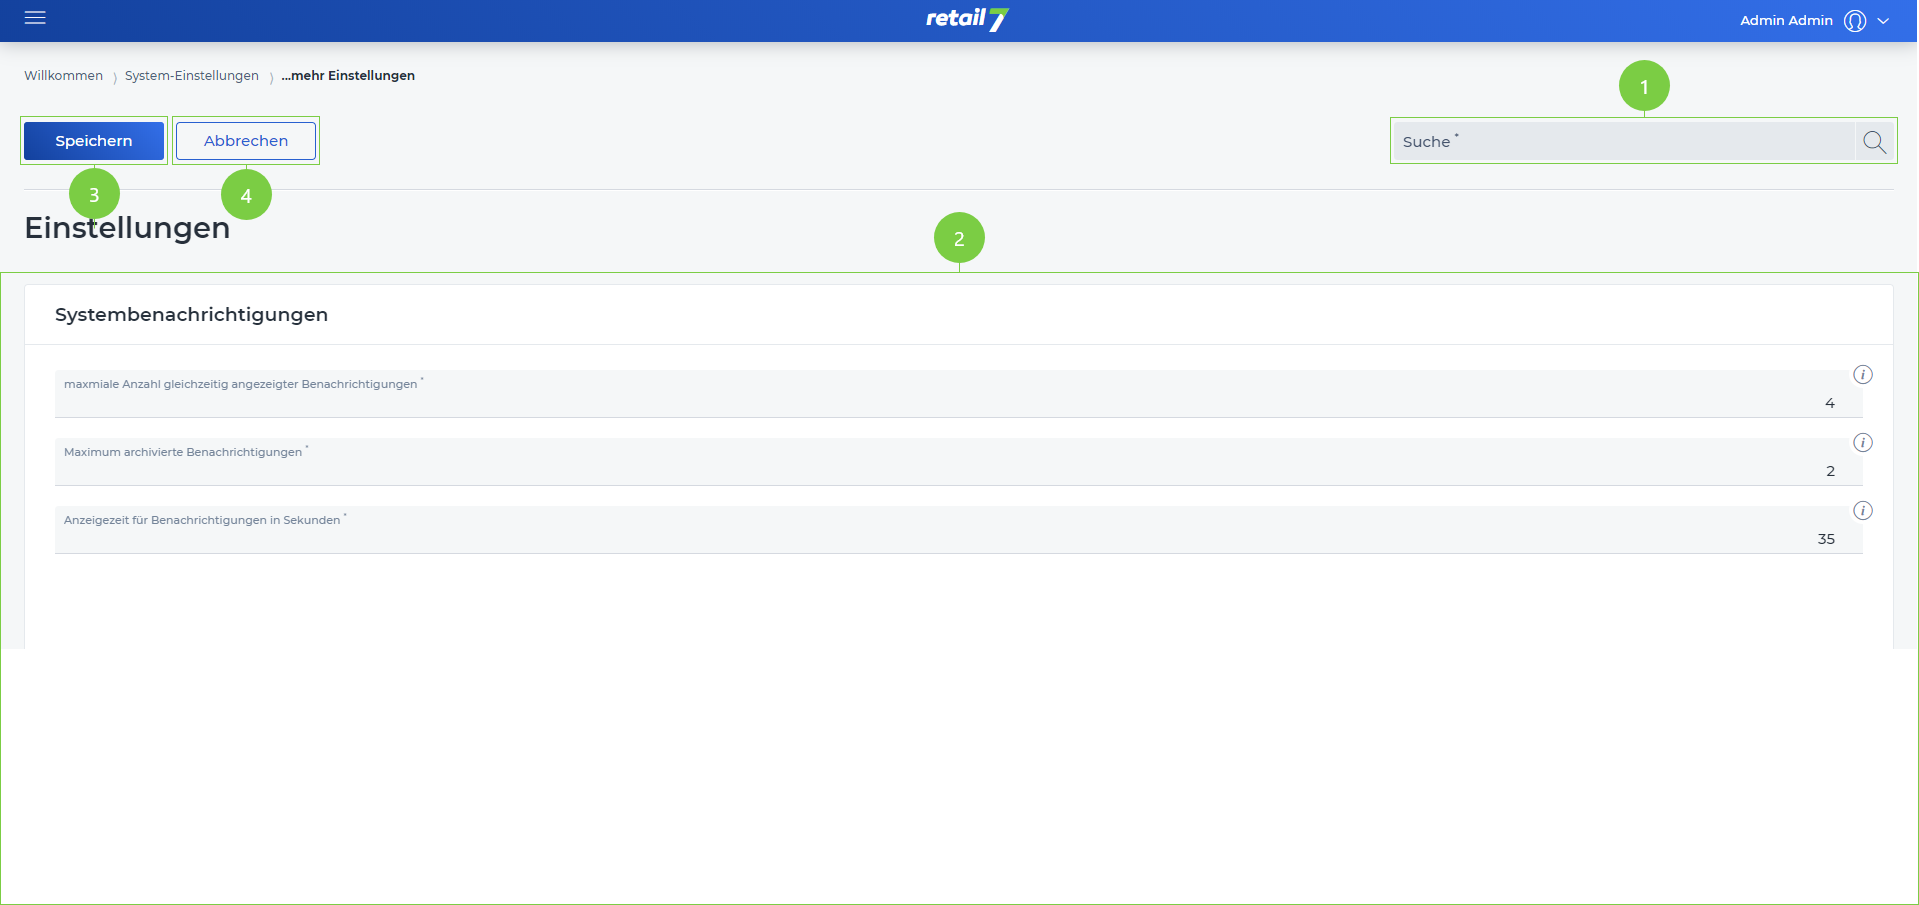 1 Search function
Enter the desired search term in the search.
Click on the magnifying glass.
Wait for the result and select a desired setting.
2 Editing window
3 Save entries
4 Close editing window
7.4.2.3.1 Add system notifications
System notifications inform the user about possible errors, warnings or important notices registered in the system. Thereby, it is possible that the user can take appropriate measures based on this information in order to use a stable and safe system. If it is not possible to find a suitable solution based on the system notification, the retail7 team is always happy to help!
Open the menu → System settings.
Select System notifications under the General menu.
Specify the maximum number of notifications to be displayed.
For example, if there is a 3 at this position, a maximum of 3 notifications will be displayed at the same time. It makes sense not to display too many notifications at the same time, otherwise the user will not be able to read or interpret them.
4. Specify the maximum number of notifications archived in the system.
This function saves the notifications that have been registered in the system. Thus, the user can trace, for example, which errors occurred in the system.
5. Define how long in seconds the system notification is displayed.
If a high number is defined under 3, it is useful to display a high number here as well, because this gives the user more time to read the notifications.
6. Click Save.