4.1.6 Item choices
The RETAIL7 system provides options to create item variants and item choices, which may seem similar but serve distinct purposes in product differentiation and customization.
Item Variants are different versions of the same product that typically vary based on specific attributes such as size, color, material, or other defining characteristics. For instance, a T-shirt available in different sizes (small, medium, large) and colors (red, blue, green) would be considered as having variants based on size and color.
Item Choices, on the other hand, refer to the options or selections a customer can make when purchasing a product, and are often related to additional features, accessories, or customizable elements. For example, a drink can be ordered with or without ice, a steak can be customized by meat doneness, or a pen can be ordered with engraving or without.
While both features help cater to diverse customer preferences, variants focus on inherent product differences, whereas choices allow for user-driven customization or upgrades.
With these distinctions in mind, the RETAIL7 system offers a selection of predefined item choices to streamline setup for common use cases. However, businesses can also create custom item choices tailored to their specific needs and operations. This flexibility ensures that the system can accommodate a wide range of industries and product types.
Below you can find the functions and explanation of symbols of the item choice groups overview: 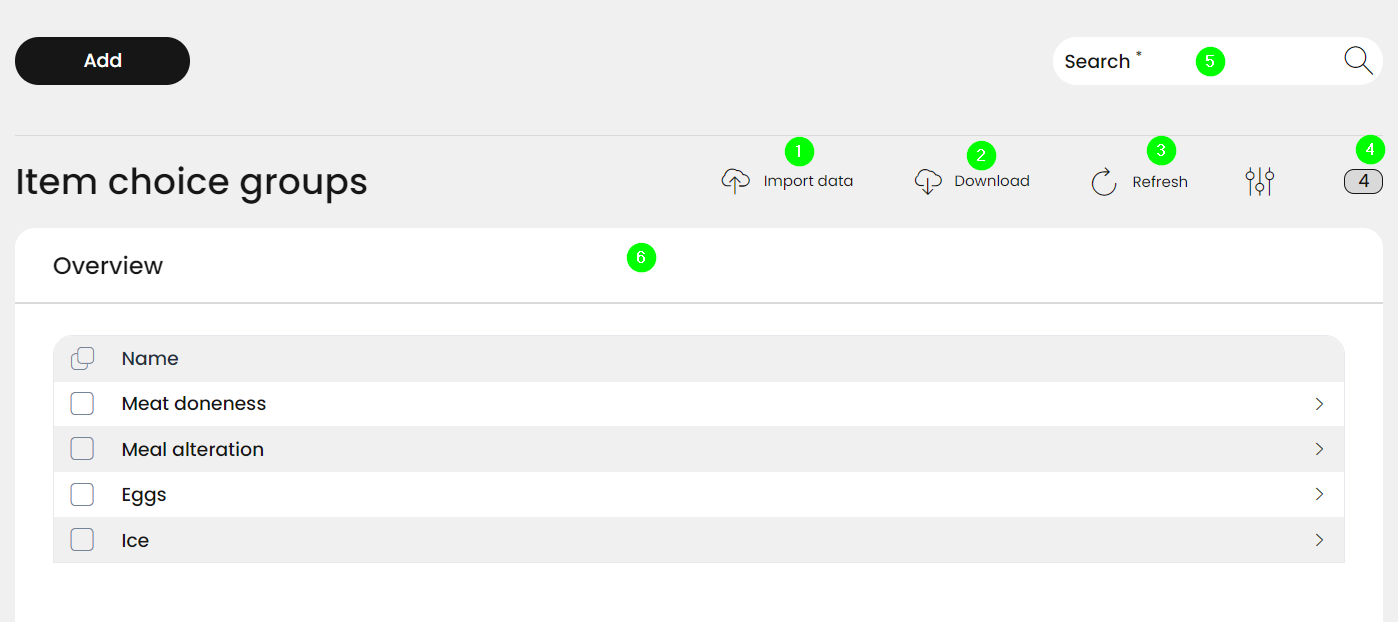
Import item choice group
Item choice groups download
Update overview
Number of list elements
Search item choice groups
Information about the item choice group
Managing item choice groups
The RETAIL7 system offers various predefined item choice groups tailored to different industries, enhancing product organization and customer experience. If needed, you can create custom choice groups by clicking the Add button in the Management Console and saving the new group to suit your business needs.
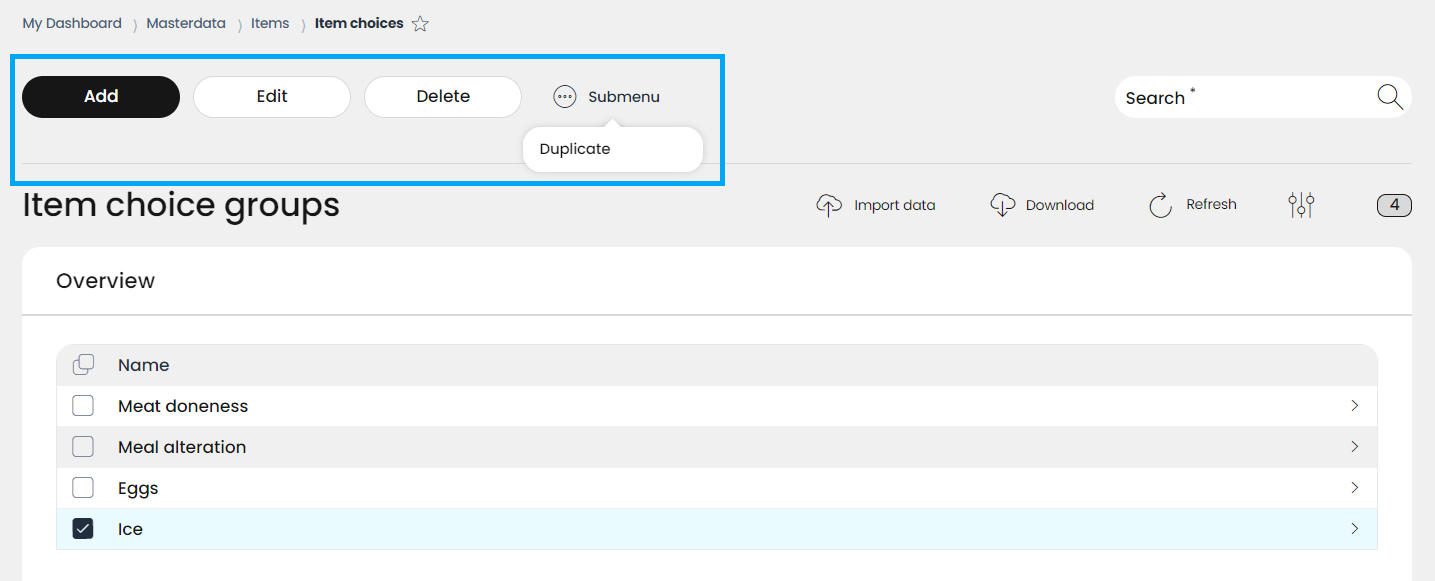
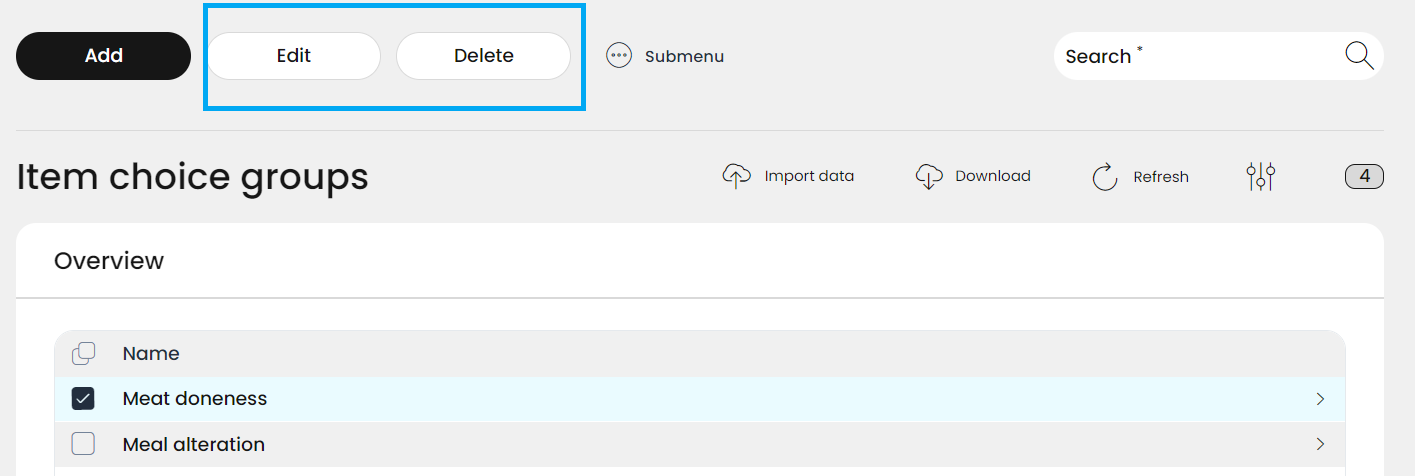
If an existing item ident choice group must be edited or deleted from the database, first you have to select it by clicking in the box in front of the name . Now the buttons Edit and Delete will appear.
Of course, besides editing or deleting, other managing options are also needed. For this, a submenu is displayed here, and by clicking on it, the Duplicate function is available.
Adding new item choice groups
If a new element needs to be added to your item choices database, you can create it by clicking on the Add button.
Also, if more than one new elements are to be created, there is an option for that by using the Create another checkbox.
Now the Add item choice groups mask is displayed.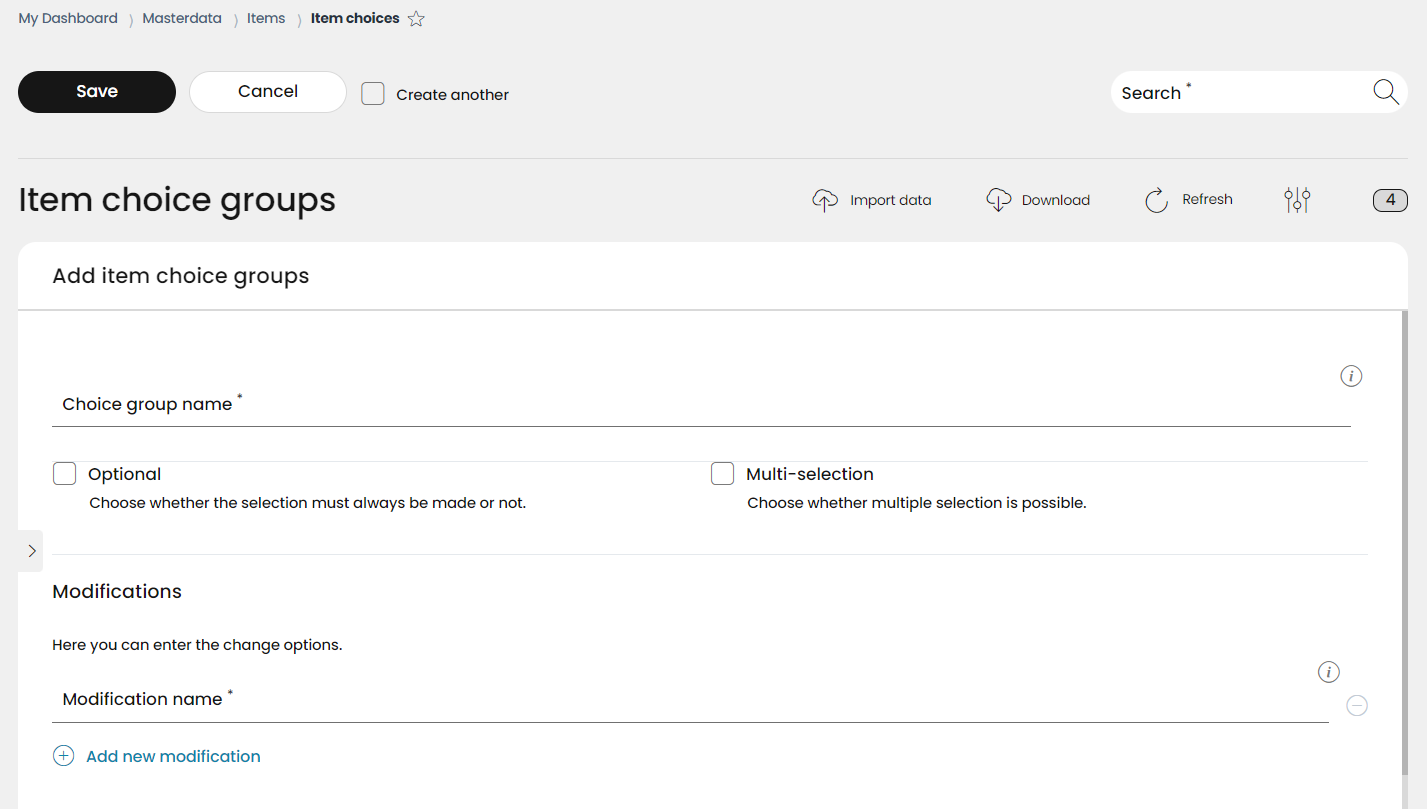
Enter the desired Choice group name.
This name can be used to filter out the group from the list using the search function. For this purpose, it is particularly important to assign well differentiated names to each element. This provides a better structure in the overview and all groups can be easily assigned thematically.
Select by ticking the boxes whether the new item choice groups are optional or multi-selectable or both.
Now add the possible change options. 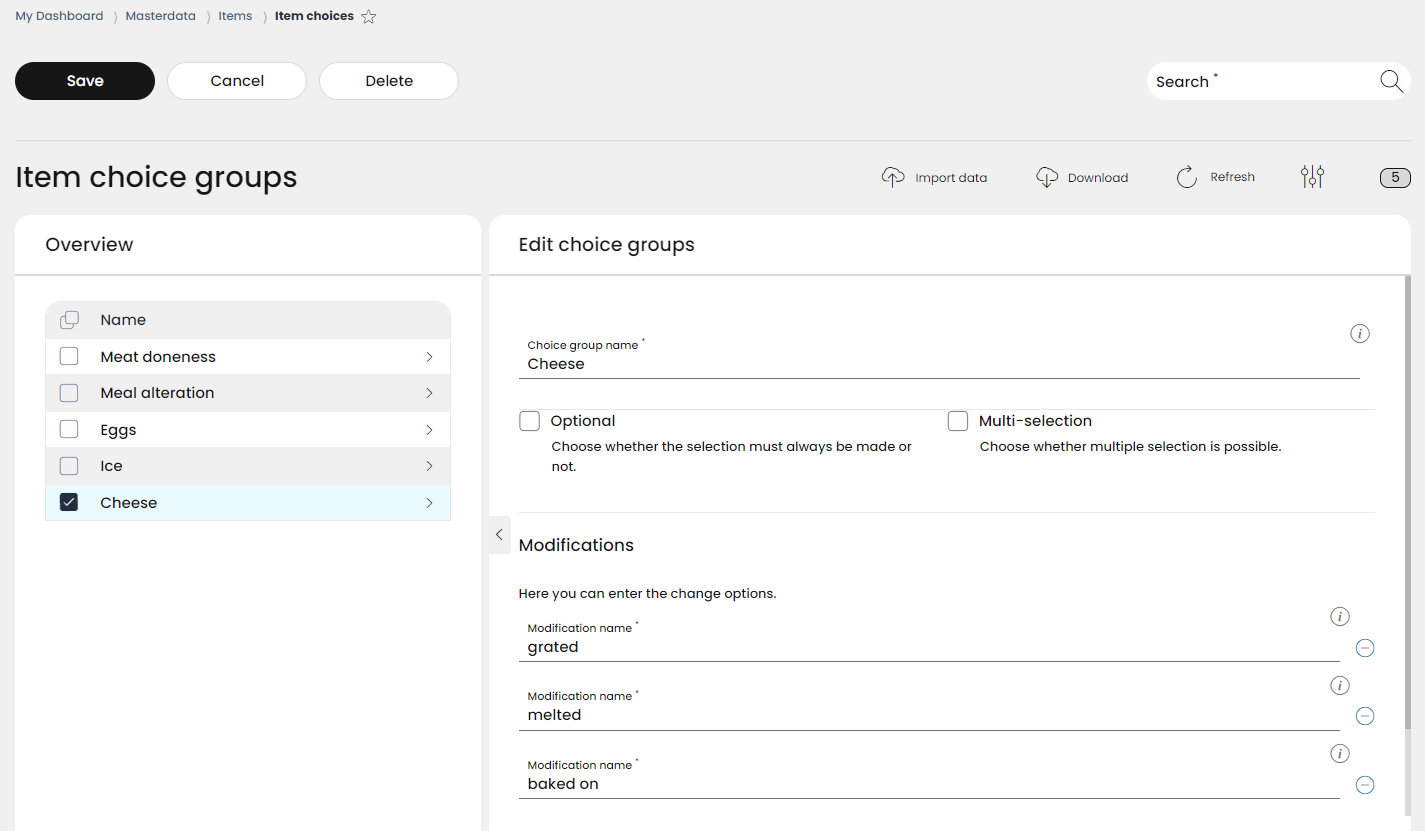
After clicking on Save, your new item choice group will be added to the end of the list on the list view.
If you used the Create another option, the Add item choices mask remains open so you can create and save the next needed new elements. The loop ends only when you remove the tick from the Create another checkbox before the last Save.
Assigning the new item choice to an item
To be able to use the new item choice options with an item, you have to assign it to the corresponding item(s). You can do that via Menu → Masterdata → items → Item list. Here, each item can be configured individually.
Find the needed item you would like to assign the new item choice and click Edit.
Scroll down on the Edit item mask to the Item choices section. Here you can select the new choice group from the scroll down menu.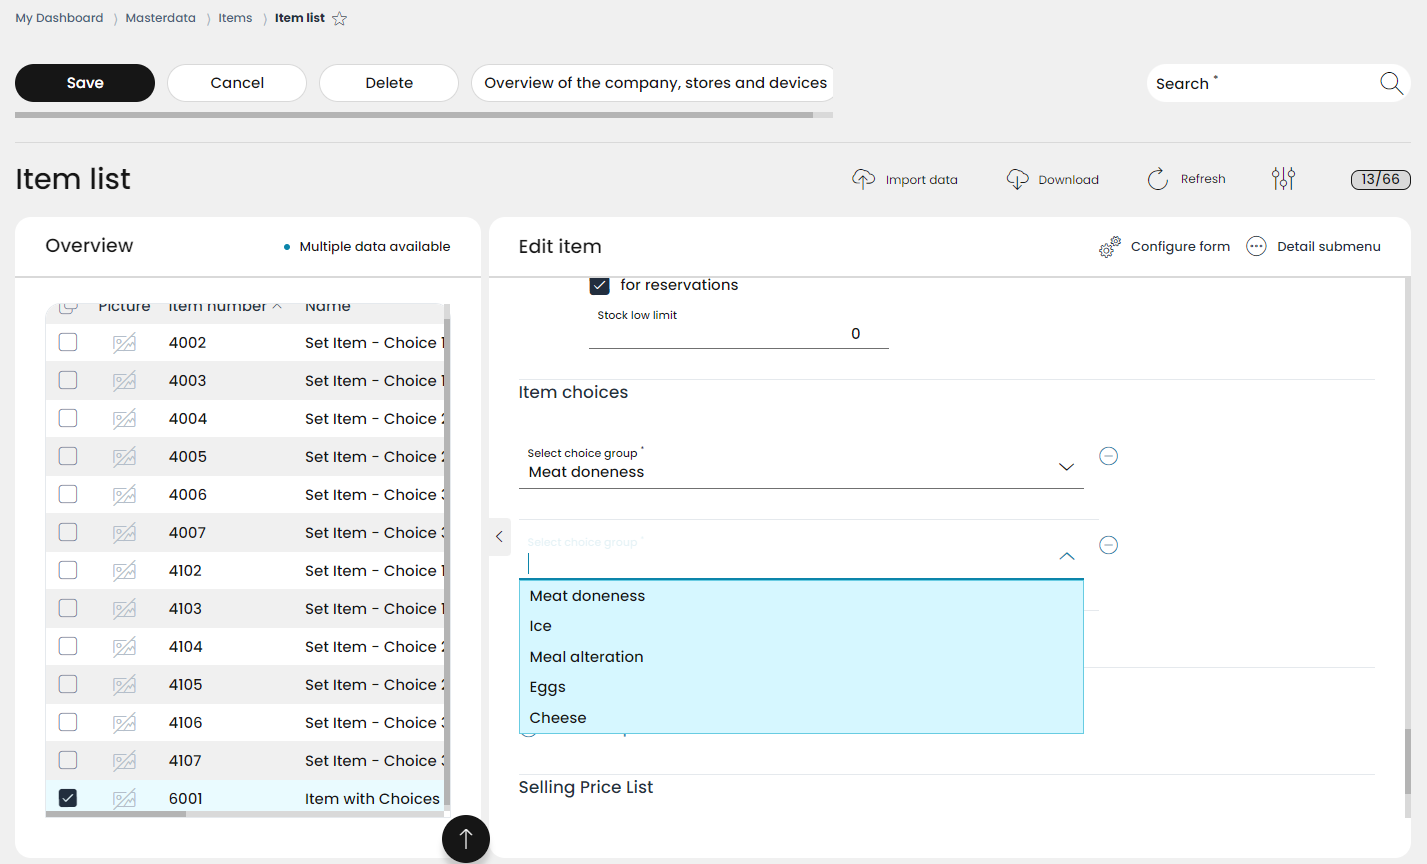
Click Save.
From now on, any time you register this item on POS, you will get the question about which modifications would you like to add to the item.
Note: The Item choices field is only displayed on the item datasheet, if it´s activated. For this, click on the Configure form icon:
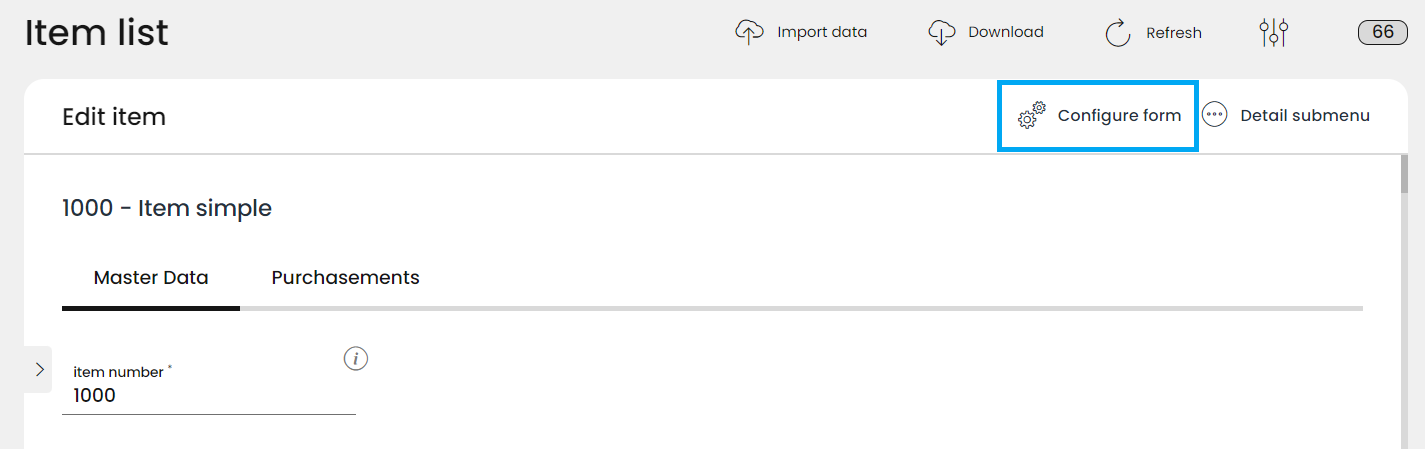
Now the configuration popup is opened. Here you can check the boxes of each field separately, or you can choose to activate them all by clicking on the Advanced checkbox and Save it.

Editing item choice groups
After a group has been successfully saved, it can be edited again and again. Thus, changes can be made at any time, but it is important to make sure that the changes are saved, otherwise they will be lost.
Select the desired selection group from the list and click on Edit.
Change the settings of the item choice group as you wish.
Click Save.
Deleting item choice groups
After successfully created, the groups can be deleted at any time. Removing no longer needed elements keeps the system up to date and more stable.
Select the desired item choice group from the list.
Click on Delete.
Confirm the dialog box with Yes.
If you click No, the deletion process will be aborted.
Copy item choice group
To add another group that is very similar to another, the Duplicate function can be used. With this, it is not needed to create the entire group again, but only to copy another one with all the associated settings. Then the desired changes can be made and saved again. It is important to ensure that the names of the groups are not repeated, to avoid confusion.

Select the desired item choice group from the list.
Click on Submenu and Duplicate.
Wait for the saving process.
After successfully saved, the copied item choice group will be displayed in the list. Note that after updating, the newest element will be at the top of the list.